Its first owner was almost certainly a Mr. John Hugh Haine of Eastbourne.
At the time it was about the best you could buy, at the previous years TT races, Triumphs like this had won the race and taken the first 8 places with the fastest bike averaging almost 48mph over the mountain course.
Mr. Haine probably bought it from his friend and the local Triumph dealer a Mr. Thomas Gander (my Grandfather).
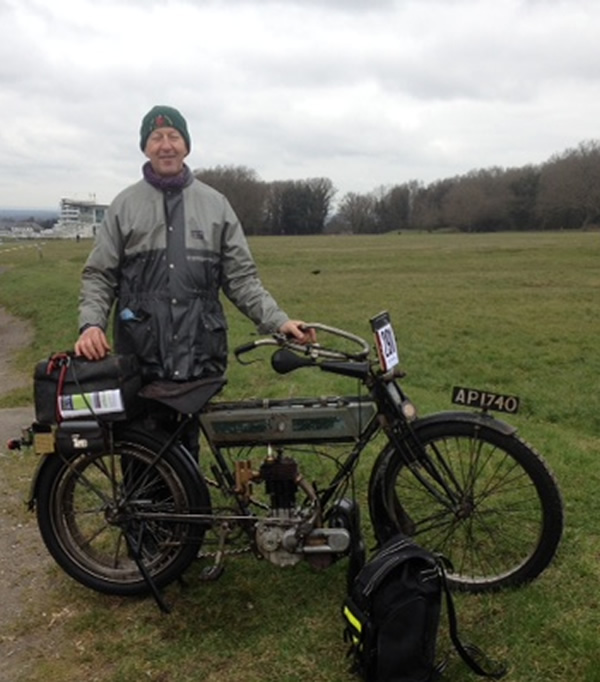
The registration was and still is AP1740 with AP being for East Sussex and 1740 being the 1,740th vehicle registered. Vehicle registration only began in January 1904.
We do not know how much Mr. Haine used his new bike, but we suspect enthusiastically as we have found a period advert where he is selling the bikes original wheel and clutch and upgrading it (in 1912) to a new state of the art 3 speed hub. Mr. Haine was born c1872 and was part of a prosperous local family that owned the local undertakers. The business still exists at the same address - Haine & Sons, 19 South Street, Eastbourne. Mr. Haine joined up on the 10th June 1916. He joined as a Private in the Army Service Corps Motor Transport, seemingly confirming his interest in things mechanical. Whilst his military record card doesn't say either way - he may well have been a dispatch rider and continued riding motorcycles as the motorcycle magazines of the time were running active campaigns to get riders to sign up and become dispatch riders. I have not found any history to show what he did in the war, but know he was discharged on 5/2/1918 – reason given is AO/265/17 which means “having served his country and still of military age, and served overseas on active service, is now discharged through disablement or ill health”. I am in contact with the Haine family and hopefully their family archive may produce a picture of his Triumph when he owned it.
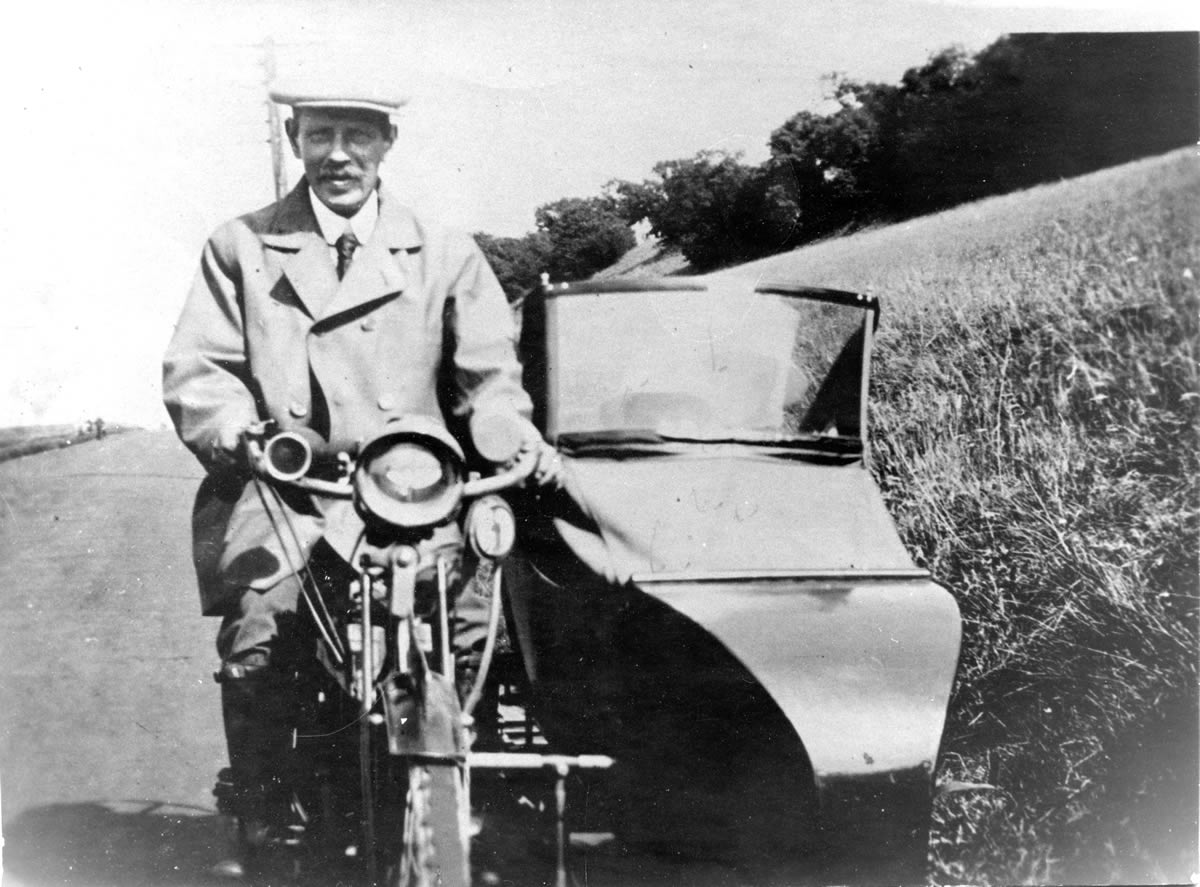
In 1918 it was bought by my grandfather Thomas (Tom) Henry Gander and he used it as family transport for many years, adding a sidecar and pictured below in the mid 1920's.
Its known history:
1911 November/December - bike newly built
1911 Maybe January 1912 bought by Mr. Haine
1918 Mr. Haine sells it to Tom Gander
1946 my Grandfather sold it for £1 to a local man Mr. S.K. Rolfe. At the same time my grandfather also sold his 1908 Moto Reve LB923 also for £1 - it also still exists somewhere.
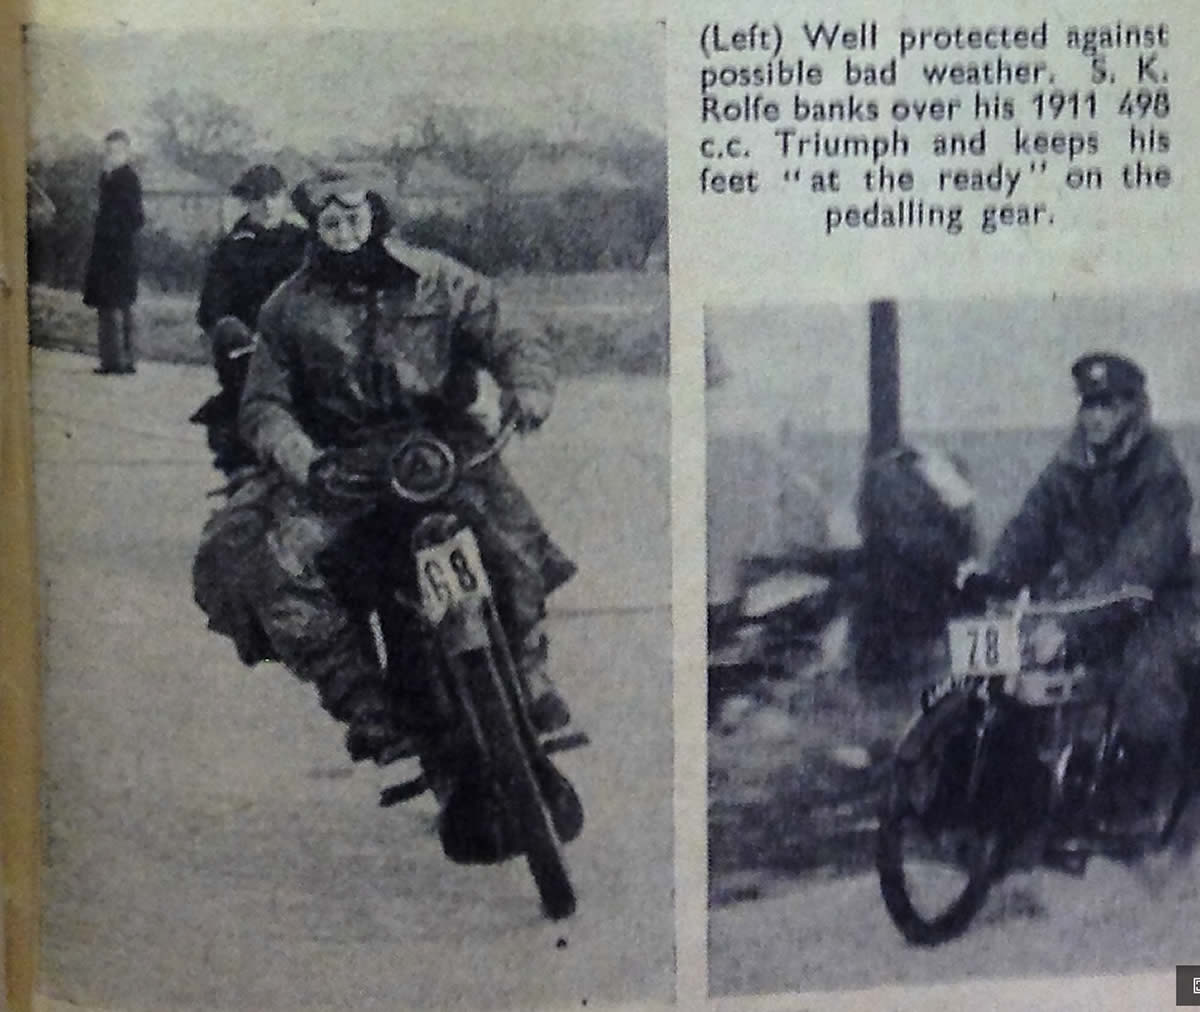
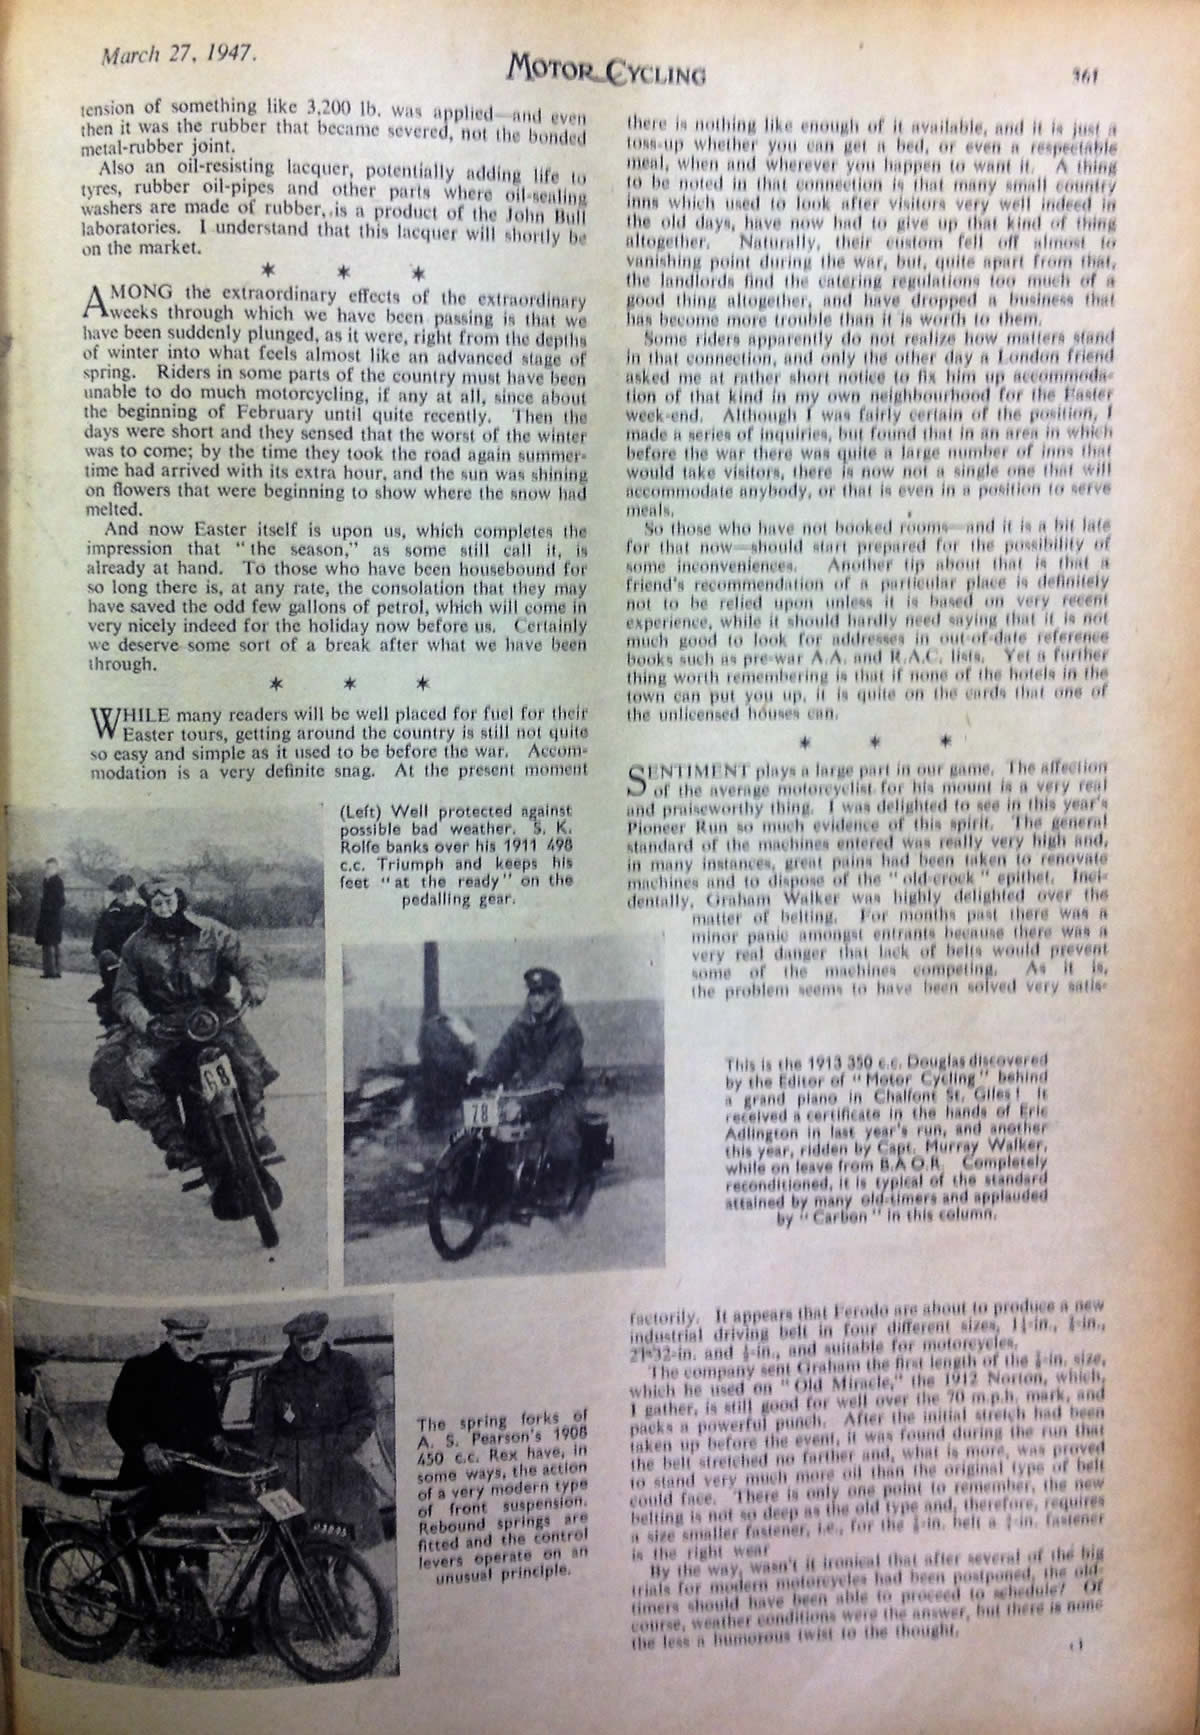
Mr. Rolfe used the Triumph in a number of events for old bikes, including The Pioneer Run and Banbury. The bike was featured in Motorcycling March 27th 1947.
1954 Mr. Rolfe sold it to Mr. Gordon Little. Gordon used it extensively in many events in the UK and Europe and taking many Concours and Originality awards.
1973 Gordon sold it to Mr. Geoff Morris (then registrar of the Sunbeam Club).
1976 it passed to Roger Phillips a local friend of Geoff's. Geoff removed the original lights, speedo and a few other bits and carefully stored them. Roger used it in Numerous Pioneer runs and other veteran events.
2011 Geoff Morris buys it back. Geoff regretted parting with it and was able to buy it back and reattached all of the original parts that he had been keeping for over 30 years.
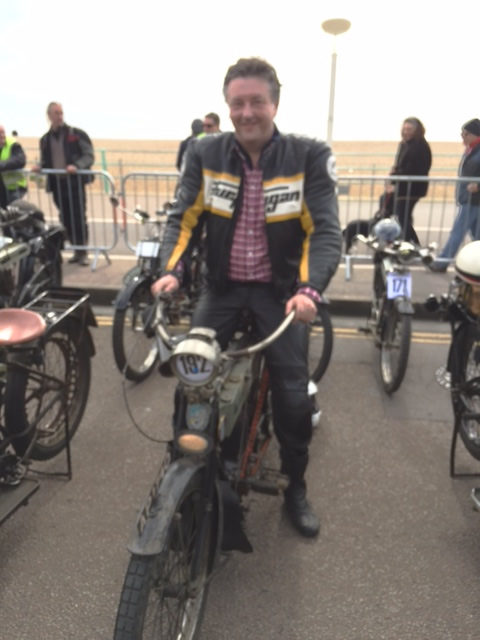
2014 April Geoff very kindly sold it to me Paul Gander and it is now back in the family and pictured below arriving "home".
The bike has spent its entire life in either Sussex or Surrey.

For perhaps the last ten years of Rogers ownership it hadn't been used and I would need to recommision it before using it.
Geoff very kindly donated lots of 1911 Triumph parts, many of them original unused items.

It also came with other goodies including its original speedo.


I treated ny 1914 Triumph just like any motorcycle, but this one was my Grandfathers, the first bike my father ever travelled on and the first he ever rode so a little more courtesy seemed in order, especially so as it remains remarkably original and I will be keeping it original.
After sitting for so long the tank needed cleaning out and any rust removing. With fuel drained in went a handful of old bolts and all given a thorough shaking to loosen any rust or muck inside.
I also resorted to using electrolysis to remove the rust inside. This method sucks the rust off the inside of the tank and onto a sacrificial strip of steel.

As you can see below, the rusty muck from the inaccessible insides is attracted to the steel strip that was inserted into the tank.
It took a few days and eventually the inside of the tank returned to bare metal - very satisfying.
Out came about 5 egg cups full of muck that would have with time tried to find its way into the carb and stopped the bike, so best get it out now.
Some of it had probably been lurking inside for over a century!

As some of the rust came out it created tiny pin holes in the tank. The period approach to fixing this was to clean up the holes and solder them up and so that is what I did. My grandfather had been apprenticed as a White Smith (fine sheet metal workings) long before 1900 and I still had some of his original soldering tools. I used his tools to make the repairs and imagined him over my shoulder tutting at my lack of skills with them.
The tank has a glass sight window which when you unscrew the needle valve that runs through it, allows petrol to run inside and show the petrol level. I am told this is very prone to leaking and so spent much time trying to make it petrol tight. With the basics of a clean and leak free tank I moved onto other jobs.
I dismantled the petrol tap and priming taps and cleaned them out. The had slight internal wear from a century of use and were not 100% petrol proof. I used fine grinding paste to lap the surfaces perfectly smooth against each other and returned them to being leak free.
Next was the carb and this is a pretty simple unit and came apart easily. It was a bit gummed up and needed a thorough clean out. With most old carbs you push down the "tickler" to flood the carb and give extra fuel into the engine to aid starting. With the 1911 Triumph carb you pull up the tickler. It has a tiny bob weight arrangement at the top of the float bowl.
After this I took out both valves and cleaned them up - they were both in excellent condition. My Grandfather Tom had been by all accounts been a clever engineer and a bit of a perfectionist - I suspect most were in the Victorian era when good enough was not good enough. Accordingly the valves were cleaned to a mirror finish and properly ground into the head to get a perfect mating surface and maximum power!

The magneto was then removed, stripped and checked and found to produce an excellent spark. It was refitted and timed.
This is the neat and sturdy platform that the magneto sits upon.

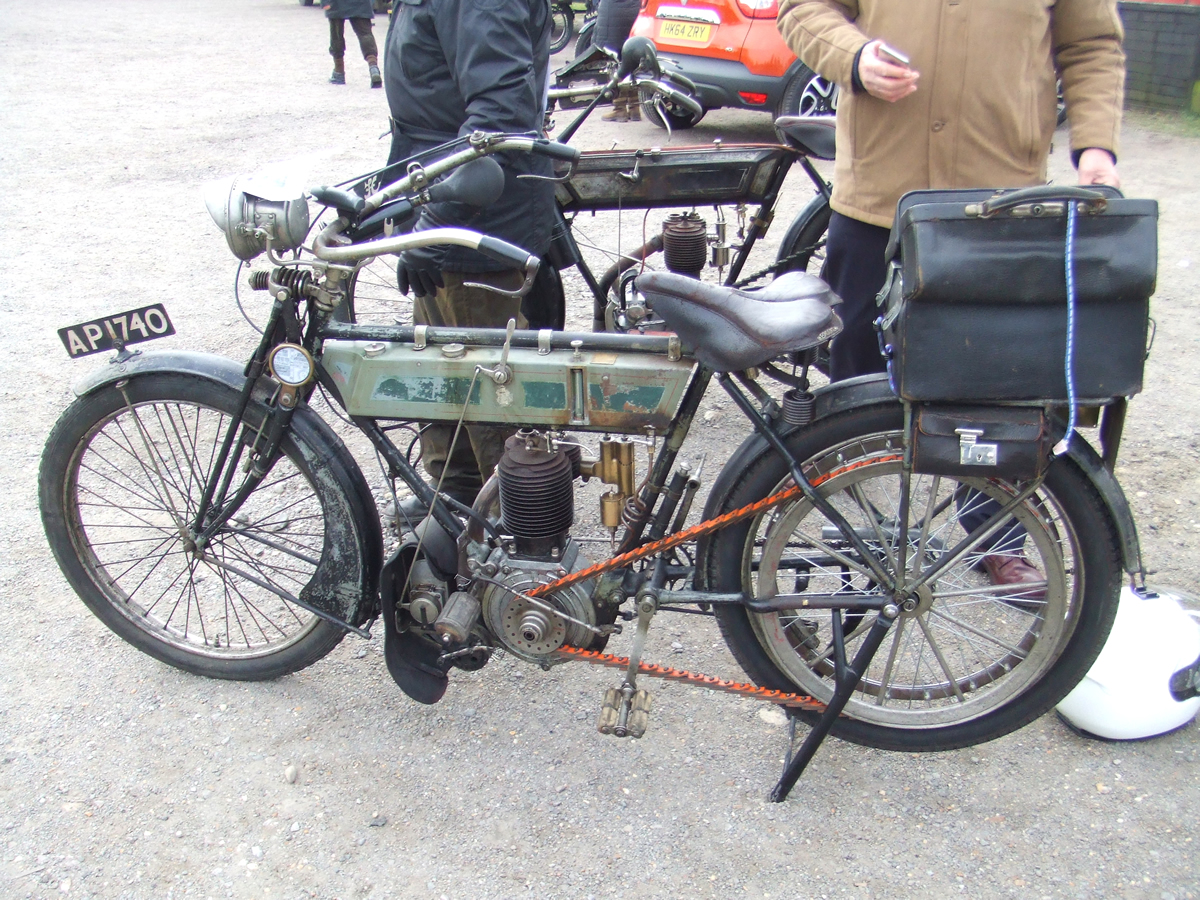
As I checked the bike over I was pleased to see how very original it all is. The number stamped on the cylinder still matches the crankcases, so they have been together since being built at the factory in late 1911. The pedal rubbers remain as original in white rubber with a lead bob weight on the left pedal so that it always presents the pedal horizontal and ready for a rider to mount.
Numerous other small jobs were undertaken. I must admit to working slowly on each job as each time I did something I wondered when my grandfather had last done the same to it.
After much tinkering we were ready to fire it up. As my Grandfather was called Tom, I think I shall call it Tom's Triumph or Tom for short.
And so a few weeks later on a fine sunny day I wheeled Tom outside to let it sniff the air and hopefully run. I am not superstitious , but what happened next was either a million to one coincidence or something else!
With the bike outside, fuelled up and ready to be started I popped into the garage to get a fire extinguisher - just in case and then stood alongside it ready to start it for the first time back in family ownership since Tom parted with it in 1946 - almost 60 years ago. With fuel turned on and carb tickled, I was about to fire it up, when I heard a bike coming up our lane and a few seconds later in rode my cousin Steve - we share the same Grandfather and love of bikes. He just happened to be passing by after a trip to Wales and hadn't popped in for over a year and didn't know I was planning to start the bike up. For him to arrive literally a second before I started our Grandfathers bike, I found it slightly spooky and rather wonderful - either a million to one coincidence or perhaps Tom wanting both his living motorcycling descendants present for the starting of his bike!
Tom's Triumph burst into life at the first push of the pedals and ran very sweetly as we both appreciated it running. After a few minutes I stopped it as a new pin hole leak had appeared and we had petrol dripping out onto the engine - not ideal. Tea was then taken and the bike appreciated from all angles.
October 2014
Whilst I had done much work to get the bike running properly including stripping, cleaning and setting up the magneto, valves, timing etc. it ran well for the first few days and then started to run erratically. I have checked and rechecked everything without finding out the issue. Last week I think I discovered why. I was stripping the carb again and after dismantling, left it aside to let the petrol evaporate. When I came back to it the parts were dry but oily. I think the firewall between the petrol and oil part of the tank must have a pin hole leak and as the bike sits the oil mingles with the petrol and quickly oils the plug when it runs. As I had previously used electrolysis to remove the rust and solder to seal a few pin holes, the inside of the tank was pretty clean, though I had no way to get inside the tank and seal up this pin hole. In all my previous work I had used only period approaches, but with this leak my only option is to use a modern sealant. A quick look on the web and www.tankcareproducts.co.uk seem to know what they are doing and so it was ordered. First up is to drain the tank and with the bike on its rear stand it lifts the rear of the tank higher at the front so you need to lift up the front so that all the petrol will drain out.
The yellow bike in the background is a new purchase. It is a Buell XB9S. A 1000cc tuned Harley Vtwin engine in a state of the art frame (that holds the petrol) that provides excellent handling and low weight. The exhaust is under the engine and the bike is full of clever features. They are just starting to appreciate so buy one now!

You have to remove both petrol taps and the fuel and oil caps and then the tank slides out the right-hand side of the frame to leave a rather empty looking Triumph.

With the tank off and drained of fuel and oil, the next step is to use the degreasant provided in the kit to degrease the inside of the petrol tank. Rinse it all out and then add a rust killer and leave to soak overnight. In the morning the tank is drained out and chemical added that helps extract the water then all drained out again. Next step is to remove all moisture and for that the tank is warmed up with a fan heater whilst air is sucked through it with the vacuum - this is best done when she who must be obeyed is out! She has banned me from using "her" stuff for bikes after she found a Triumph engine in her new dishwasher - made a fantastic job of cleaning up the crankcases and yet still years later the subject comes up ...

This took about 20 minutes and the tank was warm and bone dry and looking very clean inside and back to bare metal.

Next the tank needed warming to c45 degrees so that it is warm and lets the warmed sealant cover it all inside. The towel keeps the heat in the tank and the flywheel you can see if from my Brough SS100 project, in fact so far the entire project consists of just a set of flywheels - but its a start! The fan heater did the job and the sealant was warmed in her microwave (again, best if she's out for this).

The heated runny sealant is then poured into the hot tank and sloshed about to cover the whole inside of the tank. It then needs to be left for 5 days to harden.
When the sealant was starting to set, I wiped the excess from around the filler neck and drip fell into the now cool tank and you can see it below. The tank is now evenly coated in the sealant.

Five days later and its time to go back together and see if it worked.
June 2016 Update - I used a the product that www.tankcareproducts.co.uk sell and sadly it didnt last long before it started leaking. I then had to buy more expensive stuff to remove it and getting the old sealant out of the tank was a major faff and took a very long time. I then reapplied more of their product (following instructions exactly) and it leaked the first time I put petrol in. So now I have to remove this stuff and try something else.
I had to refit all of the taps and below is the cocking tap. It fits near the top of the engine and you would only use it to put neat petrol directly into the top of the engine.
With the original oils of a century ago they would get very sticky and the piston could get stuck, especially when cold. You would open the tap in the top of the engine rotate the tube on the tap until it was over the open tap and then turn on the petrol and let a little run into the engine. With modern oils we don't need to do this, but its all original and works.

For the normal/main petrol tap the 1911 models had a conventional tap that you turn 90 degrees shut on/off and it even has a nice positive click to let you know. My 1914 Triumph had a needle type petrol tap which seemed very old fashioned compared to the 1911 way of doing it. Not sure why Triumph seemed to have been going backwards?
The gauze filter on the tap may not be original, but its a good idea and so its staying - maybe my Grandfather fitted it.

Whilst tinkering in the garage we were joined by the beastie below, quite large and seemingly not bothered about me having a look at him/her?

With both petrol taps and the sight glass all fitted it was time to take out the oil pump and thoroughly clean out the oil tank and check the oil pump is OK.
All back together and fresh oil added to the oil tank. It takes a couple of cycles with the pump plunger before its primed.
Oil is drained from the sump and then the pump retested to make sure its oil reaches the engine, which it does.

Then a few other little jobs complete its time to add petrol and try and start. In goes half a gallon and I leave it for a couple of minutes to see if any leaks exist.
No leaks so petrol turned on and carb tickled and it fires up first press on the pedal. I let it run for a few minutes, but notice that if I pull the magneto lever back towards me the engine starts to stutter, so the timing is still not correct. When I turn the fuel off the bike keeps running as it uses up the fuel in the float bowl and the engine starts to race as the fuel gets low, so another area of setup to explore.
Next up is to recheck and set the magneto timing.
As the engine raced when the fuel was turned off, this seemed to imply it was running rich. I took the carb apart again to see if I had missed anything. Most carbs have a float that rises as the float bowl fills and this carries a needle upwards with it and when full the needle blocks the fuel intake and stops further fuel entering the float bowl. Triumphs from 1907 to 1911 had a Triumph made and patented carb that had the fuel entering the bottom of the float bowl and at the top of the float bowl is a counter weight arrangement that is pushed on my the float and this then pushes down the needle to shut off the fuel supply. On close inspection of this counter weight arrangement I could see that the float could not fully shut off the fuel supply as it fouled on the split pins fitted to allow the counter weights to pivot. These looked modern so I found some thick wire of suitable diameter and bent a length of this to hold the weights in place under spring tension. With this done I connected the float chamber to the fuel line to see if it now worked and shut off the fuel whilst still getting fuel to the jet. The fuel just reached the top of the jet and so all seemed as it should.

All was reassembled and the bike fired up and it ran much better and responded better to the movement of the levers. Still not 100% perfect as the timing is still not perfect. I have set the timing a couple of times and am a little confused why its not spot on, but it must be still out so that's the next job.
Whilst tinkering I noticed that one of the spokes was broken, snapped at the head where it fixes to the hub. The wheel came out and off came the tyre. a couple of other spokes look a little ropey so I now need to get a few spokes to get the wheel 100%.
Last year I had the wheels of my 1914 Triumph rebuilt. I had asked around and everyone told me the best man to rebuild wheels was Steve at Wheelwise http://www.wheelwiseengineering.co.uk/ as he had done an excellent job I visited him again with my 1911 wheel. I had hoped just to replace the broken spoke and maybe one or two others, but as Steve looked over the wheel he pointed out further ropey looking spokes, spokes of various sizes and the spokes were not all laced in the same pattern - so all less than ideal. After pondering matters and considering I want to really use the bike, I decided to have the whole wheel properly rebuilt with new spokes.
The following pictures are of each side of the wheel as I want to share the pictures with others to see if all is as it should be.
I do not think the three washers on the chain look right although they did correctly space the wheel.


This picture is from the 1911 Triumph Parts book and shows how the wheel would have originally been laced up.

Between the above and below, much has gone on and will fill in the gaps when I find spare time.
March 2015
The Pioneer Run
I left home at 5am and rode the bike via a long route the c50 miles to the start. All without incident, apart from one of my pedals falling off (sadly still AWOL) and various friends passing by in vans and cars and giving me friendly abuse out of the window! A couple of hours after leaving home I arrived at Epsom. There was mild misbehavior at the start as it had an audience, including its previous owners from the early 1970's onwards and then we set off for the sea.
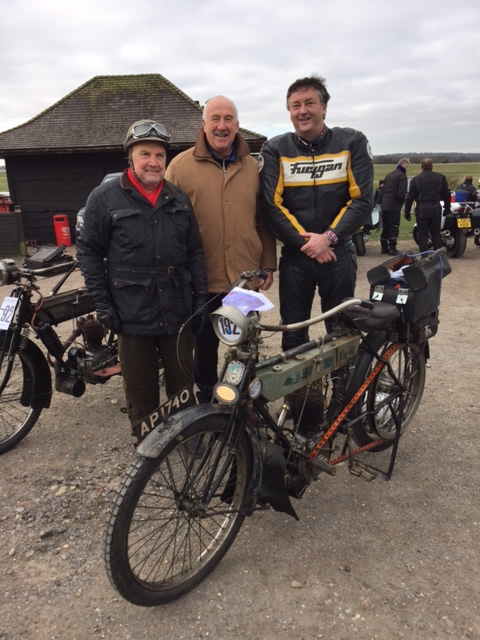
Below we have Geoff on the left, who was the Pioneer registrar so knows a thing or two about veterans and owned AP1740 twice from 1973 to 2014.
In the middle is Roger who owned it from 1976 to 2011.
On Reigate Hill we had a 60 minute stop and I checked everything and finally discovered that the timing had slipped so had to retime the magneto at the roadside. Off we went for another ten miles until a blocked jet stopped play, then on again for another 10 - this time a duff spark plug. I was quite chuffed to make Brighton, although the traffic was grim and with nothing moving and both of us getting hot, I pushed the final mile and just made it to the finish with 3 minutes to spare.
I was taking no chances and had tools and spares for all eventualities - which was just as well with the mild misbehavior! it all fitted in the large leather bag - the bag is c1906 and from a local junk shop.
After Brighton I then rode it the 50 miles home and it behaved well and gave every satisfaction as they would have said in 1911.
150+ miles in a day on a Veteran is a knackering experience and I was pleased to do it, especially on my grandfathers bike.
Much rider and inevitable related tinkering occurred in the rest of 2015 and into 2016 without major incident.
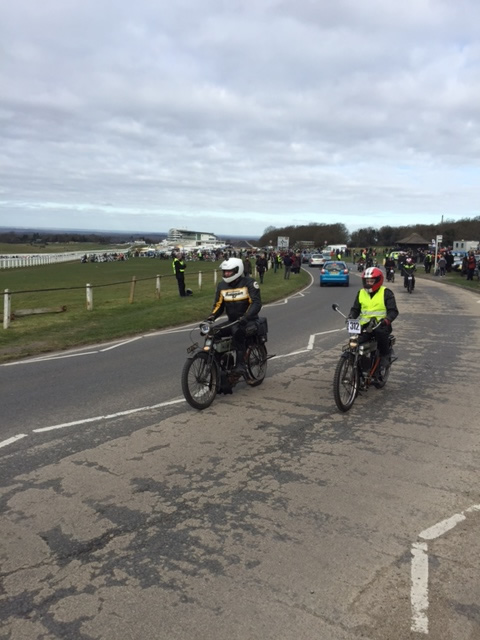
For the 2016 Pioneer Run my cousin Steve is going to ride - we share the same grandfather who owned this bike so good to share it. Naturally it misbehaves in the month before the Pioneer and wont run, but after dismantling everything several times it is back to rude health and Steve comes over for a test ride. Steve has been riding bikes longer than I have so soon gets the hang of riding it, he runs a Velocette so has the leg muscles to easily start it. It was a very fine day to learn to ride a Trusty. I followed on a Buell.
.JPG)
Naturally a celebratory pint was called for and Steve also had a bracing double espresso before setting off again.

Steve managed a further 50 or so miles running around East Sussex to get the hang of the bike before the Pioneer.
Here he is below setting off from Windmill Hill in East Sussex, just after dawn. He has c50 miles to ride to get to the start at Epsom.

The 50 miles to Epsom is not without incident. The petrol pipe comes lose and empties half the tank. Next misbehavior is the oil pump which when Steve goes to pump it there is no resistance. An inspection shows it has fallen apart and all the bits have fallen into the tank. The toolkit comes with thin wire so Steve embarks on a fishing trip into the oil tank and miraculously manages to fish out all the parts and put the oil pump back together and sets of to Epsom. I am at Epsom awaiting his arrival and at 9am he appears, but then creates a large cloud of smoke. A Marshall asks if it is steam powered... cheeky s*d. Investigations show that the metal that separates the oil tank from the petrol tank has really failed and both are mixed and hence much oil in the petrol and the clouds of smoke. We explore options to allow the bike to continue, but cant find a solution. Sadly whilst the bike has made the 50 miles to Epsom it wont be going any further today. Below it is resting at the Pioneer start.
The Triumphs first Pioneer was in 1947 when it was owned by S.Keith. Rolfe of Cowbeech, Sussex. The following weeks Motor Cycling of March 27th 1947 carried a picture.
In the June 2016 edition of The Classic Motorcycle on page 87 is printed a picture of AP1740 taken in 1954. It was taken at that years FIM Rally at Tours, France and was being ridden by its then owner Gordon Little. Hopefully the magazine will allow us to have a copy of the picture.
The following year of 1955 Gordon organised the Pioneer Run to Paris and a charming period movie exists of this event, see -