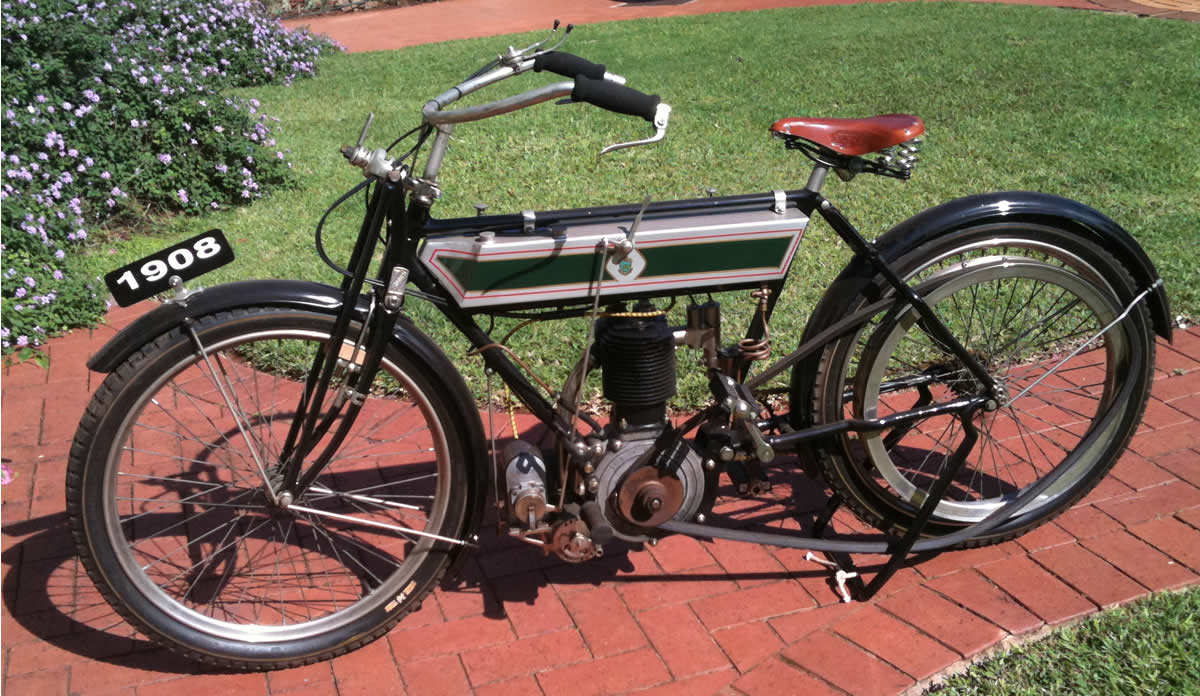
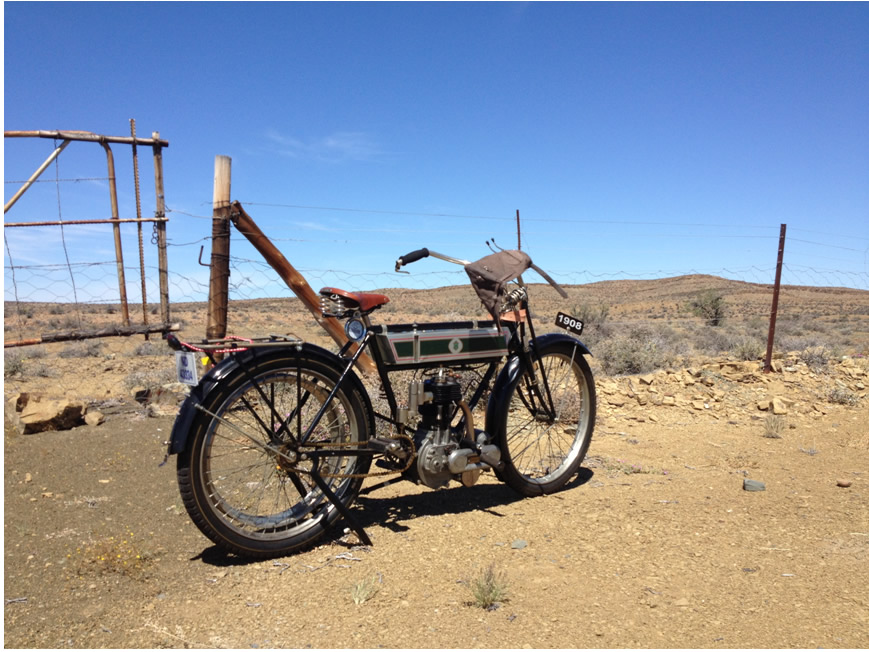
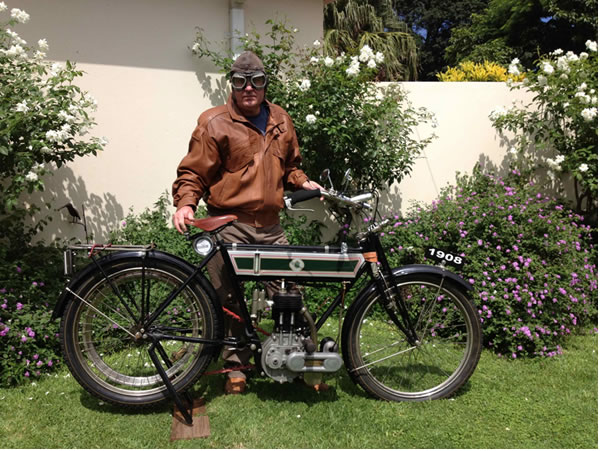
The resurrection of a 1908 Triumph single speeder by Andrew Mather.
This blog has been inspired by Paul’s writings about his 1914 Triumph and the experiences leading up to the Pioneer run in 2012. Like Paul, I’m a virgin Vintagist or whatever we call ourselves!. My old bikes have been mostly in the 1950’s with my earliest riding experience on my 1928 New Imperial, so taking a step back in time to ride a much earlier machine fills me with excitement and trepidation at the same time. But I’m getting a bit ahead of myself...let me set the scene as to why I have decided to put myself through all this and really my efforts are focused at achieving one single objective. If you want to get in touch, my email is andrewmather@telkomsa.net
To ride the oldest bike 650 kilometres (that just over 400 miles for those of us whom still understand this number better!) over 3 days on the Durban-Johannesburg (DJ) commerative rally in March 2013.
Read more on the DJ at http://www.djrun.co.za Entries are expected to open in September 2012.
I will be covering the story of my Triumph’s resurrection in three parts, firstly her early history before I bought her and the challenges of restoration her, secondly the preparation, running in and build up to the 100th anniversary DJ run and hopefully the last portion will focus on the actual event.
Part One: Finding a bike
In the South African context bikes from the 1920’s ands 30’s are old so finding a Veteran is almost impossible unless one has loads of money to buy a machine from overseas. Alas with a growing family and young kids this was not going to meet with acceptance on the domestic front. Fortunately I got a lead that one of our Club Member’s (Classic Motorcycle Club of Natal www.ncmc.org.za.) had an old Triumph which he was thinking about selling. Ok then this might be just the thing... with not a moment too loose Derek (the friend whom gave me the lead) and I hitched up the trailer and drove down to meet Dave the current owner. After some discussion and negotiation the deal was struck and the bike was loaded with some spares to boot. A bit later on the spares.
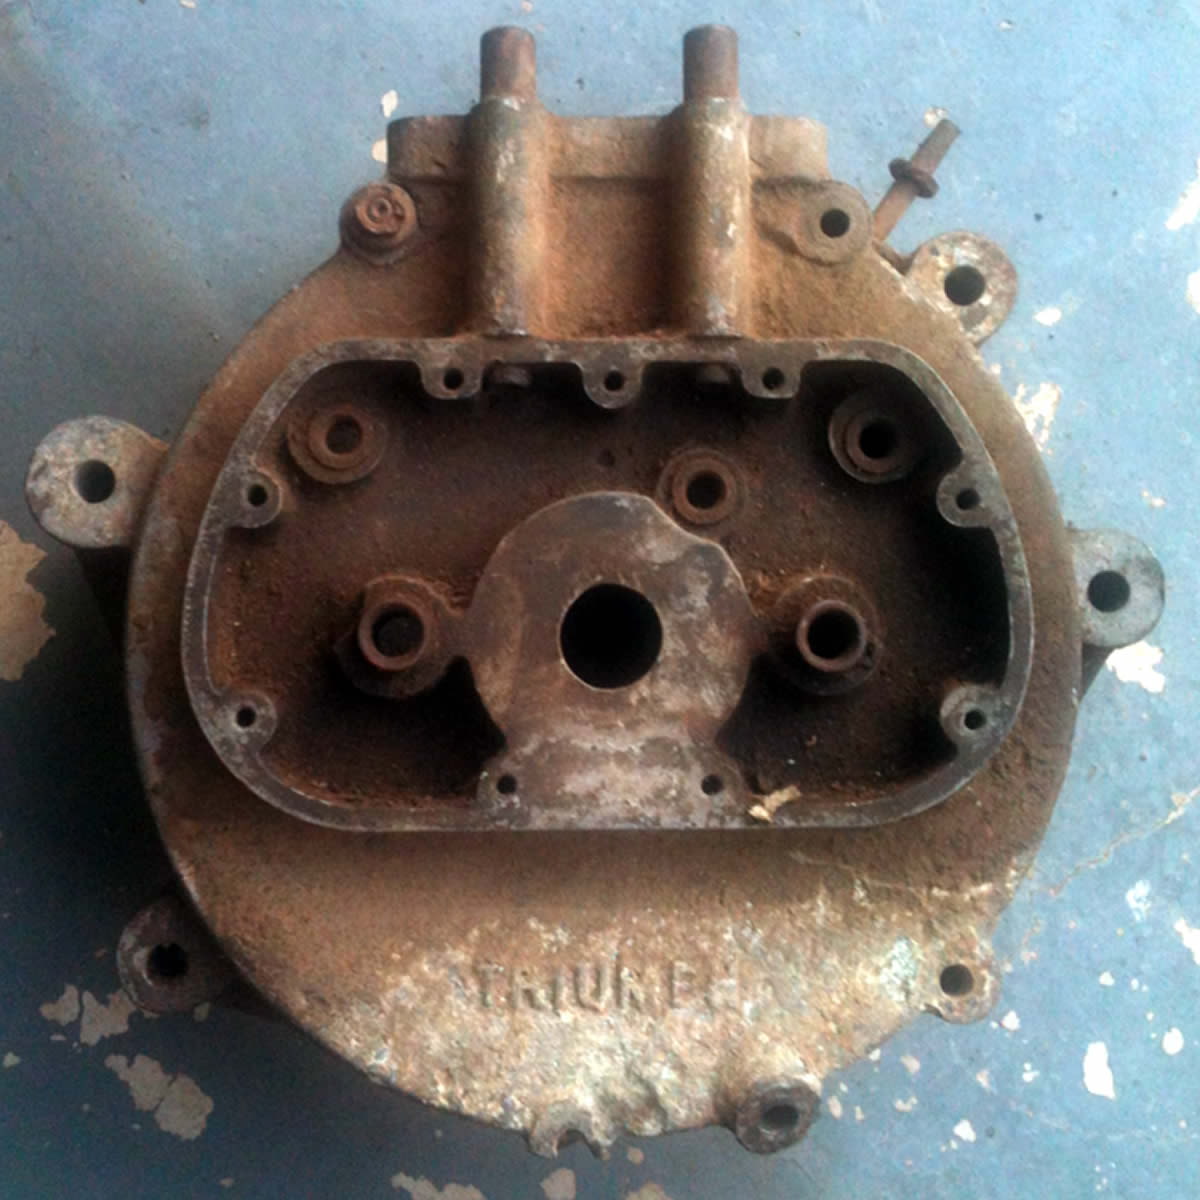
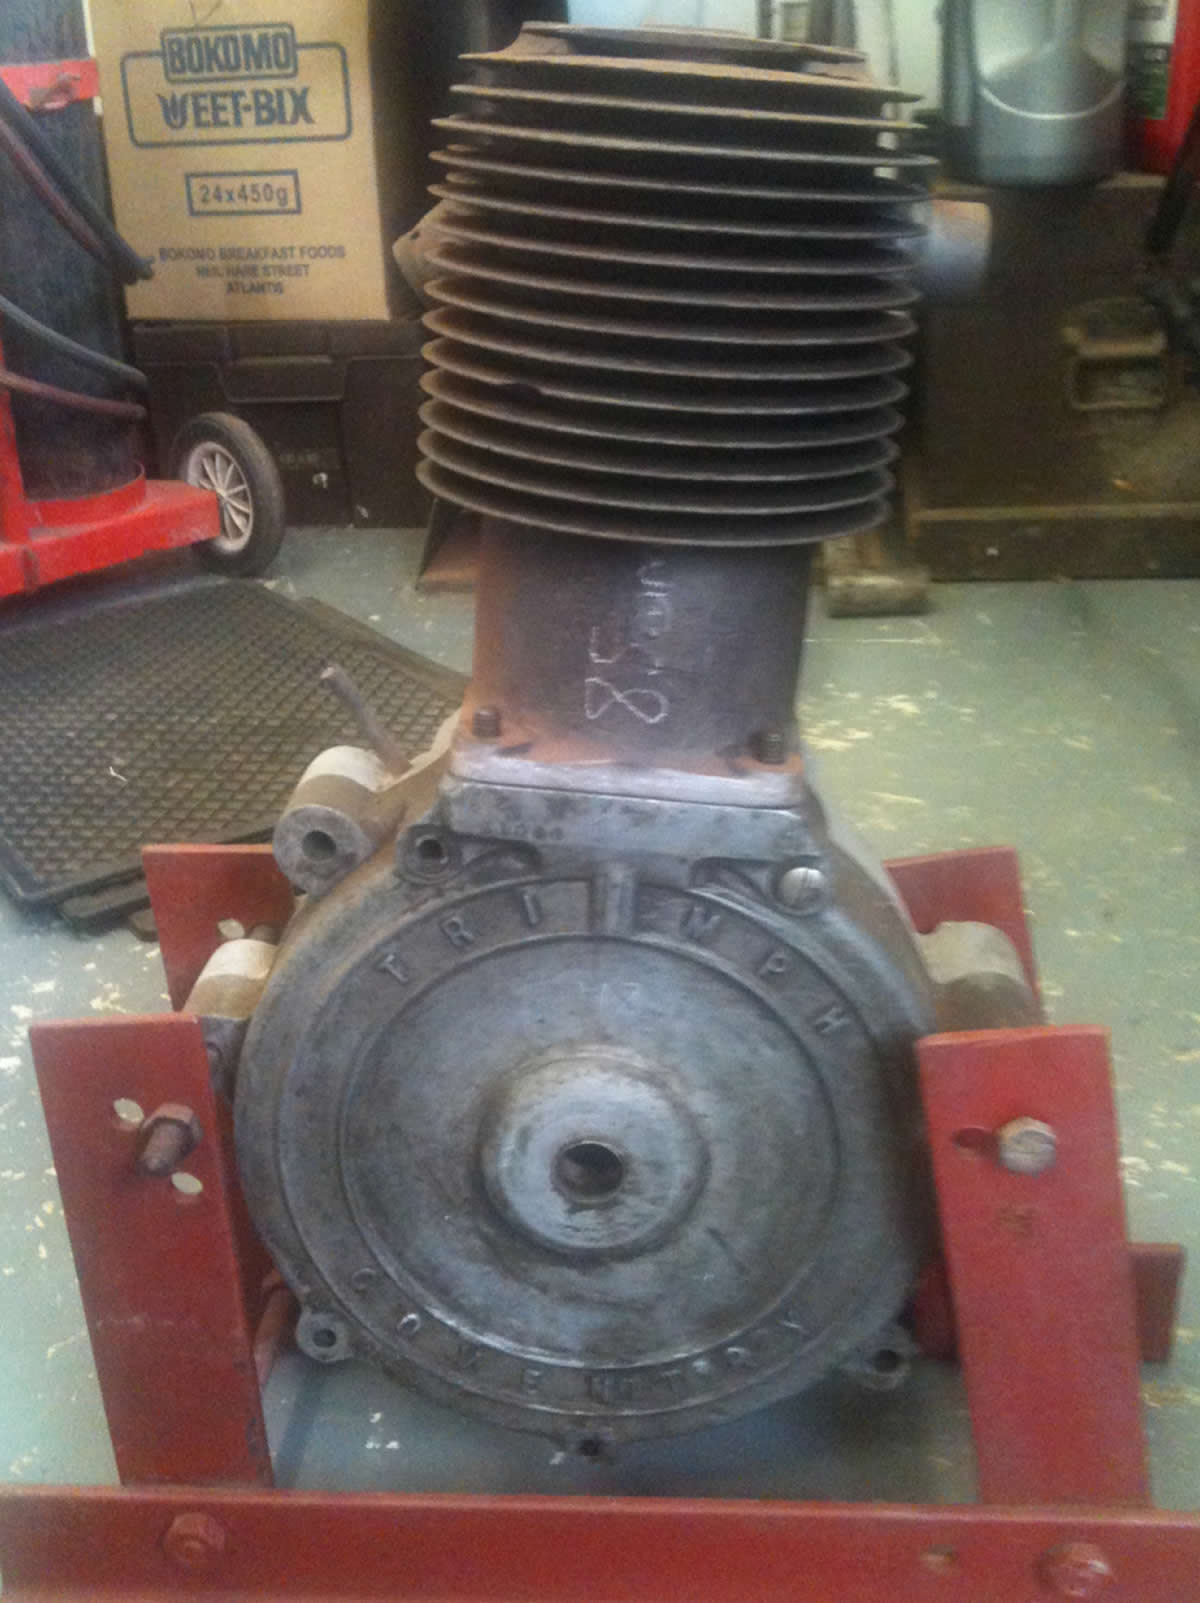
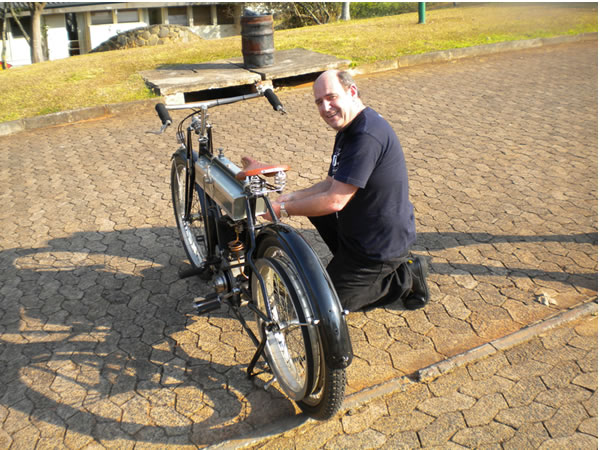
Dave told me the story of how he came to acquire this Triumph. He bought it from the brother of the original owner when he died. The original owner bought the bike new in 1909. It’s a 1908 model the factory dates on the crankcase indicate 4 November 1908, so presumably the bike was shipped out after Xmas and reached South African shores in early 1909. Incidently in the picture below is the barrel I’ve used matched to the 1910 crank and which is dated 12 August 1910.
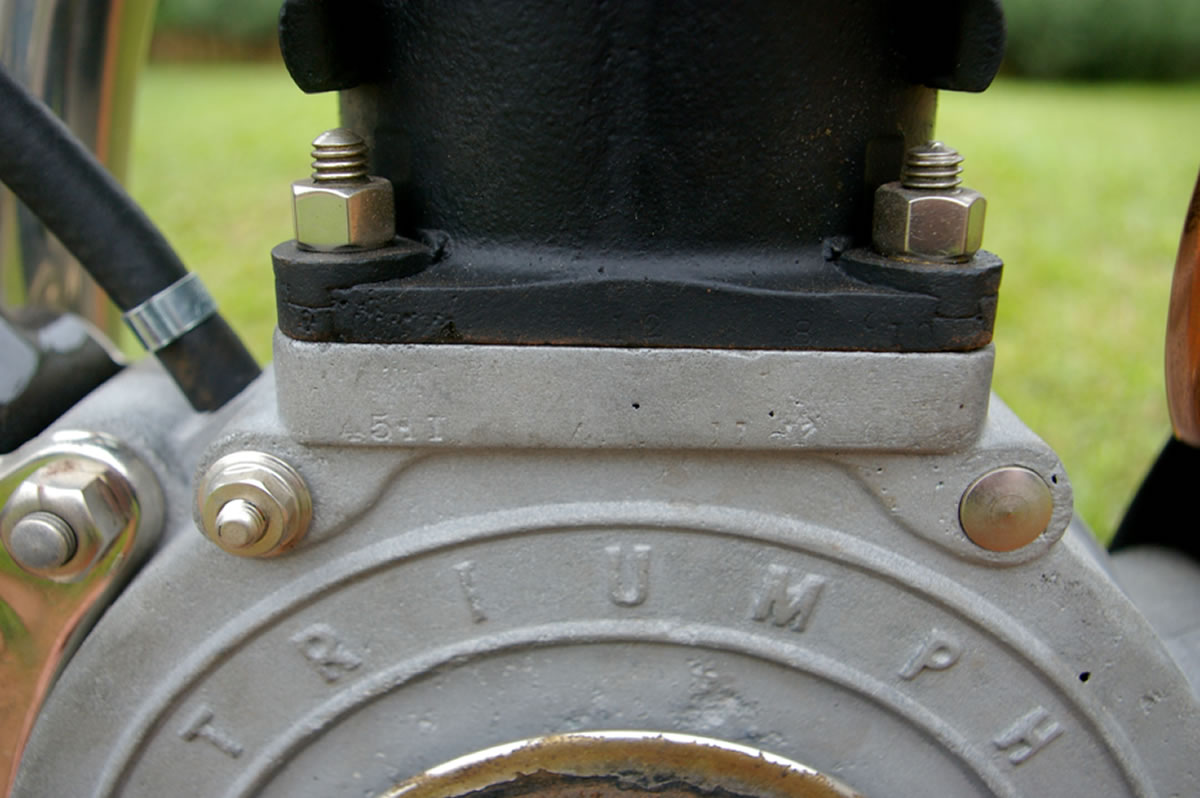
The engine number 4511 dated 4 November 1909 seems to clash with the accepted engine numbering circulating giving 4212 as the last engine manufactured in 1908. Could this be the model year ending in Sept. as opposed to calendar years????…comments please.
The original owner used the bike up until 1917 when, as the story goes, something broke!. (I have not been able to find what that was during the restoration process). So the original owner wrote to Triumph UK requesting the spares to get his machine on the road. The reply came back that unfortunately as the Triumph factory was supplying all its product to the war effort they were unable to supply at this time. I’m told that’s when the bike was put to one side. Presumably the original owner found alternative means of transport and the Triumph lived in a box until he died, passing it on to his brother who later passed on. So that makes me the fourth owner of a bike that had only been on the road a maximum of nine years and off the road for ninety one years!!.
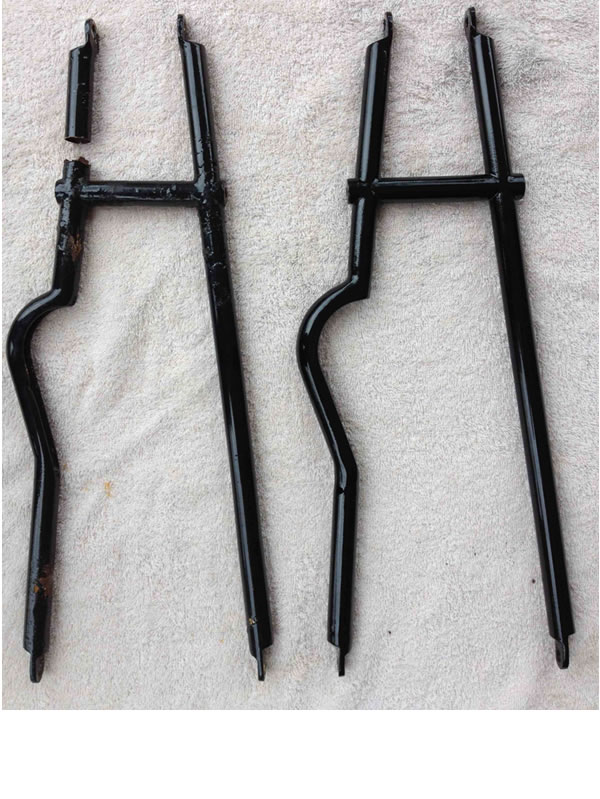
Well I dragged the bike home and sat down over the next few days after the excitement of the chase had subsided to realise the enormity of the challenge to get the bike together. Dave had sorted out the wheels, nickel plated rims with new tyres, he had had the tanks sorted, painted, lined, sealed inside with only transfers still to go on. The frame was unpainted and rusty, the motor was in pieces, it fact the bike came with three motors from 1908, 1910 and 1912 as well as a spare set of front forks. Unfortunately I don’t have many pictures of the earlier stages as the computer crashed and was unable to recover them.
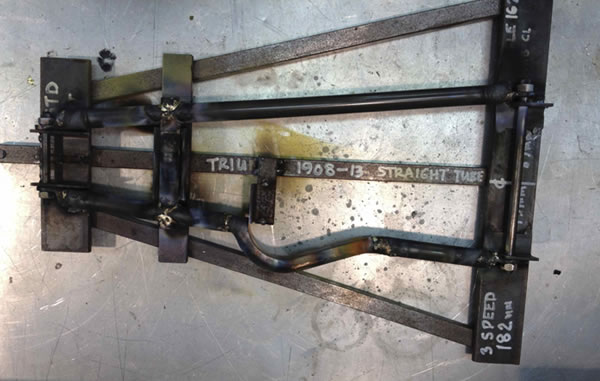
A 1913 frame which will give you an indication of the state of my 1908 frame and the engines which came with the frame are shown below
Unfortunately work and study pressures took its toll on progress and for nearly two years the bike languished in the corner of my garage while I worked on my PhD. As things became less hectic I had time to relook at the bike and the aim was to then prepare her for the 2010 DJ run. This didn’t give me much time so progress was fast tracked. First thing to outsource was the paintwork to my friend Ken (more on him later). Painting was difficult, apart from the rust, the sand blasting introduced some moisture which has caused bubbles in the paint to pop up later. Perhaps the only way to sort that out is to retube the frame...but not now got a rally to prepare for!!. The motor need a few spares and unfortunately the local engineering shops here were not prepared to machine up the components I needed. Guess fiddly work like this doesn’t pay them to spend a lot of time on something they cannot charge a commercial client a lot of money for. Fortunately for me I overhead another good friend Paul W. Talking about the veteran triumph website run by Adrian and Ian. Well that was a turning point in my progress. Without reference to “she who must be obeyed” to coin Paul’s expression of the wife, the parts order went off.
I was still short a saddle...couldn’t turn up a reasonable priced second hand one and so in desperation I bought a new Brooks B66 while in Germany on business. It will have to do until I locate one. Anybody out there with a spare saddle?. The painted bits arrived looked great for a few months before the water problem reared it’s ugly head. The bits from Adrian and Ian arrived and I was able to get the engine off to a friendly engineering works whom does slot in the bike motor work between their other work. Unfortunately once it is in their hands I need to be patient while they prioritise the larger better paying repairs. Anyway three months later I hear the motor bits are ready. My mate Ken and I spend the weekend assembling the motor, sorting out the set up and finally swing the motor in. Easier said then done. Eventually we worked out that one has to swing the cylinder forward get the engine into the frame gap at the rear at a higher level than required to locate the front main engine to frame plate. Then to lowered the back of the motor till the bolts lined up. Presto she in!!!.
We carried on till we had the carb, mag, exhaust on, peddling gear repaired and fitted and the belt on, cables one. The belts not right as it’s a steep angle than the 28 deg required...add to the sourcing list!!. By this time Ken and I wanted to hear the engine run!!. I worked on the TDC side while Ken timed the magneto and locked down the sprockets. Put oil...not enough I later read in the instruction manual...fuel and then pedalled like crazy. Ken operated the decompressor by hand at my command as we hadn’t rigged up the decompressor cable as yet!!!. Anyway nothing happened. After ½ hour of this, checking spark etc...pedalling and pedalling the net result was a sweatly peddler!. It transpired that we had timed the magneto using the wrong direction of rotation i.e points closing when they should be opening. You just can’t get decent help these days!!!. We discovered this after we kept adding fuel into the cylinder until a foot long flame came out the open Town and country exhaust. Flame very nearly burnt Ken...maybe after 93 years of slumber the Triumph was “seeking revenge from those how wish to harness her again”. We took a break as with all the peddling I was finished...hoping this is not how it always going to be and if that’s the case I’m heading to the gym!!!. Skipping ahead a bit she finally burst into song on the 16th February 2010, my eldest daughters 15th birthday, having not run for 93 years!!!. There a great satisfaction in this achievement alone...but there no time to sit back with a rally to prepare for. See the video clip on her first run in 93 years here.
To enter the DJ one must satisfy two basic requirements. Firstly the bike must be manufacture BEFORE 31 Dec 1936. This date was selected as the last day of the last year of the original races ended. And secondly it must be registered on the road. Well the first requirement was no problem I few photographs engine and frame rubbing and an application form/money was sent off to the South African Vintage and Veteran Association (SAAVA) who are responsible for dating vintage vehicles’ here in South Africa. Guess they operate like the Sunbeam Owners Club who issues the dating certificates for Pioneer run eligibility. Anyway the response came back from SAAVA with a certificate and brass plaque to be mounted on the bike.
The second requirement was far more difficult. With the electronic age the old paper logbook system has been replaced by an electronic system called eNATIS. Suddenly the system only worked on engine and chassis/frame numbers so suddenly older vehicles’ with low numbers were duplicated in the system. The fact that one was a truck and the other was a motorcycle made by different manufacturers was not factored in by the licensing department. Their solution was to require any duplicate numbers to have a new 13 digit unique Vehicle Identification Number (VIN) stamped on all vehicle. Why would I want a 13 digit number stamped onto my bike just to make the authorities system work!!. While I support the spirit of this initiative, which is also designed to cut down on the practise of copying of license discs onto multiple vehicles all sporting the same number, I don’t want my bike disfigured. I was told a certain motorcycle club were apprehended recently with no less than 5 bike trailers with the same number plate! Guess even our cops aren’t that stupid if they see these trailers all following the string of bikes!!!. I still need to get the bike registered and I know that SAAVA and the various clubs are trying to work with eNATIS to sort this out to everybody’s satisfaction. One suggestion is a aluminium plate stamped with the offending 13 digit number then epoxyed onto the frame...I think I could live with that option.
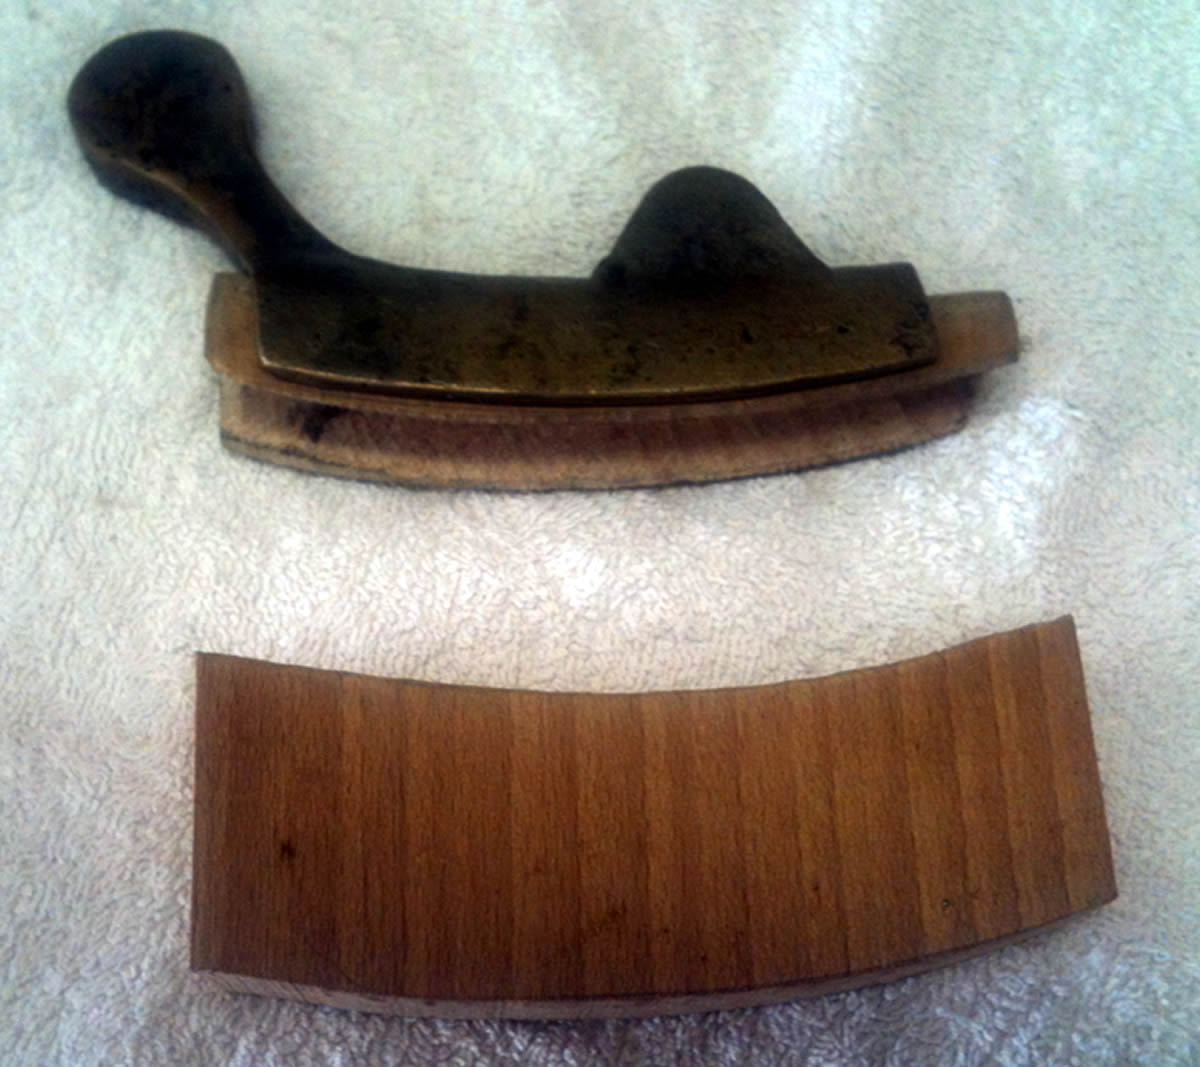
Anyway in Feb 2010 I took the decision to pull out of the 2010 DJ as my bike would never be registered in time. The sound of her running spurred progress and the cabling was completed but we need some friction material for the brakes. After some research we choose the best of the available braking material 100% solid beech wood and crafted two blocks for the stripe brakes and one for the rear brake.
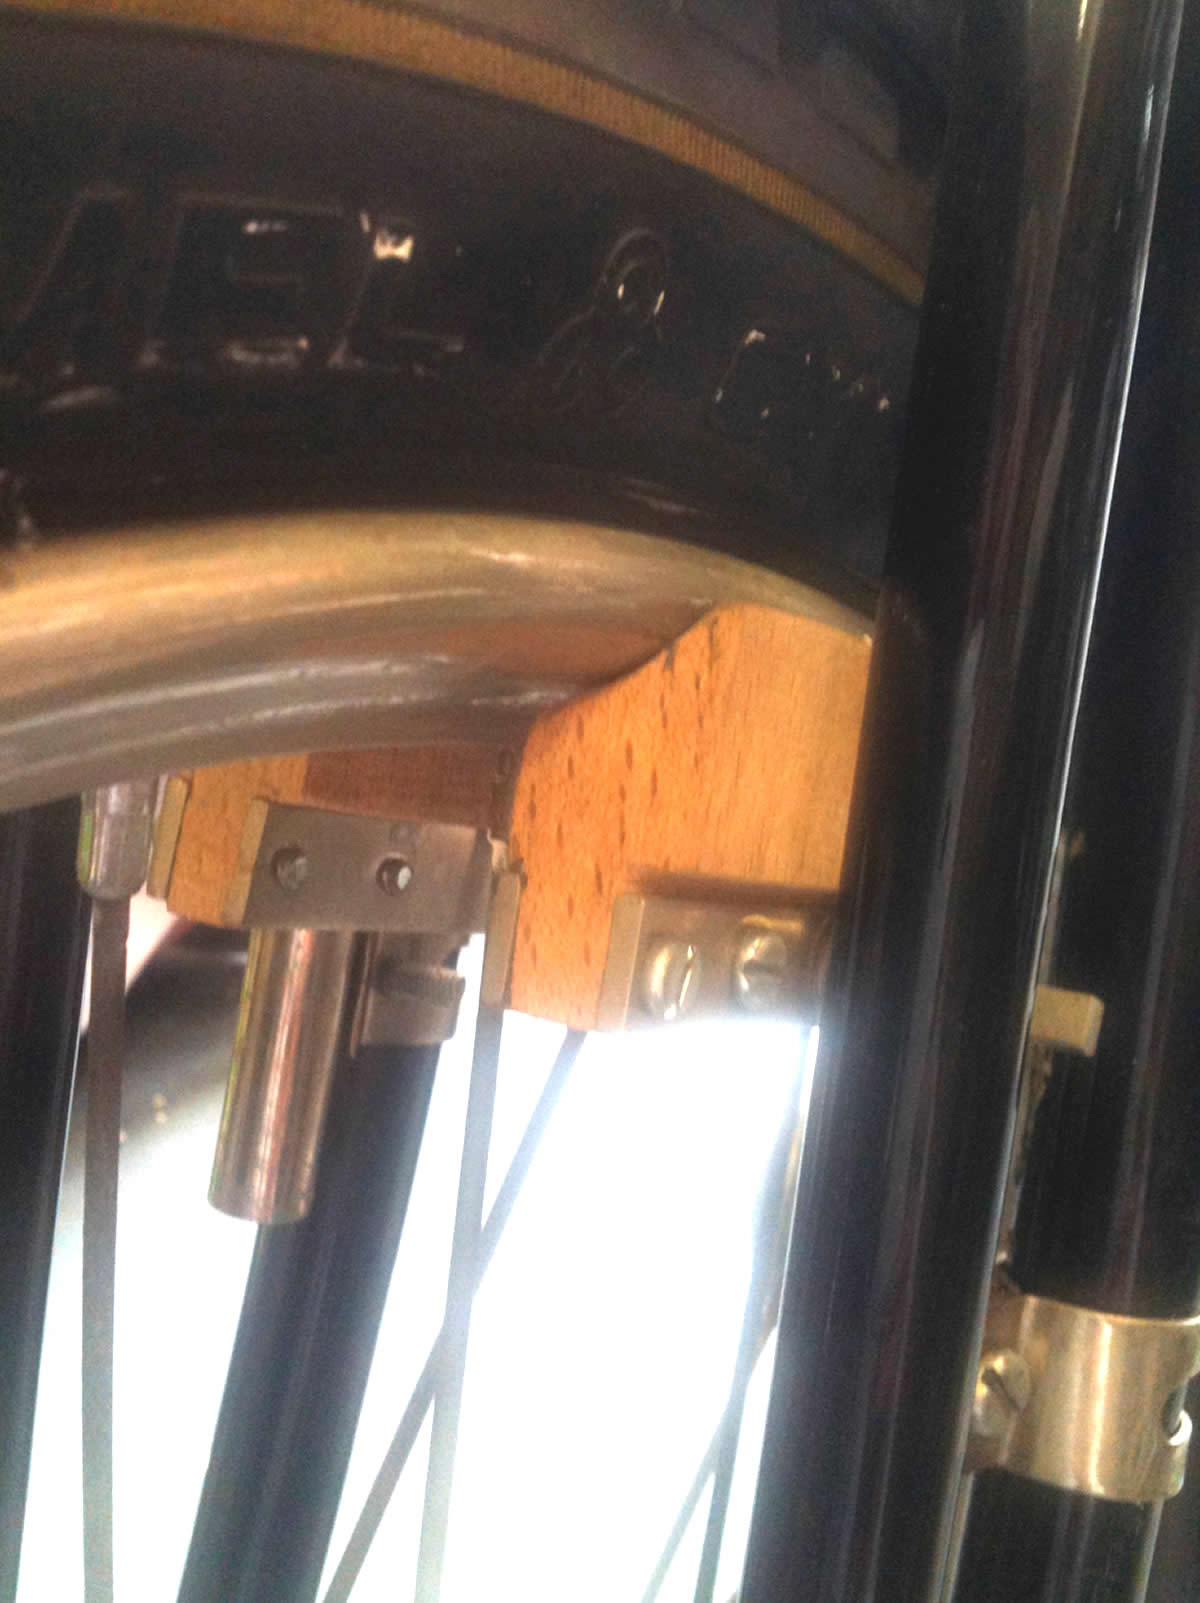
I’m sceptical about it’s future performance but will report later once she is on the road. I’d be interested to hear from other in this situation and if there’s something better to try!. 2010 rapidly went by with no further work on the Triumph while I completed my PhD. She sat in the corner while I got my New Imperial ready for the 2012 DJ. From here on in I’ll be using the date line and count down leading up to the start of the 2013 DJ on Thursday 7th March 2013.
Saturday 17th March 2012 -355 days to go
Dragged the Triumph into the workshop. Thought I’d better get her going as soon after the 2012 DJ thereby giving myself a year to sort out all the issues. First thing I tried was turning her over. She was solid..didn’t want to force her. No choice but pull the motor out. This time we dropped the whole motor with magneto attached so as not to alter the timing...didn’t want to go through the performance we had last time!!!. Valve caps were removed and a mix of paraffin and penetrating oil was left to soak on top of the piston rings. The piston was sitting right at the bottom of the stroke!.
Sunday 18th March 2012 -354 days to go
Tried next day to turn her...no luck. Removed the four nuts holding down the barrel to check if it was the piston or the bearings/crankpin. Flywheel turned over fine so we now know we need to ease the stuck piston.
Monday 19th March 2012 -353 days to go
More oil and another day to soak. Still no movement. Ok time to get a bit more radical. Tried heat but no luck. Out with a wooden dowel and light taps around the edge of the piston crown. Just a slight movement, continue tapping gently and rocking the piston back and forth over the area… it’s moving at last.
Tuesday 20th March 2012-352 days to go
Much more movement today and finally got her turning over. Drained the paraffin and oil mix off came out a light brown colour. Moral of the story is spray a bit of oil into the cylinder and turn her over if you are going to leave the bike for a year!!!.
Friday 23rd March 2012
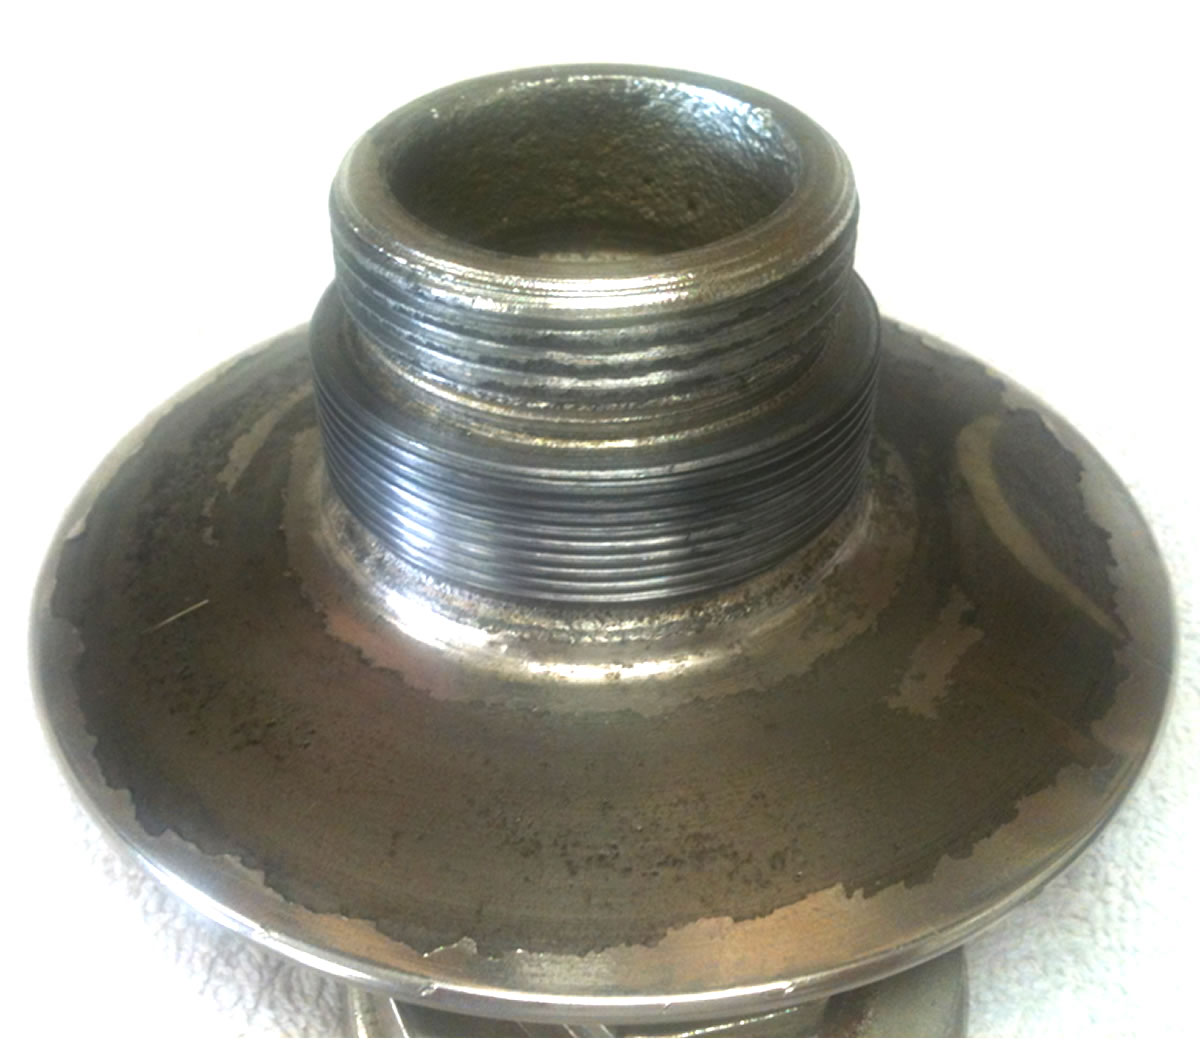
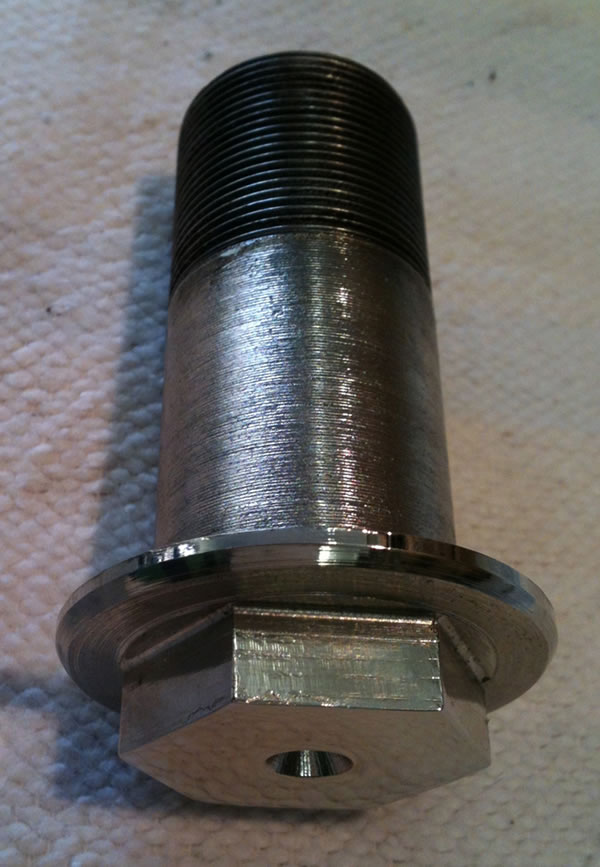
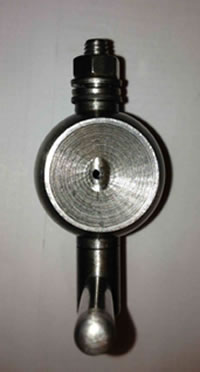
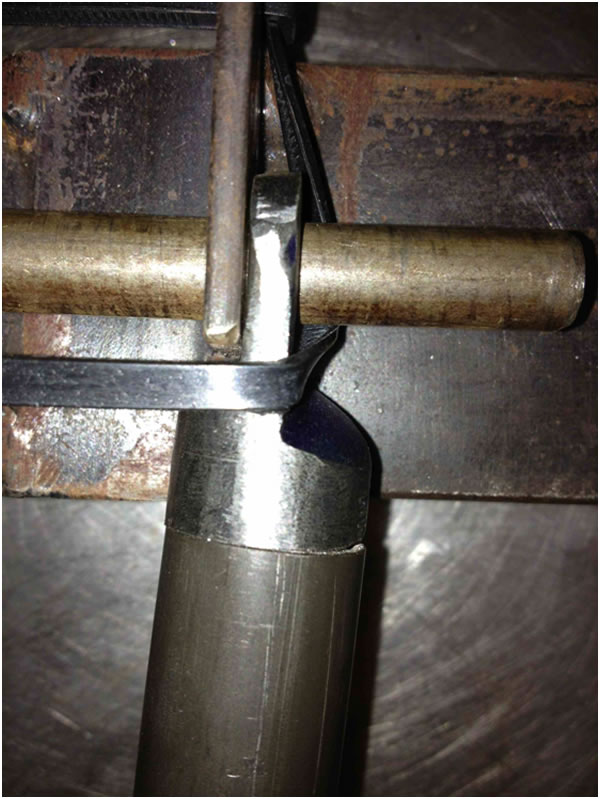
The adjustable engine pulley had seen better days. The threads against the engine side flange had been damaged enabling adjustment only when the pulley vee’s are wide apart...great for hills but that’s about it. See picture of repaired adjustable pulley.
Ken and I jointly owned a 1914 3 speed hub model (bought as his ride for the DJ 2013) so we have borrowed the pulley from this machine for the testing. With this pulley the gearing is 4,5 : 1. The pulley looks a bit deferent to the adjustable pulley but fortunately the pulley taper is the same.
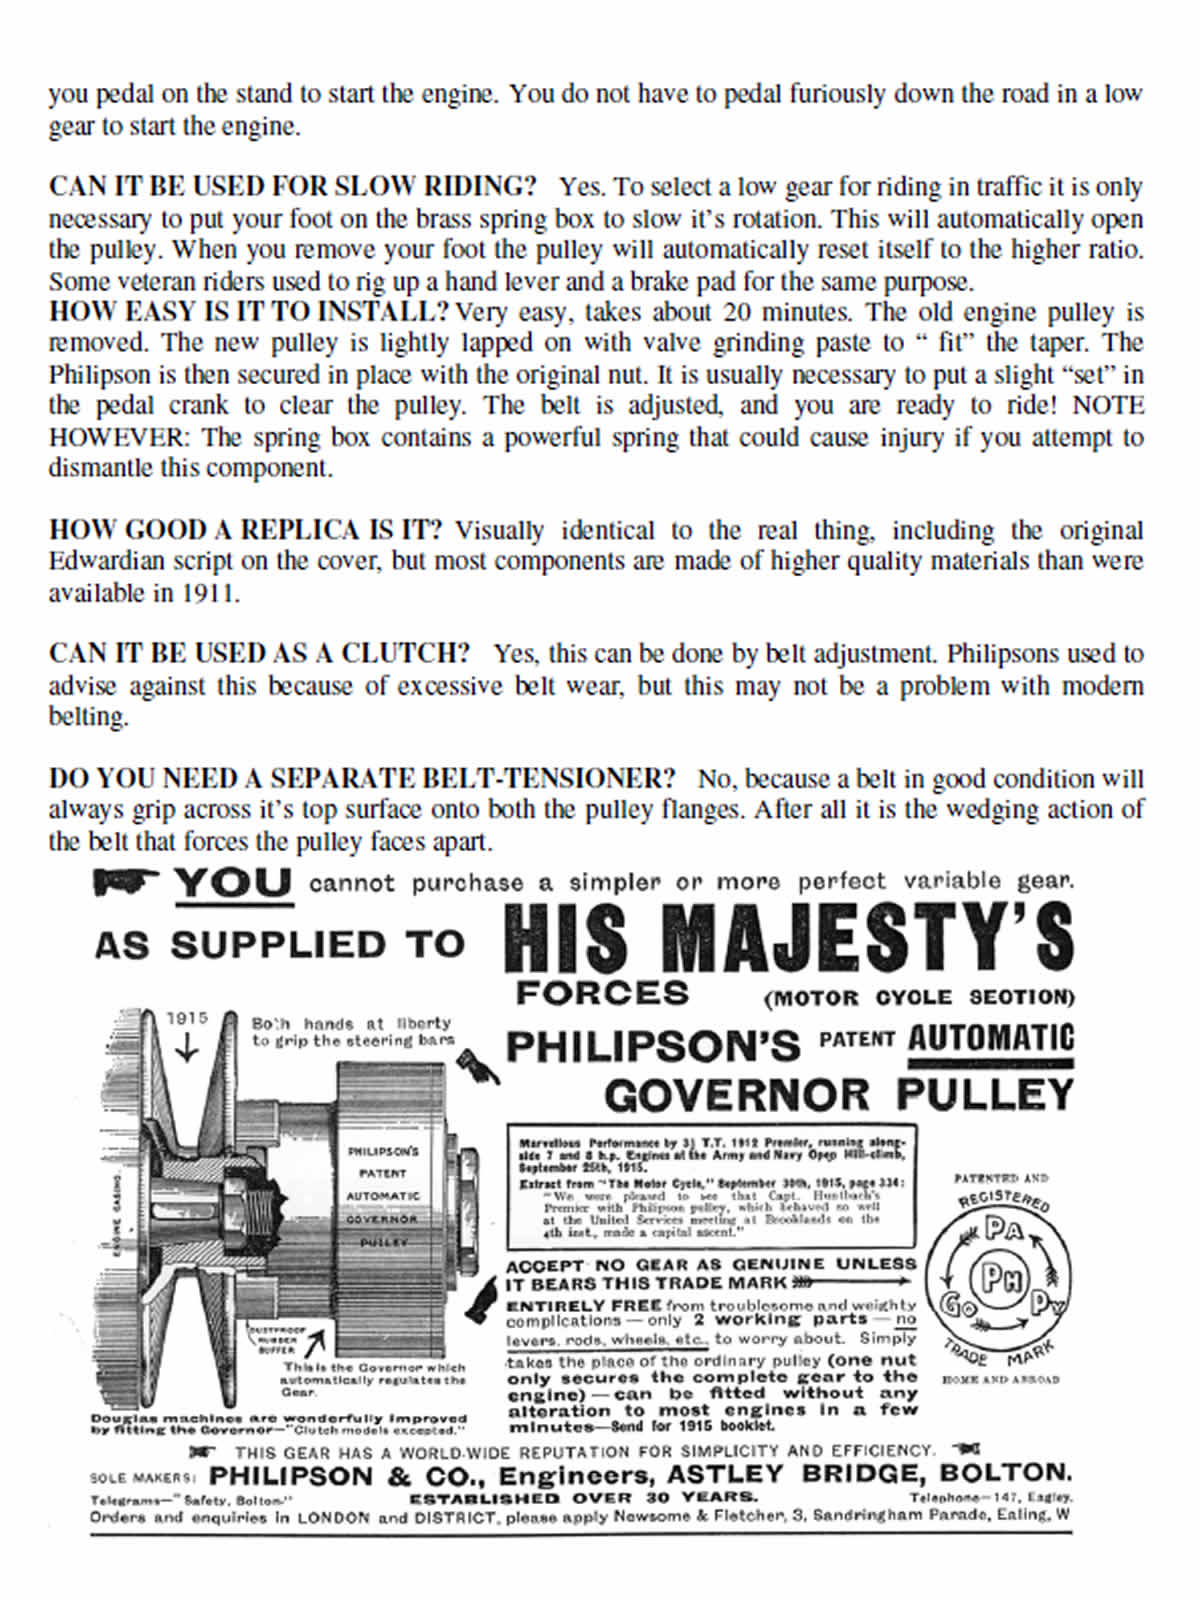
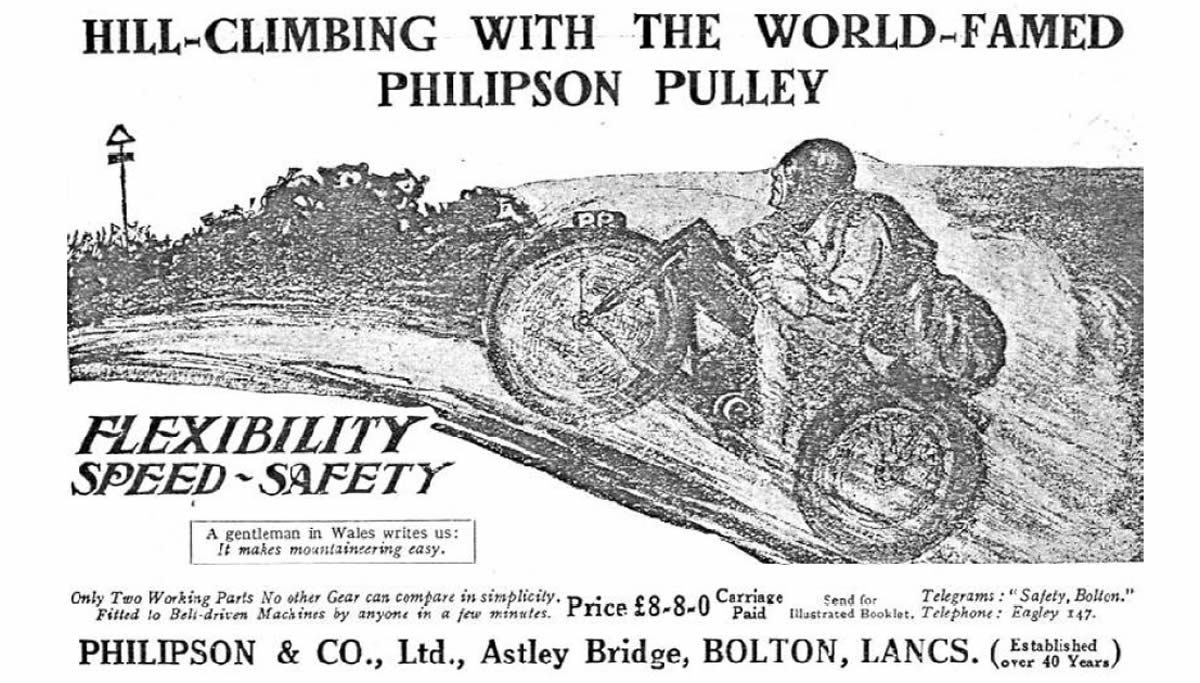
To cover my options and to make the bike more ridable I have explored the availability of a Philipson pulley. These pulleys enabled riders to vary the gearing whilst on the move. Unlike the variable pulley which you had to stop the bike lengthen/shorten the pulley adjust the pulley and then proceed again only to have to readjust when the gradients change again. With the Philipson pulley a large spring adjusts the pulley depending on the engine speed or torque. Anyway I found that an old acquaintance Chas, whom I meet when I restored my 1928 New Imperial 6A Super Racer, was making these in partnership with Jasdane Engineering (www.jasdane.com.au) in Australia.
One has been ordered so will report back on its performance once we start road trials.
Saturday 24th March -348 days to go
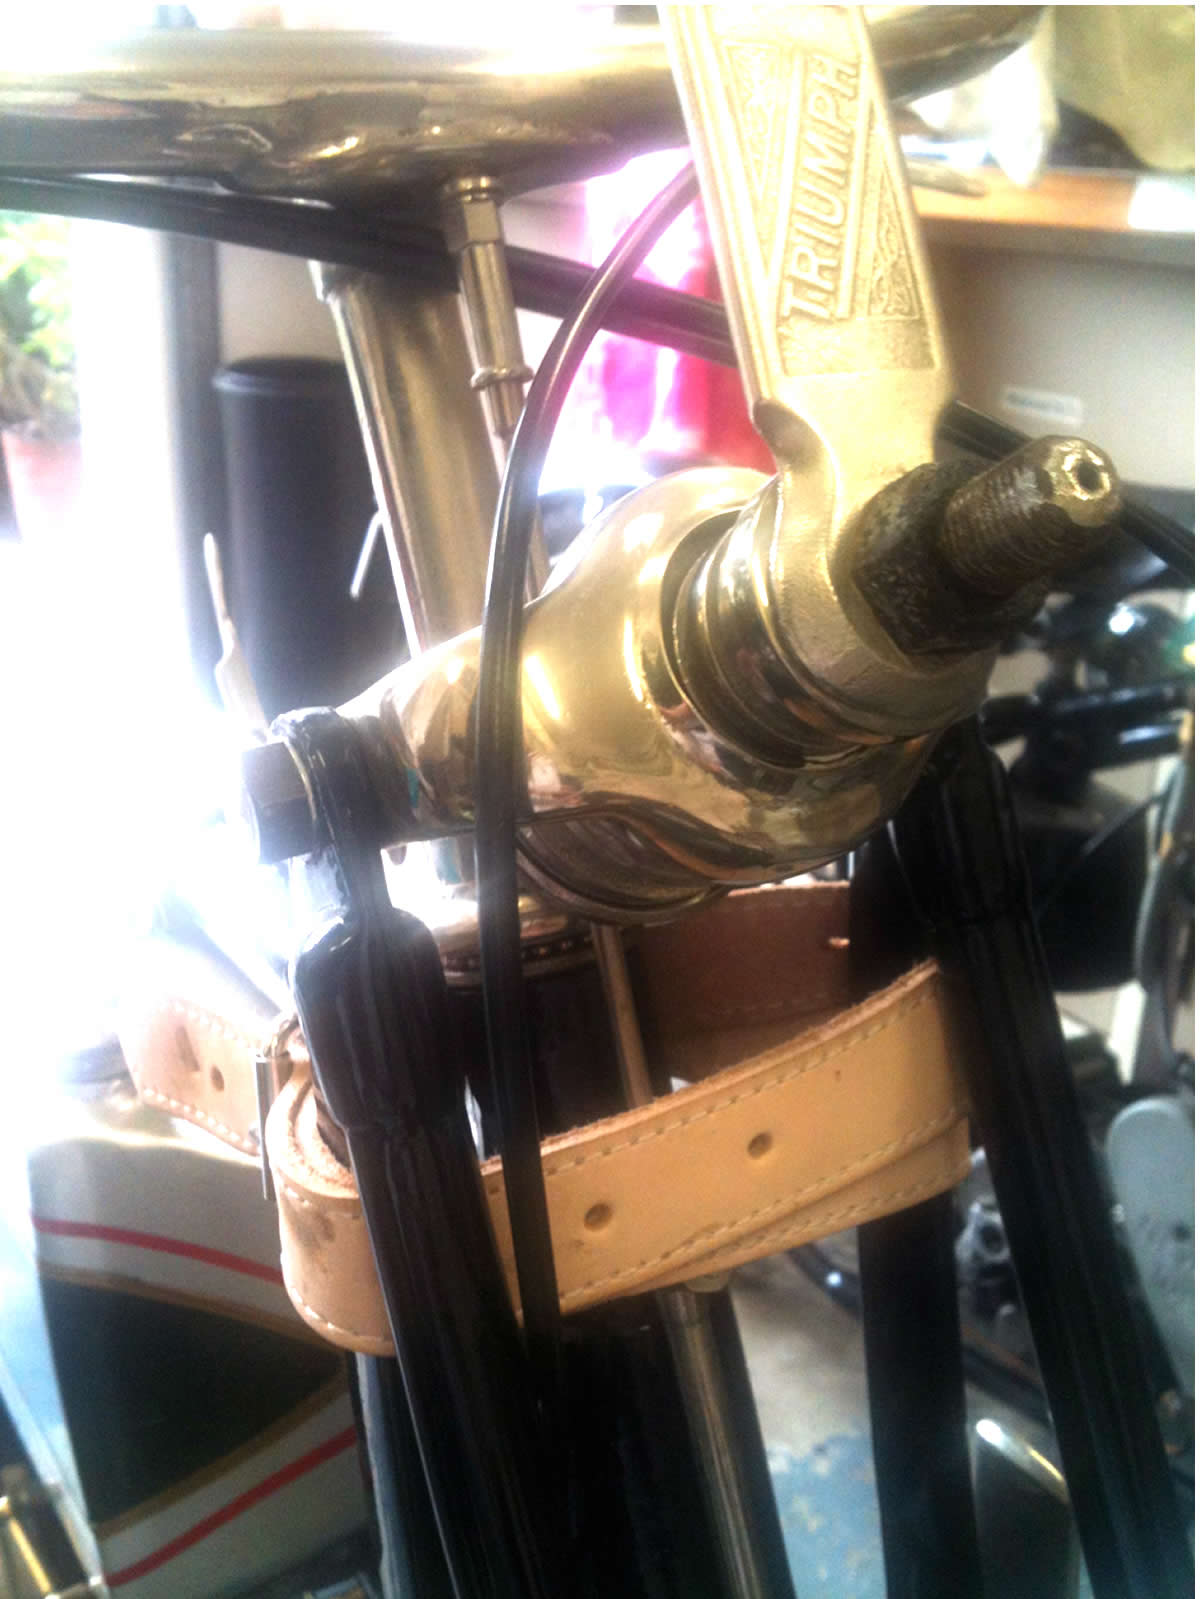
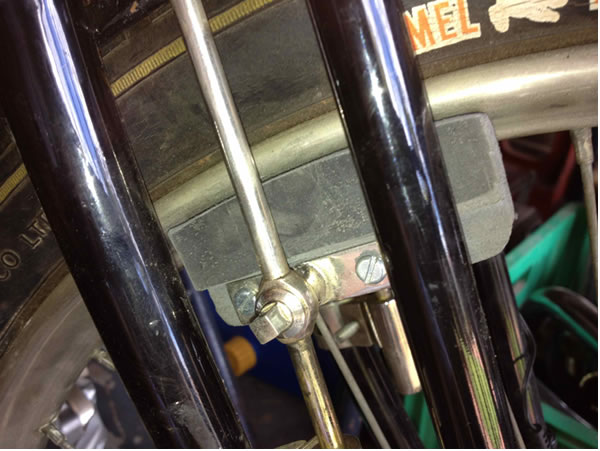
Ken pops over and we replace the motor back in the frame. Time to fire her up again!!. A few minutes pedalling doesn’t get her started. We try the petrol thing again and are rewarded with a bang in the exhaust. The levers are completely puzzling us. Magneto adjustment does do much at starting perhaps it works better while running we shall see. We retard the ignition, open the throttle wide open, open the air level to about a quarter and a few drops of petrol into the cylinder and the motor roars to life. This time I had the benefit of knowing that 4 plunges of oil into the crankcases is the starting quantity...thanks Paul. Ok at least the motor sounds fine. Shut her down. Drain the oil. Got to sort the brakes and then she’s going out onto the road!!. Decide that after reading all the horror stories of broken front fork springs I decide to fit a leather belt as security.
Sunday 20th May- 291 days to go
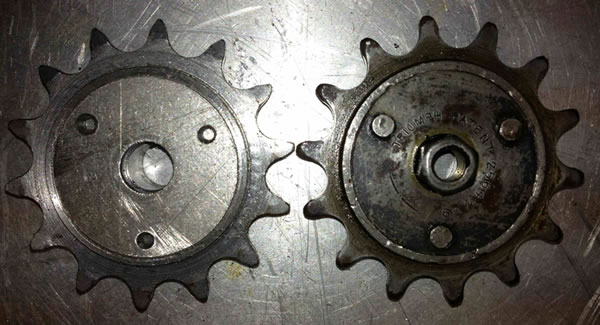
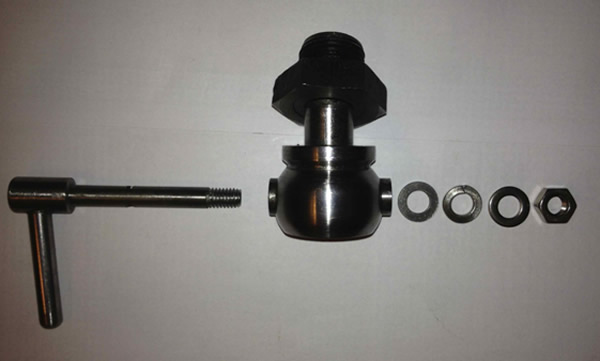
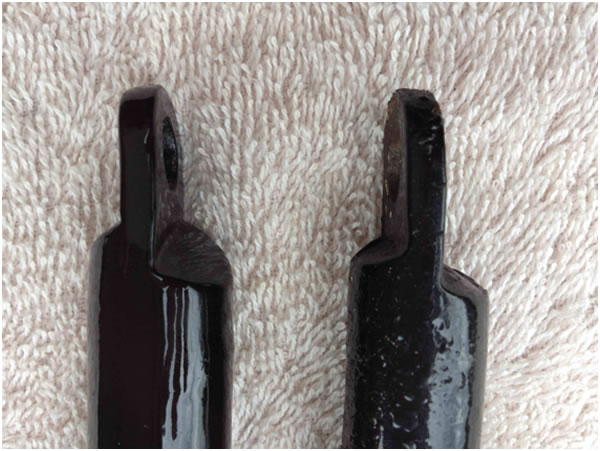
The Philipson has arrived and is certainly a well-built “piece of kit”. The Philipson pulley next to original pulley is show below.
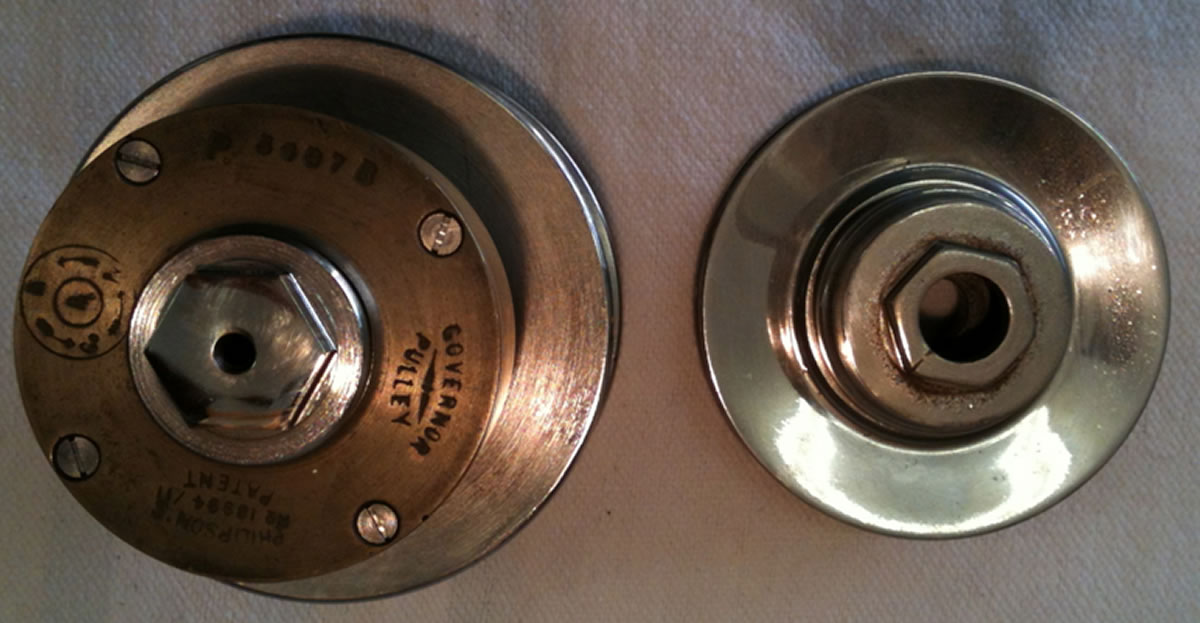
The flanges are much thicker than the original the diameter and made from stainless steel. The adjustment is very wide. My friend Chas Lipscombe (Australia) whom makes these Philipson pulleys advises that I can use this as a clutch too. Apparently modern belting is much more study than the original belts. There are two approaches to using this a clutch. Use the foot to slow down the relative speed of the spring box causes the pulley to open up and the belt drops deeper into the V. If you continue to keep your foot on the spring box the flanges open wider than the belt and the fixed drive is then disconnected. The other method is to rig up a band brake around the spring box and secured to the frame. The band is compressed by a lever on the handlebars see picture below.


The design is such that it really is an easy job to install. The original nut is reusable.
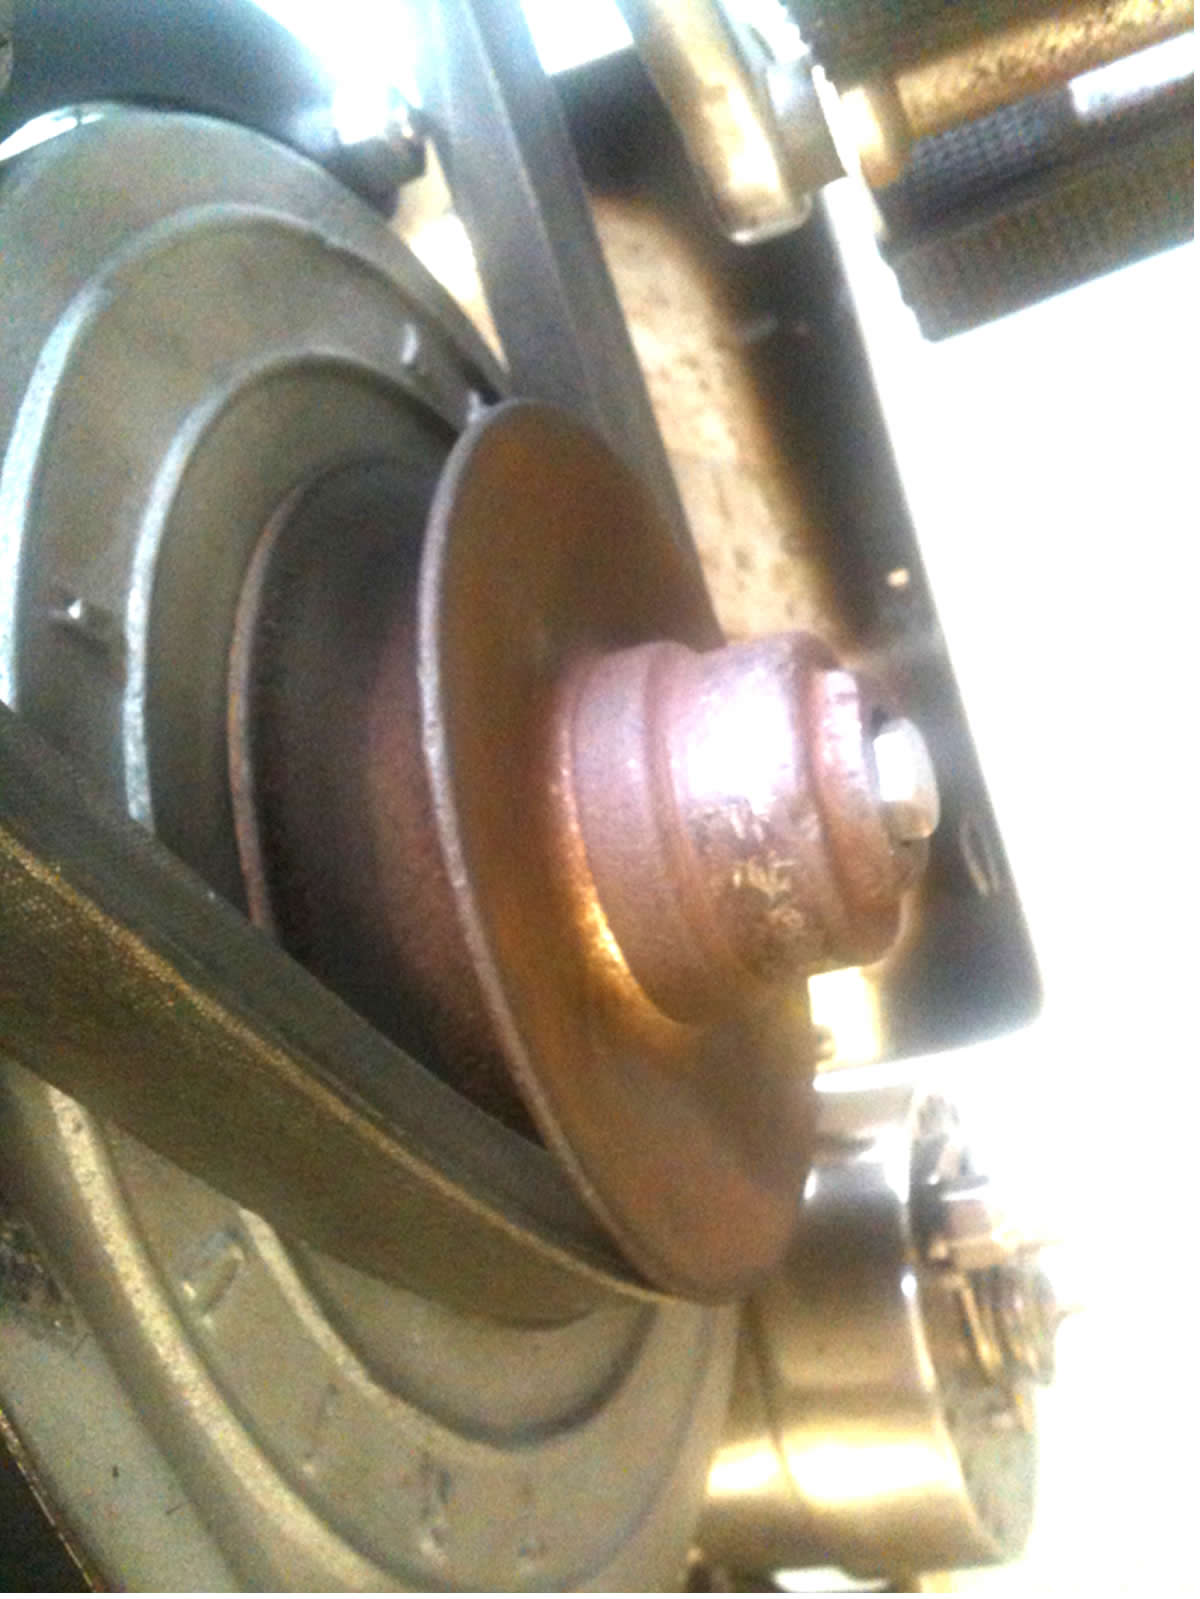
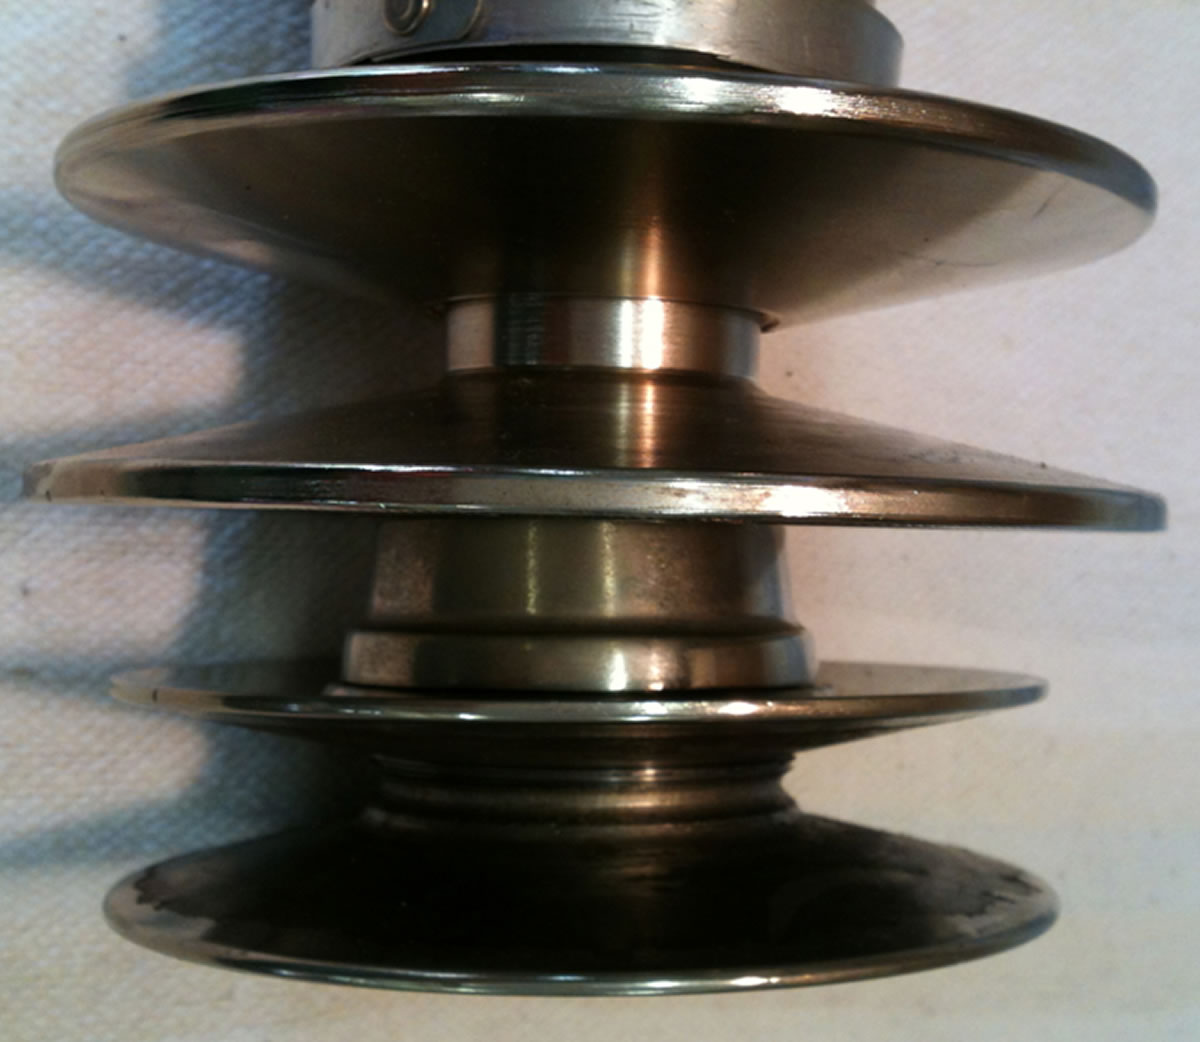
The only issue I did not anticipate was the larger diameter of the pulley that now fouls the peddling gear (see below- sorry poor quality pic but you can get the general idea).
As the rear brake and Philipson pulley need the same foot it should be interesting riding without the lever.
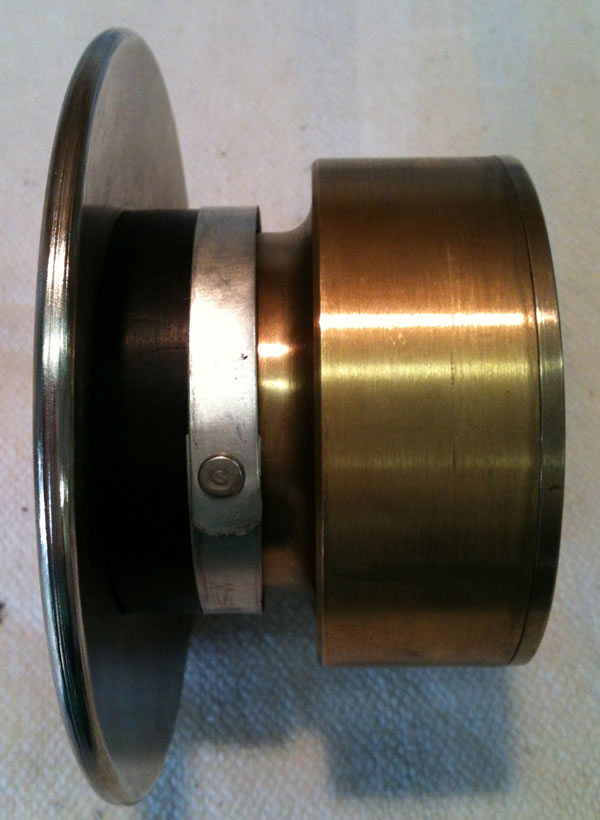
I have taken a few pictures of the Philipson partially disassembled. Undoing the spring box is NOT advised.
Looks like I’m going to have to modify the pedal. Fortunately it’s not an original pedal so I’m going to give it some heat and bend it with a longer offset and hopefully that will shorten the pedal sufficiently.
Still haven’t worked out where my foot will go to pedal her if the clearance is so tight!!.
The other change has been the removal of the leather belt from the front forks. A reader of this blog, whom owns a 1908 model like mine (hitched to a sidecar) has pointed out that this will not really help.
I have received my new rear brake block from the VMCC and this is my next job and then she’s going out on the road for a first run. It will have to wait as
this coming weekend I’m off to ride my Sunbeam S8 for two days covering nearly 600 kms at our clubs annual rally.
Since the last entry I did my Club rally on my 1955 Sunbeam S8 that I inherited from my Father in 1986. She’s done very little mileage covering only 3500 miles since 1982!. The last license disc on her was four years old…so an oil change and a new battery later gave her a new lease on life and she did me proud finishing in 3rd behind the formidable rallying pair of Kevin Robertson (who won this years DJ and a half dozen previous DJ’s, not to mention many of the local rallies) and Gavin Walton.
In June I was travelling overseas for work but managed to fit in time for biking as detailed below which is to be published in the VMCC South Africa newsletter.
A week in the UK
In June I was required to spend the first and third weeks in Paris and Nantes, France on business and was considering fly home between these to trips but decided to spend that week in the UK. Here my diary of the week.
Monday 11th June
I left London and motored down to Sammy Millar’s. I wanted to see several bikes in particularly a ‘13 Zenith Gradua, which I wanted to measure up the Gradua Gear set up, the exhaust system of his ’48 GP Triumph as well as take some detailed photographs of several other bikes including his recently restored AJS 4 cylinder and his Bradshaw engined bikes for my good friend Ken Sink. Having spent two hours photographing and measuring the Zenith, the caretaker fellow took it upon himself to call Sammy Millar out of his workshop to chat to me. What struck me first was what a gentleman Sammy is. We chatted about the vintage bike scene in SA and then he asked me if I’d like to go into his workshop and see the latest restoration. He introduced me to Bob, his chief restorer…actually his only restorer excluding Sammy. He had a Gilera and the most scruffy, corroded Beardmore Precision on the bench. I asked him if he was going to replace the pitted tubes as they were so badly pitted. He replied “No there be fine, you should see the state of the spare bike that came with it”. He showed me the remains of the other bike and I can only say Sammy and his team can really bring a bike back from it’s deathbed!!!.
Tuesday /Wednesday 13/14th June
Did the family bit and visited my Aunt.
Thursday 15th June
Had an appointment to collect my 1899 De Dion tricycle frame from Mick Penney. I got to the workshop to find two other De Dion tricycles in the shop and so got to take a whole lot of reference pictures too.
Friday 16th June
Today it’s the National Motorcycle Museum in Birmingham. I get there before opening time and eventually get kicked out at closing time!!!
I had previously visited before the fire and what a job they have done in getting things back to “normal”. I was told that there are still many bikes that are burnt and unrestored in a storage facility. Let’s hope they get to see the light of day again. Space is at a premium at the Museum and the Museum has plans to expand however despite purchasing an adjoining site, the council will not permit any building as it’s a “green belt”.
Well onto the bikes…what can I say… you can only really appreciate it when you’re there. My first task was to measure up another Zenith Gradua, this time a 1912 single. I had arranged access to it before my arrival and found it set up in an open area for me to climb over, measure and photograph. I even tried it out for size!.
While I was measuring the Zenith a white haired chap came into the hall I was in pushing a racing Velo. The bike looked magnificent but I was too involved in the task at hand and only when I took a break did I get the full story from the caretaker. This Velo was the last of the nine machines taken to be restored after the fire. The white haired chap had single handedly restored each one and apparently his parting shot to the caretaker is that he’s not doing any more as he has his own bikes to complete. Now you Velo lovers out there will berate me as the white haired chap was none other than Ivan Rhodes and I’m sure there many a member whom would have loved to meet him in person!.
Saturday 17th June
Today its auction time so off to Oxford. Bonhams hold several vintage and veteran auctions most often in conjunction with motoring events. This one was associated with the Banbury Run (more on this later). I’ve attended several auction by nothing at the scale of this. Essentially there were three types of lots, motorcycle parts and projects, complete and running machines and cars. I concentrated on the bikes and in the parts section one could bid for anything from frames/tanks/rev counters to wheels. A nice restored racing 1927 Triumph TT motor went for £750 while a running 1000cc JAP motor went for £1400. Some bidder went off with a set of Honda VFR400cc forks as he offered a cheeky bid of £5 went the auctioneer want an opening bid of £20! (Estimate £80-£120).
A 1915 BSA 4 ½ hp project (Estimate £400- £600) went all the way to £2400 and a 1915 Indian “Little Twin” went for £11 000!.
On to the complete machines. An immaculate Sammy Miller restoration of a 1904 Humber sold for £15 000, the ex-Murray Museum 1902 Kerry for £14 000, a 1925 New Imperial 250 cc Sport for £5800 and BSA Bantam’s at £400-500. A nice 1934 Velo KSS “Mk 1” went for £10 000, a 1949 Norton International for £11 500, the ex-Rudolf Runtsch Manx Norton for £25 000, a Vincent Grey Flash replica for £11 800 and a 1951 Vincent Rapide for £27 000 (the highest bike price at the auction). All in all a very interesting day…the take home message was your box/partly restored bike is not worth much but if its all together then its worth considerably more. Time to convert all those project to runners!!!.
Sunday 18th June
Father’s Day… what better way to spend it then at the 64th Banbury Run!!. Got to Gaydon early so I could spend as much time at the event. I had prearranged to meet a few people amongst them Bill Phelps (previous president of the VMC UK) whom was riding a 1908 Triumph like mine with a sidecar. The weather had been rainy over the last three weeks and the organiser’s had to curtail the autojumble...pity as I was hoping to scour the fields for bits. Anyway before the start at 10:00 (a very civilized time to start) I walk around the autojumble. Vin and Vet had a stand of bikes for sale, A brace of FN’s, a little single as well as a beautiful 1920 4 cylinder 750 cc for £33 000. Both the bikes are very similar to the two Brian Wallace has. There were all the usual rubber products, a stand specialising in girder forks as well as the general stalls. When one see’s this one realises how deprived we are here in SA.
Well the field had filled up by the time I’d finish looking at the autojumble. 600 bikes all built before 1931 were participating. The earliest was a 1896 Leon Bollee carrying the number one plate followed by a 1898 De Dion Tricycle. Bike makes varied from Calcott, Campion, Lincoln Elk, Kynoch, Ixion, Premier, Cedos, Wolf, Mongomery, Connaught, Henley, NUT, McEvoy, Radco-Ace, Frera, DOT, Clyno, Wilkinson, Victoria, Chater Lea, Omega, Terrot, Monet & Goyon and Edmund to pick out a few amongst the “run of the mill” bikes.
Bikes set off in batches of five at one minute intervals…what a sight. There are three routes, one of about 30 miles, and two of over 50 and 60 miles including the infamous Sunrising Hill. Fellow De Dion club member Nick Canfor finished on his De Dion Trike while Bill Phelps on the 1908 Triumph retired as the decompressor cable broke after 15 kms and without a decompressor you cannot ride these single speeders. After a day of looking at the bikes, chatting to riders I return to London thus ending a really special week. When I spoke to my wife that night I told her it could only get one better….if I could ride in the 2013 Banbury Run!!!. Who knows but it’s a dream worth pursuing!!!.
The DJ dates are now finalized 7 to 10 March 2013. The rally will be over 3 days and from Jo’burg to Durban as per the original 1913 race breaking with the traditional commemorative runs from Durban to Jo’burg over two days (See www.djrun.co.za ).
14 July 2012 (235 days to go)
Well the time has finally come to start the road tests on the old Triumph. The family had planned to go away to the KZN midlands for two days, as it’s the last week of the school holiday and a bit of a treat for the girls before they start school. The place had around 12 kms of paved tar roads that are almost completely car free. What better place to give her the first bit of open road since she was taken off the road in 1917 (95 years).
Got the family settled and got the bike off the trailer. Filled the tank with 2 litres of fuel, gave her a squirt of fuel into the cylinder and four pumps with the oil plunger.
Setting up the bike for her very first road run in 95 years!!!
Got into position on a slight down hill and tried a running start…Nothing!. Ok push her back up the hill try the same process and get the same result!!!. Ok check the points…at least they opening. Check the plug…bit difficult on your own so my mate holds and grounds the plug…Nothing. Take off the plug and test magneto spark using the spark plug lead….success!!. A spark is coming from the mag. Ok new spark plug required…check my spares tool box. Stupid me forgot to pack a spare plug!!. OK it 3pm on a Saturday afternoon, closest town is Howick (sleepy little retirement village at the best of times), in the car and off we go. The fifth garage we go to has plugs. I ask for a BP7ES. I’d had new valve cover nuts made and drilled to accept the larger 14mm sparkplug range. Purchased two just to be sure and head back home before the light goes. Set the bike up once more; get the plug out to discover it’s a BCP7ES. Same heat range, 14mm thread but smaller hex nut and a fixed connector point, not the “normal” threaded end with aluminum top. I wouldn’t repeat the words uttered but time to “make a plan”. Find some wire and wind it around the top of the plug and the end of the spark plug lead. Seems like a reasonable contact so I give the bike a go. Bike fires goes 15m then stops. Repeat the exercise and much the same the bike stops firing after about 10/12 stokes. I check the fuel supply…carb bowl is filling rather slowly…maybe the pipe in partially blocked. Check and its clear. Check the tap and the flow is poor. OK drain tank and remove tap. Blow it clean seems fine so put the tap back and fill fuel tank. Test the tap…fuel flowing fine…attach fuel line and put the tank filler cap back on the tank.
Ok we ready to run again. This time she chuffs along for about 50m and stops. Try again and the bike keeps cutting out and going shorter and short distances. I give up for the day but happy that I got to ride her at last.
15 July 2012 (234 days to go)
Next morning I run through the symptoms…fuel starvation is my diagnosis. But I’d checked the fuel tap/line and carb…everything worked fine. Take the tank filler cap off and check the breather…the only thing I didn’t do and it’s blocked!!. I now realize I checked the tap flow with the filler cap off!!!. Ok clean the breather. By this time I’d got the right BP7ES plugs. New plug, a dash of fuel in the cylinder and try again. Not even a single ignition of fuel. Put another plug in and the same result. Losing my sense of humour at this stage I park her for another day.
16 July 2012 (233 days to go)
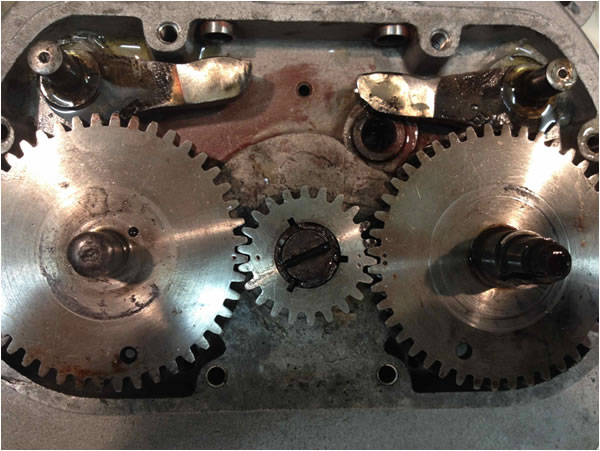
My mate Ken comes around and we have a fresh look at the problem of a lack of spark. The magneto is not turning. We strip the magneto chain cover to find the keyway on the engine drive side has moved and is no longer providing the vital engagement. We reset the keyway and she fires on the first attempt. We ran her for about 10 mins and we let her cool down. I repeated this routine over the next few weeks and was starting to get the knack of firing her up.
Over the period of this blog I have had a few people contact me and offer good advice. Here I repeat the advise sent to me by Lee Wright from Australia
“Those keyways are a bit of a problem with Triumphs Andrew. Earlier this year my son and l rode our 1911 and 1912 Triumphs from Perth to Sydney as part of the commemoration of the 100th anniversary of the first crossing of Australia by vehicle. Most of the many problems we had were in the magneto platform area and the magneto drive sprocket. Seeing that you are going on a big ride next year l think it's worthwhile taking the following with you--- A spare platform rod (they break), spare magneto bolts (those underneath ones that fall out and you don't notice), fuel line rubber hose and Loctite (on everything). Good luck to you Andrew-- it's exciting going on a long trip on those bikes.”
12 August 2012 (192 days to go)
I find that I have to prime the cylinder with fuel ever time I want to start her. I’m not sure that is what everybody else does but she does not want to even fire unless I pre-prime the cylinder. I’d appreciate comments from those of you wiser in these matters.
The bike is now a pleasure to start and I can pretty much get her fired up by following a routine of:
-prime cylinder
-set air level closed and throttle about a quarter open
-set slightly off fully advanced
-hold in decompressor and pedal three revolutions and release decompressor
away she goes chuffing away.
13 August 2012 (191 days to go)
The South Africa rally scene has 4 rallies and some of these events have a pre event Veteran run over a relatively short distance so that the early machines can get an airing. As part of my preparation for the JD, as it will be called for 2013, I decide that this Veteran run will be a good run to do. I send my entry off the “The Fairest Cape rally”. I’ll ride the Triumph in the Veteran run and the main rally will be done on my 1955 Sunbeam S8 that stood me in good in our Natal rally.
15 September 2012 (173 days to go)
JD entries come out. http://www.djrun.co.za
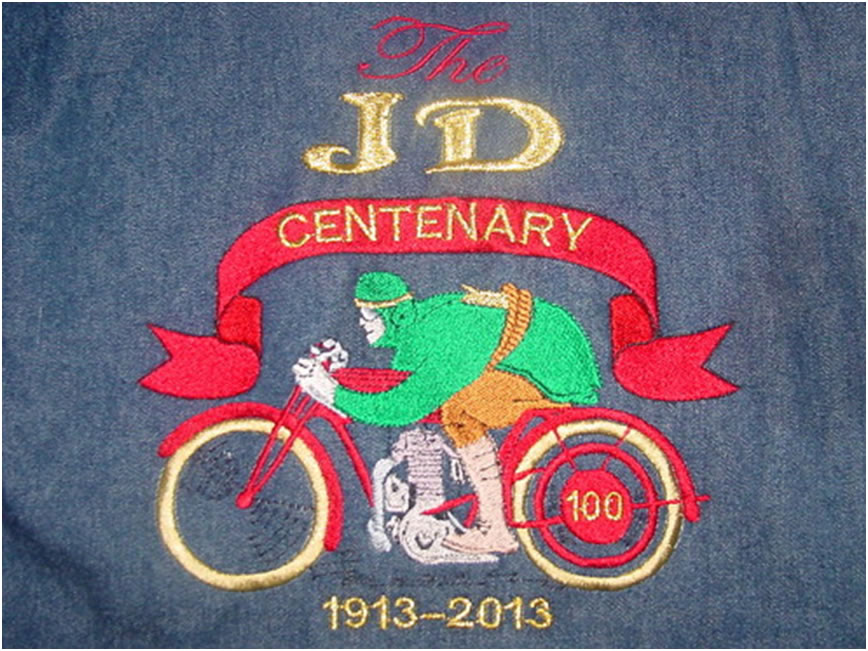
The logo to go on the commemorative shirts
I waste no time getting mine off to the organisers and request the No. 1 plate. The format has changed from previous years and this centenary event will be in the format of the first 1913 race. Three days starting in Johannesburg and ending in Durban.
Day One Johannesburg to Newcastle
Day Two Newcastle to Nottingham Road
Day Three Nottingham Road to Hillcrest
The distance has also increased to ±700 kms. The last 30 kms into Durban will be a mass ride to commemorate the event.
29 October 2012 ( 129 days to go)
I get notified that my entry has been accepted and also advised that I have been allocated the requested No. 1 plate. Well as I said at the start of the blog my aim was to enter the oldest motorbike and it looks like I succeeded as the No. 1 plate is normally given to the oldest bike.
Source: www.djrun.co.za (modified from the original)
3 November 2012 (124 days to go)
Having been travelling again I get the chance to spend the morning in my garage. I’ve sourced the last remaining bits for the rear brake. A big thank you to Mike Lawson (UK) for sending me a brake hanger and to the VMC brake block scheme for a new rubber insert. Now have something that resembles a decent brake (well at least as decent as you can get for a +100 year old machine.
4 November 2012 (123 days to go)
Spent the day going through the bike in preparation for its run at the Fairest cape Rally on the 11th Nov . She will be doing the flatter 31 km course. I’m driving down with my mate Ken to Cape Town (±1700 kms over two days) for us to participate. The bike will have travel 3500 kms on the trailer and cover a maximum of 62 kms if both Ken and I managed to complete a lap each!!!.
10 November 2012 (117 days to go)
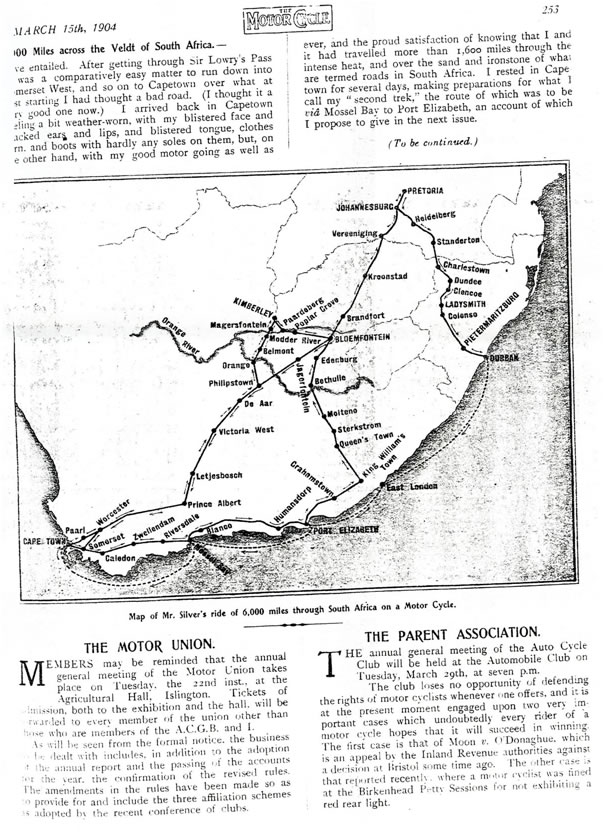
We (Ken Sink and myself) had set off from Durban for the Fairest Cape Rally the day before at 05:30am and drove though the day till 8:30pm and slept over at Beaufort West. The whole journey is 1776 kms and we decided to push it the first day to give us flexibility the following day where we decide to give the Triumph a run in the flat arid Karoo. We find a quiet road off the main freeway, a local road to a town named Prince Albert. As an aside the very town that Tom Silver drove through on his epic 6000kms ride around South Africa
(see http://www.go-faster.com/quadrantmotorcycle1903TomSilver.html).
We off load the Triumph in the early morning heat, it’s only 10am and the temperature is already 28 deg C. We check her over and nothing has been lost on route. We start her up as usual on the stand and she’s a little hesitant at first and then gets going. We primer and push her off and she fires but dies. We try this repeatedly for an hour trying different settings etc but still no luck. We call it a day when the temperature got to 34 dec C.
We still had 400kms to our destination so we decide to go to Ben van den Berg’s place in Cape Town to use his workshop to look at several things. Ben’s an old friend of Ken.
First up was the carb. We suspected fuel starvation and we were not disappointed. 1300kms of rattling along on the trailer had moved all manner of crud into the fuel line and into the carb bowl staving the fuel to the motor. Cleaned out and refitted carb. Lapped in the float needle at the same time as we were getting a little over flow from the carb. We had to put out two fires around the carb as the backfire lit the excess fuel around the carb float. Not something one wants on the road with a full tank of fuel between your legs!!!. Belt is shortened to suit a reduced pulley ratio. I had decided to gear it down as low as possible to allow for the slowest running speed.
11 November 2012 (116 days to go) – 5 kms
Awake at 4:30am…must be the excitement as I’m normally still in bed at 6:30. Leave Cape Town and drive out to Worcester and on to Goudini Spa were we will stay for three nights. We arrive and get the Triumph off loaded. The car park isn’t too busy. There were two old cars already there for the Veteran Run a 1901 Benz and a 1902 Wolsey.
The 1902 Wolsey in action.
But onto the bikes
Five bikes comprising:-
1913 Douglas 350cc belonging to Brian Wallace
1910 New Hudson belonging to Brian Wallace
1914 New Hudson 211cc two stroke belonging to Mark Shaw
1910 Bradbury 500 cc belonging to Mark Shaw
And my 1908 Triumph 467cc
I get the Triumph ready, prime her and off we go. I now negotiate the T junction, bearing in mind that this is the first real ride I have had on her on a public road with traffic. Negotiate the T junction and approach a long gentle gradient. I’m all thumbs with the levers and the bike starts to slowly reduce speed…I start pedaling…she picks up and then start slowing again. I do this several times in succession. Final she stops. I look down to see that in the excitement I forgot to close the priming tap. No wonder I was losing speed. Turn the bike around and face down the slope…prime her again and off we go. She goes for about another half a kilometer before stopping. I keep repeating this until she only firing on the primer charge. That’s means a blocked fuel supply. Strip down pipe, float and jet to find dirt. We drain the tank and inspect the offending petrol. Not much crud. We reassemble and try again. She doesn’t disappoint and soon is running along at over 60 kms per hour (I’d fitted a bicycle computer to track the vitals, distance speed, etc). She stops again after about a kilometer. The same set of symptoms persist. We give it one more clean and off she goes again and stops again. This time the primer charge is not igniting and to top it all, the belt now starts slipping. I push her about 500m home and call it a day.
Brian Wallace and Mark Shaw very kindly loan out their veterans to anybody whom would like to try one out. The bikes get sent out on a 31 kms lap and buzz/putter along over the rest of the afternoon being heard and enjoyed by many riders.
My good friend Brian Wallace wanted to take his 1910 New Hudson back to his aircraft hanger and so Ken and I keep Brian company on the trip. We take a potter around his hanger and see his latest project, a very unique 1909 Humber that came out with a ROC gearbox, which unfortunately is missing from this bike. If anybody has a ROC gearbox suitable for this bike please let me know.
12 November 2012 (115 days to go)- 6,3 kms
We check her out after riding our classics bikes over 325 kms over the most magnificent scenery comprising olive and fruit estates around the towns of Robertson, Ceres and Montague. The point’s gap had moved and it appears the little lock nut is not doing its job. We adjust that as well as retime her as we suspect she was running to far advance. The other major problem was the tappet adjusters had come loose. The exhaust tappet clearance must have opened up to 10mm!!!. We make the necessary adjustments and head down to the flat, tarred farm road to run her. She covers 6,3 kms before the belt has stretched a little more and is now starting to slip. It’s now getting dark so we pack in for the night.
15 November 2012 (112 days to go) - 0,3 kms
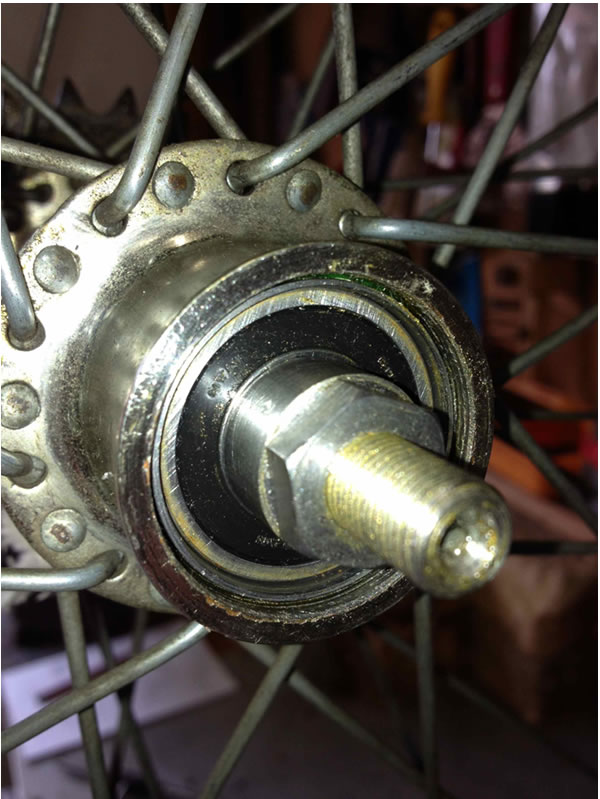
We decide to go to Brian Wallace’s hanger to run her around the airfield. She fires up and goes around the hangers, about 0,3 kms, and she pulls up. Initially I thought that she had nipped up but on closer inspection the back wheel had tightened up. The outer bearing cup lock ring had loosened and was now fouling the frame. We pull the belt and chain off and drop the wheel. The inner threads appear to be damaged and as a result the bearing cup adjusted is not seating properly. The trip was not completely wasted as Brian gave me an incomplete 1914 JAP v twin motor missing barrels, cams and rockers for my 1912 Zenith Gradua. There nothing we can do at this point so we reassemble the bike, load her and drive the 1776 kms back to Durban.
17 November 2012 (111 days to go)
We get home at about 5 pm having drive solidly for two days. I take out the rear wheel again. Getting the hang of this as I can do it single handed now. Useful in the case of a puncture…ok lets not tempt fate!!. Ken takes the wheel away with him. Ken has a friend whom is going to make up a tap to clean the damaged threads in the rear hub. This we figured is the best way to sort the bearing issue out WITHOUT having to strip the rear wheel and take the hub out.
18 November 2012 (109 days to go)
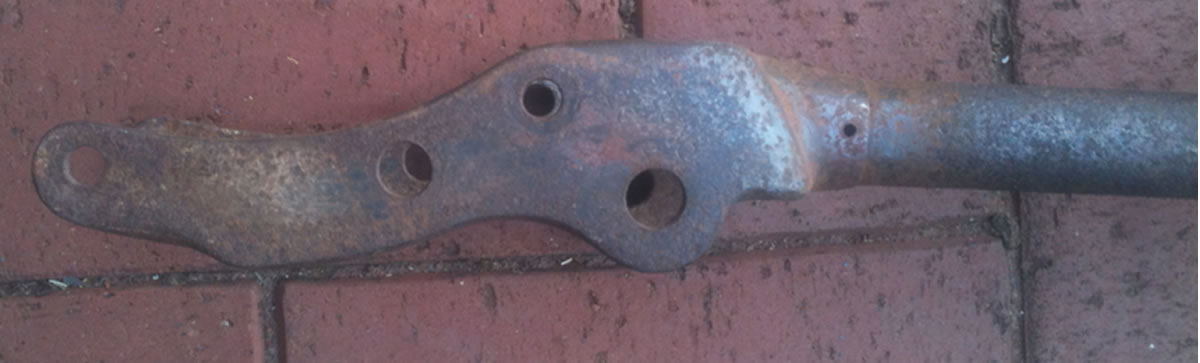
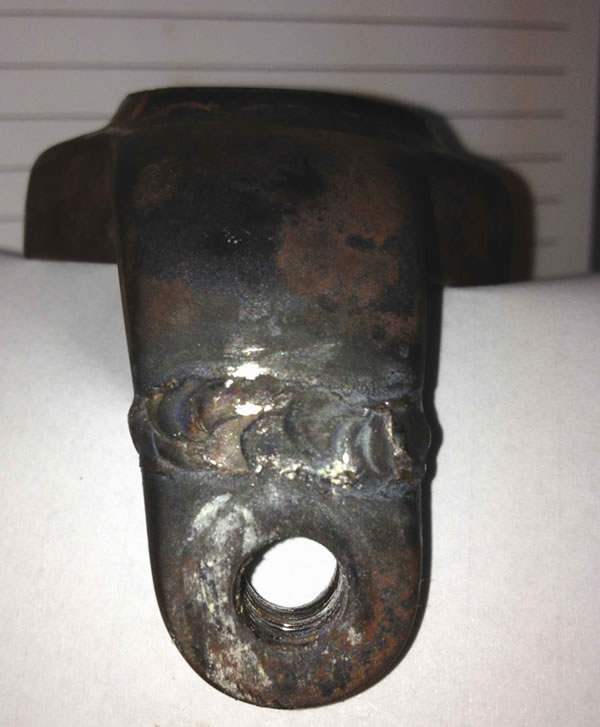
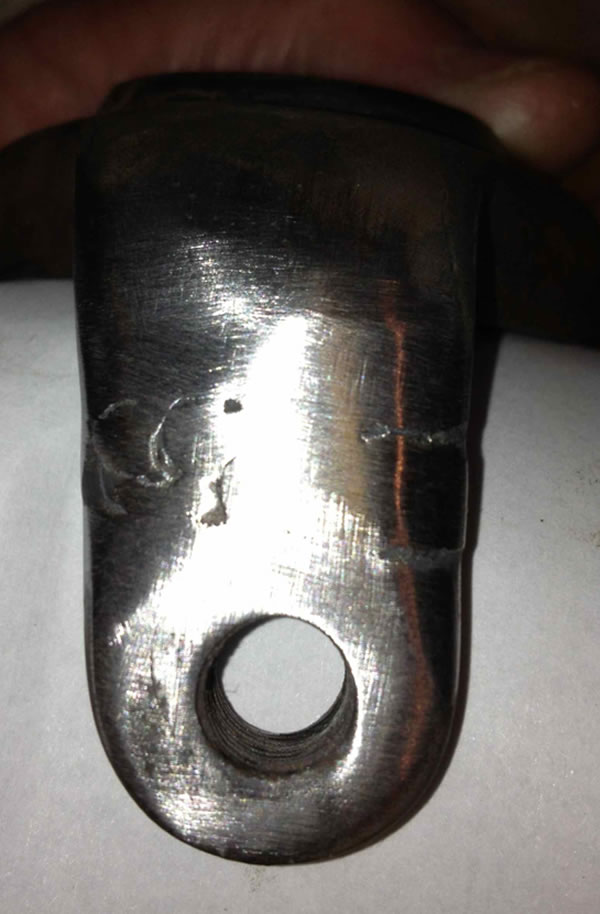
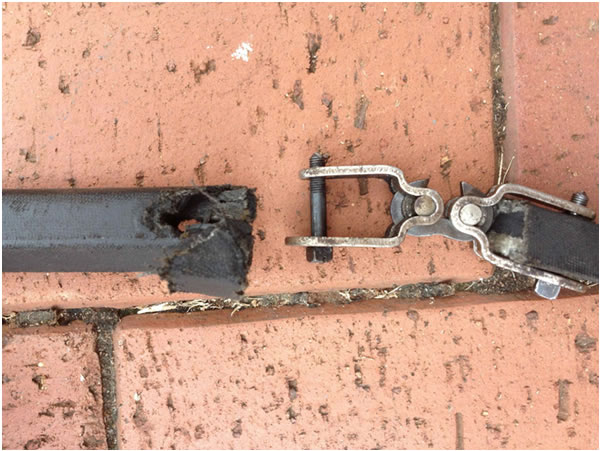
I strip the front forks so that I can get the crack that has been worrying me for some time. As I undo one side the fork spring holder breaks in two.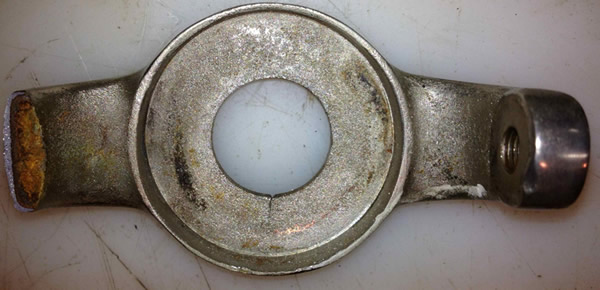
Ok that was a close shave. Just look at how little of the metal was holding it together. Those eagle eyed readers will have spotted the leather belt in place during my ride in the Cape. While advised not to worry about this I very relieved that I had it on because had it failed during riding…I got up to 65 km/h…I’d have been in serious trouble.
19 November 2012 (108 days to go)
I take the spring holder into the electroplaters to strip, which they do in a few hours at no charge and I’m set to take it for welding the next day. I dig out the petrol tank primer tap, the one with a length of copper tubing to fill the cylinder primer tap. The tap was leaking and so I had it off. I lap in the taper and sweat off the old copper tube and replace it with one of the correct length. I’m still searching for a cylinder primer tap. I put out a few feelers and Paul G lets me know there one for sale on ebay.
20 November 2012 (107 days to go)
I take the spring holder into a specialist welder –Clive G. I’ve only had good reports and so I explain what I need doing. Clive’s a bit hesitant when he hears how old it is but says he have a go and finish it today.
Around 6 pm I get some bad news, an old motorcycling friend had just passed away with cancer after a brave battle. Many of us attended his 80th birthday lunch just 2 months ago. Michael Milner-Smyth was a true gentleman, never one to complain and always there to help another motorcyclist out. He was the Chairman and Editor of the Vintage Motor Cycle Club (VMCC) of South Africa and has been the public face of the club for a very long time. Mike, we will miss you but hope you watch over us riding, from above.
21 November 2012 (106 days to go)
I collect the welded spring holder. It looks like a good repair.
A little bit of fettling and its looks a bit more presentable. I don’t want to sand too far back and so leave it still looking like it’s been repaired. The electroplaters will also do a bit of polishing but I think it will do the job.
Ken calls to say the tap is made for the rear wheel and that he will get it to me asap.
27 November 2012 (100 days to go)
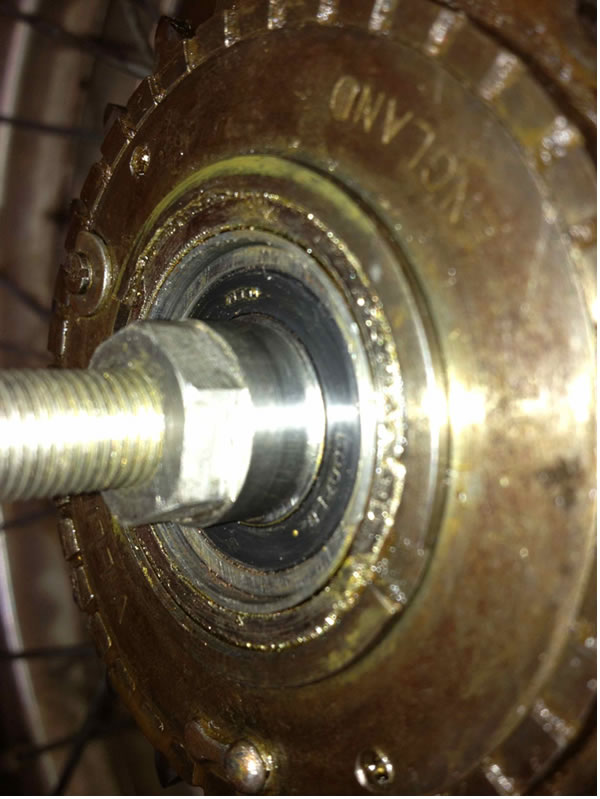
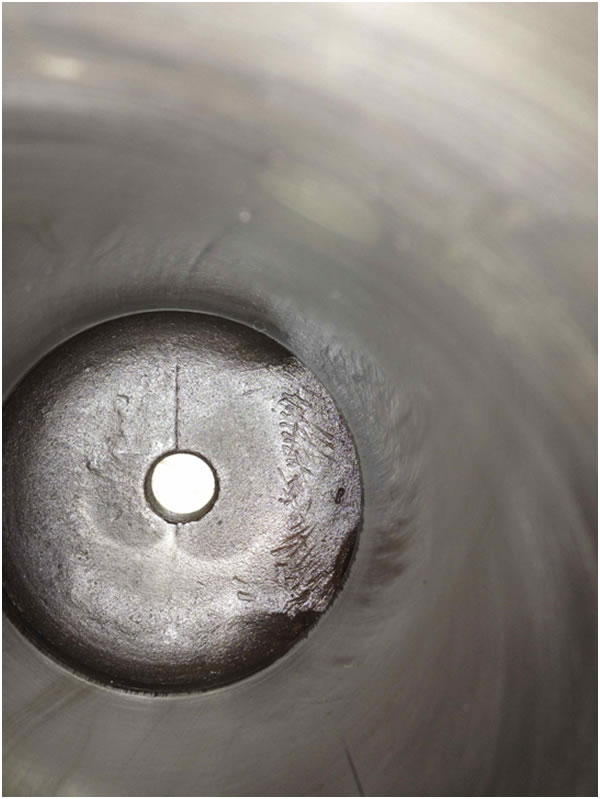
A red letter day… 100 days to go. Got the wheel back with the tap. The first 4 or 5 lead in hub threads are damaged. It looks like this was old damage as the electroplating covered the damaged threads. I try and cut a new lead in so that the outer threaded bearing cup can pick up on the internal threads. No luck!!. I set the wheel aside to consider the options.
Option 1: Get a new complete remanufactured hub from Veteran Triumph,
Option 2: Get the outer portion of the hub and reuse all the internals
Option 3: Remake an outer myself and reuse all the internals
Option 4: Bore the damaged threads out and put in an insert
Option 5: Press in an insert on the damaged side and remake the bearing cup to suit
Option 6: Make up a bearing cartridge with modern bearings and new axle. Make to sliding fit and loctite this in place within the old hub. Use oil lubrication hole as a locater and use screw to close up. Modern bearings come with plastic grease holders and so do not need to be lubricated, as would a cup and cone ball bearing.
28 November 2012 (99 days to go)
One of the things I need to do is to source a new magneto sprocket. I’d borrowed the self-extracting magneto sprocket off my 1914 Triumph. These sprockets are a pleasure to use, no bashing trying to break the taper. Simply unscrew the nut and the nut pulls the sprocket off the taper…neat job!!. Triumph patented the design. Anyway I decided to have a go at making one so below is my first attempt. It still needs the centre nut and the taper cut to suit the early Bosch magneto’s. I might consider making these to order as I saw one sold recently on ebay for over US$180.
5 December 2012 (92 days to go)
After a few days out of town I get back and collect the nickeled fork spring holder. Reassemble forks and they go together fine. The lower headstock bearing seems loose, will have to check this out too.
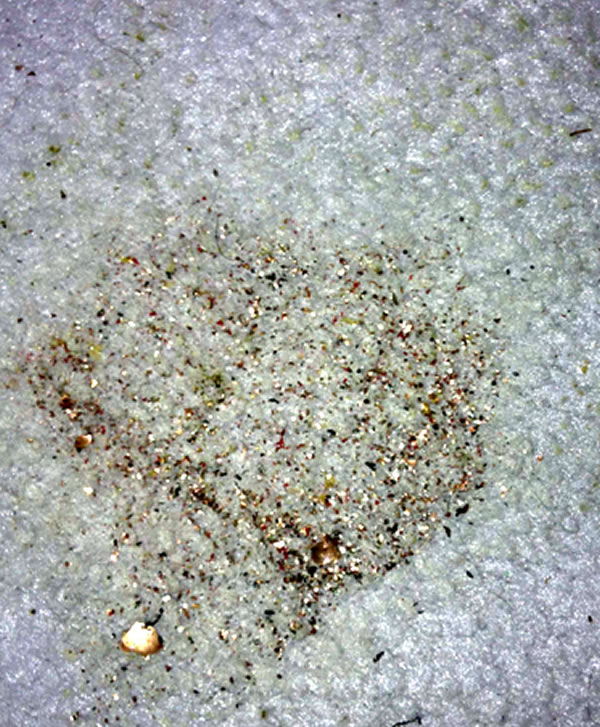
After the experience with the back wheel bearings I had decided to inspect the front wheel bearings too. I open up the bearings and the grease around the bearings has a distinct silver sparkle. I wash out the bearing with petrol and examine the bearing faces. All look fine but a bit dull. On closer examination it is evident that somebody had nickeled the bearing faces as they forgot to tape them off when they went to the electroplaters. The flakely nickel had mixed with the grease, below is the strained off residue when the washing petrol was filter off.
11 December 2012 (86 days to go)
I’ve been using a compression/primer tap that is non-original and located over the exhaust valve. I had previously bought a petrol tap designed with a rotating fuel pipe to enable fuel to be dripped directly into the primer tap. I had sorted this out by lapping in the tap taper and making up a slightly longer delivery pipe. The reason I did not locate the non-standard compression tap was because it did not clear the tank tube. I decided after watching eBay for some weeks that I might as well machine one up and so below is my efforts.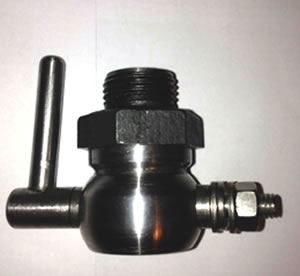
Thanks to Paul G. I had some decent rubber to use to re-shoe my front brakes. A little cutting and filing and I had quite respectable brake shoes.
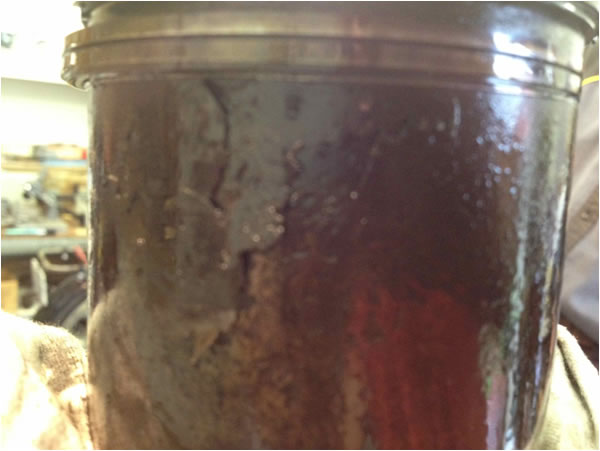
Dave gives me a call and pops around with the repaired tank. After cleaning and making sure the inner surface of the fuel compartment was sound and clean, he relined it with a two part epoxy and assures me it’s now no longer an issue. It a lovely job and I’m so impressed that I show him a really rusty tank and he thinks he will be able to even make this leak proof!!.
While Dave was round we relook at the problem rear hub. The near side bearing cup adjuster is not picking up the threads as the first 5 or 6 threads are damaged. We relook at the situation and after a bit of fiddling cleaning and careful assembly we managed to pick up the thread and after working the bearing holder back and forth with some copper slip we manage to get about one revolution of pick up. Dave suggests that he take it home and work on it and see what he can do to get it to run in at least 4 to 5 revolutions. If all else fails it’s probably the bearing carriage option I mentioned before.
I had been working on the self-extracting magneto sprockets over the last week and completed the first one of a small batch.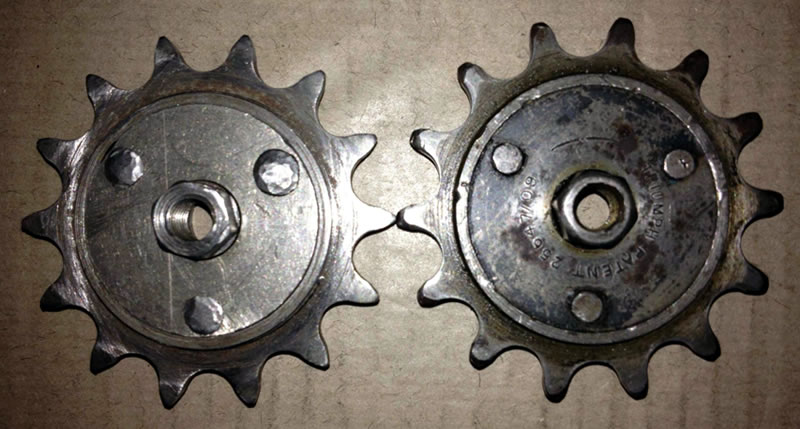
22 December 2012 (75 days to go)
Dave returns the rear wheel. The hub is so hard that it’s impossible to correct the damaged threads and even so there’s no guarantee that the cups will not seize in the hubs. I decide to go ahead and machine a bearing cartridge to insert into the centre of the hub. I source some 32mm OD, 15mm ID by 9mm wide bearings (~GBP3 each). The first problem I encounter is that the centre inner portion of the hub is narrower than the outside where the hub has been threaded. A single bearing cartridge will not go in. So…I make the two ends which will carry the bearings, a new axle with a shoulder on to shop the bearings from working inwards. The bearing holders are made to the size of the threaded portion and will then come up against the slightly narrower section which will lock the bearing carriers in position. Before I do the final assembly I use high strength loctite (the green bearing and shaft retainer loctite) and with the aid of the new axle I draw the two bearing cartridges inwards until the bearings are stopped by the step in the axle. I check that the axle is aligned by rotating the axle and making sure that the bearings rotate freely before the loctite sets. I then make up two threaded spaces which will serve to space the axle correctly as well as provide a stop in case the bearing wants to move out the hub.
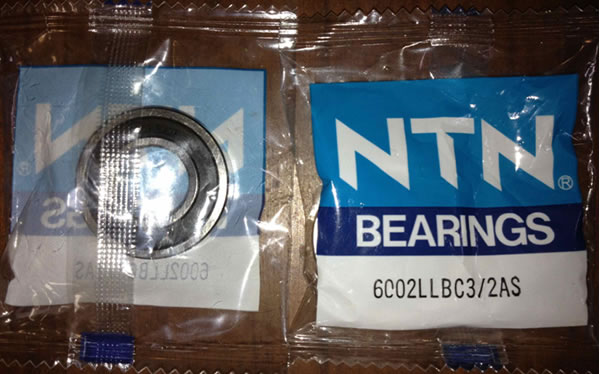
These are the bearings that I used and which Ian Jenning’s of Veteran Triumph uses for his replica hubs.
28 December 2012 (69 days to go)
I, with Dave’s help, get the tank back into the frame. Only job left now is to make up the rear wheel axle nuts and swing the rear wheel into position.
2 January 2013 (64 days to go)
New Year already…still so much to do as well as get her running and clock up some miles!!!.
3 January 2013 (63 days to go)
Make up the wheel nuts and the wheel is finally ready to put back into the frame.
4 January 2013 (62 days to go)
I visit my mate Ken sink down the coast and look at how he’s getting on with the 1914 3 speeder that we co-own. Everything’s looking good. Just the planetary gears on the rear hub to have remade. I show him the hub clutch I got from Brian W. and he gives me a good condition 40 hole BE rim to go with it. The clutch hub will either go into either of my two project bikes, a 1910 Type A (Free Engine Roadster) or 1912 Type E (Free Engine TT Roadster).
5 January 2013 (61 days to go)
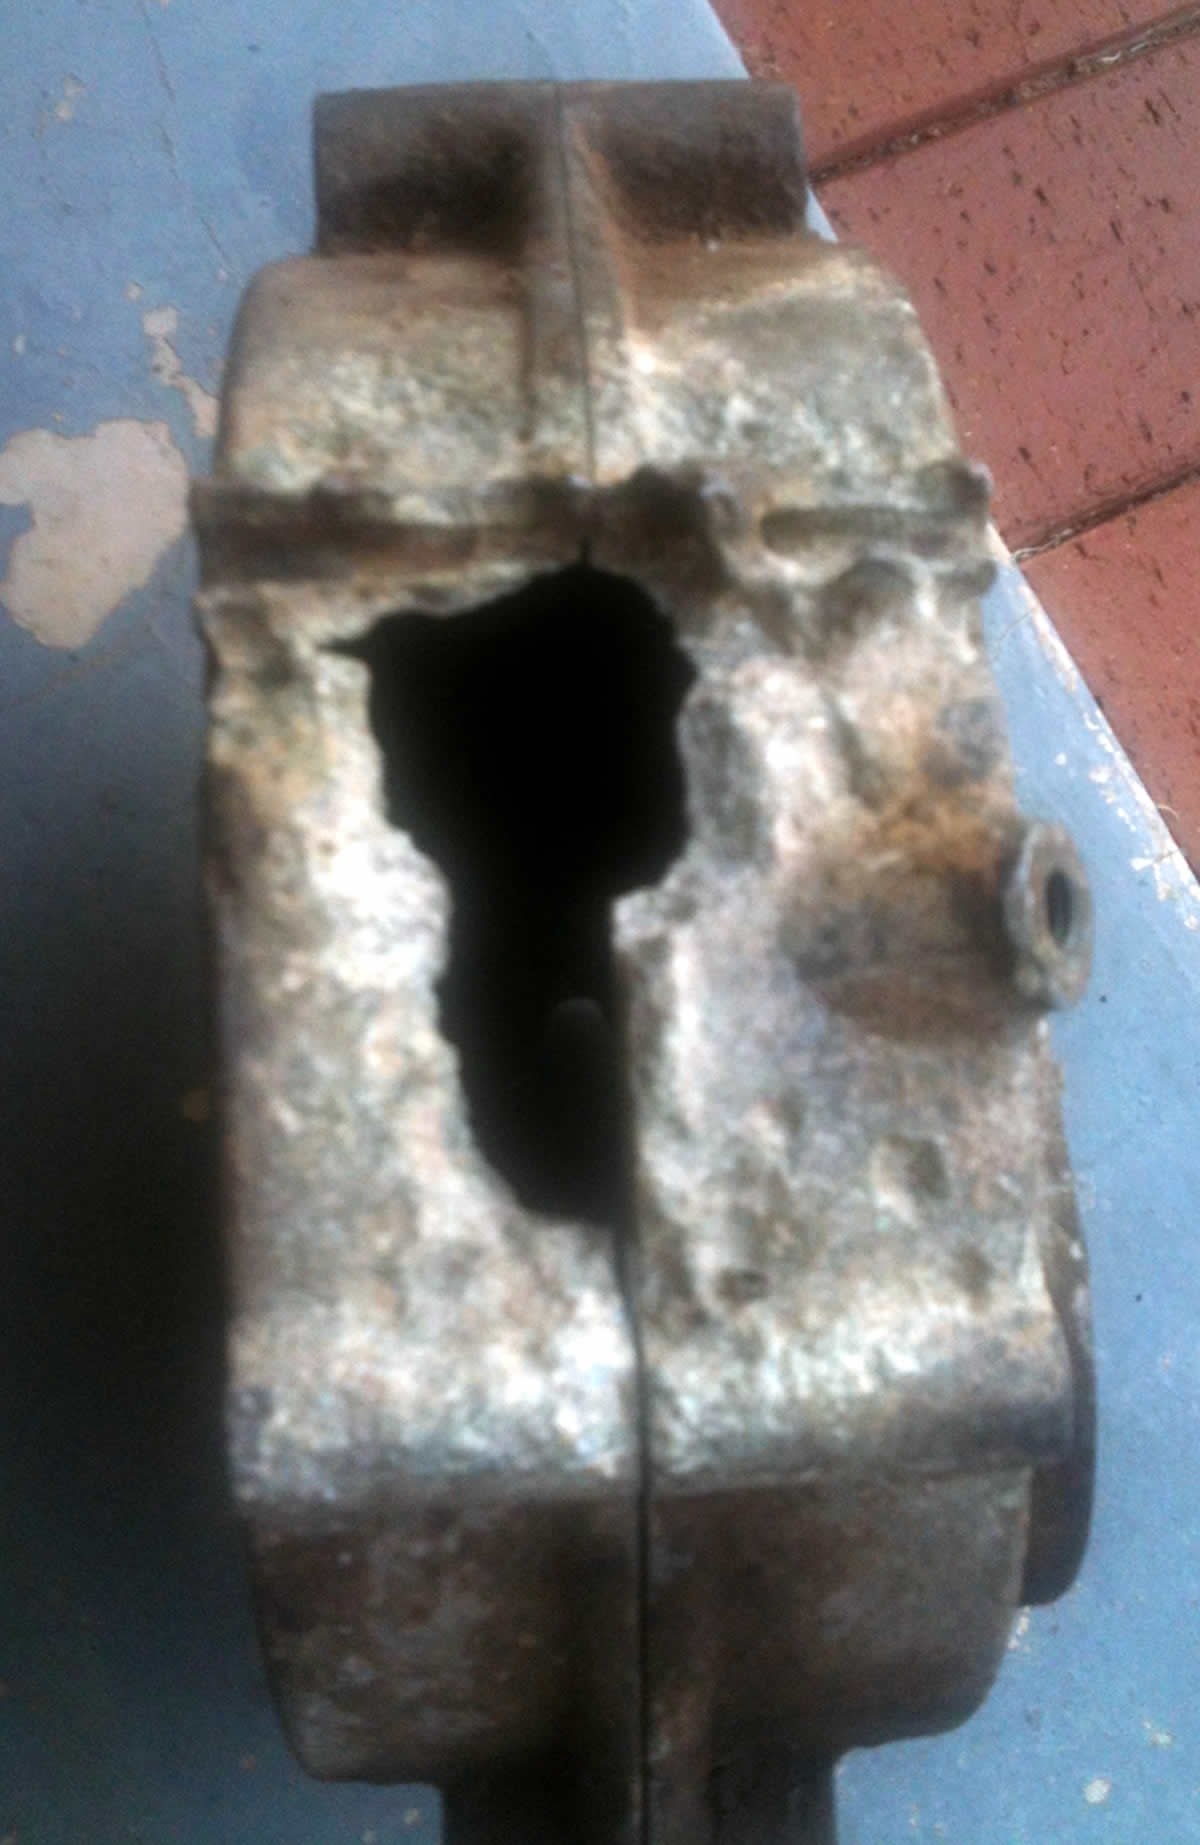
A small rust spot on the saddle tube has had me worried for some time and I notice it’s getting worst. I take off the saddle to look at it and it definitely looks like the corrosion has got in. I test it by applying some light torsional stress. I notice the crack opens and closes. I try it again and bingo… she breaks into two. Ok yet another job to do. Lucky this did not happen while riding or worst still on the JD. The centre of the tube is solid with rusted metal. I measure the thickness part of the tubes and they are not thicker than 1 mm. I presume they would have been 49 thou (1.245 mm) originally.
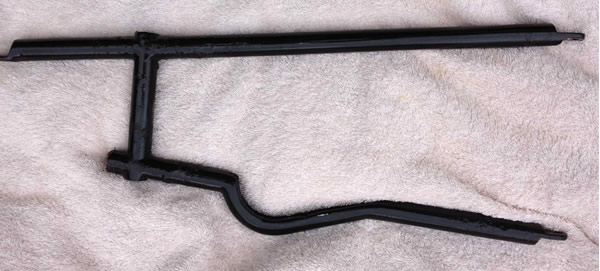
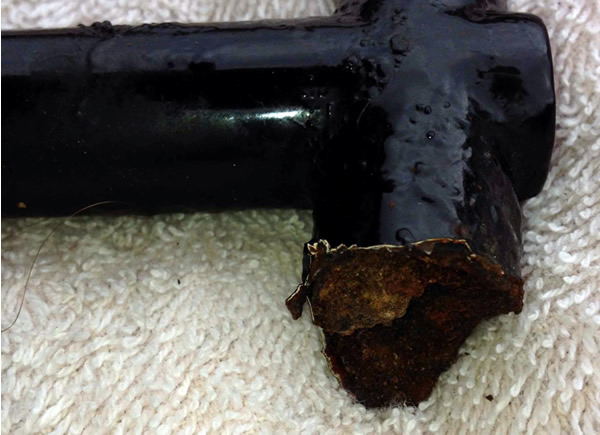
I weld up a jig to remake the saddle stay…still to finish off before I fly out to Korea for a week.
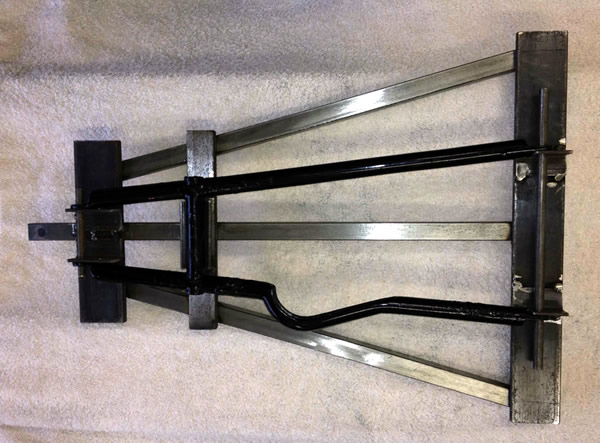
I measure up the lugs and belt rim offset casting and send off the drawings to a fellow club member whom I hope will laser cut the lugs before I get back from overseas. I chat to Dave Stone about getting some ¾” aircraft grade 4130 seamless tubing for the rebuild. That too is now on urgent order for next week.
Eventually I place an order and pay for it as I’m standing in the queue to board the plane.
14 January 2013 (52 days to go)
Return from Korea to find the tubing has arrived but that the laser cutter people only return to work today!!!. We ask them to put the order through first.
19 January 2013 (47 days to go)
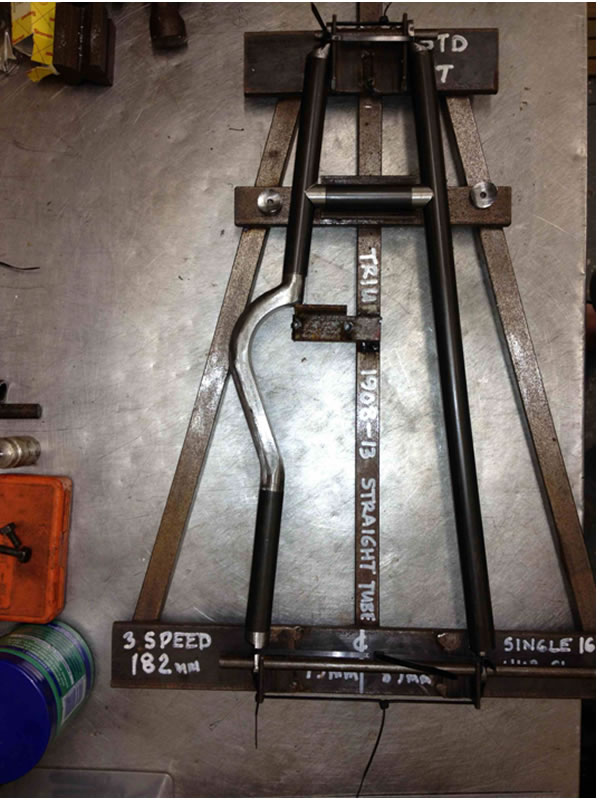
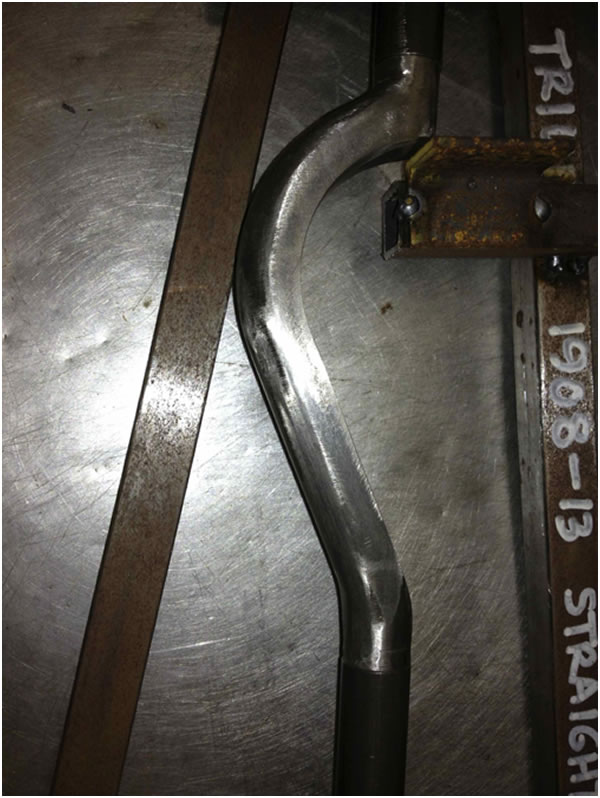
The laser cutting’s ready and when I receive it the lugs at each end of the saddle stay are cut under size. The swan neck is at least workable…it’s the most difficult to make so fortunately it worked out that way round. Plan B get some EN8 20 mm square bar and 20 mm round bar for the lugs. Spend the evening shaping the square laser cut swan neck into something at least more presentable. Set it up in the lathe and turn the two ends so they will fit snugly in the tube.
20 January 2013 (46 days to go)
Some serious hours now needed. Get into my workshop at 7:15 am machine up the four ends and make up the cross tube with the solid inserts so that these may be drilled and tapped after silver soldering so the back carrier can attach to it. Before I realise what time it is I see its 4 pm. Go in for lunch!!!. Back out and set up the jig with all the bits ready for the next step. Look for my silver solder and there is not enough for the job. Decide to call it a day after 11 hours in the workshop.

22 January 2013 (44 days to go)
I get out the hardware store and buy some silver solder…I haven’t bought for a while and was surprised at the price. R50 for a 1,5 mm dia rod…didn’t have much option.
Silver solder the frame up everything works out fine.
Looks really messy but get my Dremel out and clean up the job in no time. I give it a good clean with acetone and then spray red PA10 etch primer and leave her overnight to dry.

23 January 2013 (43 days to go)
Ready to give the frame a coat of MS primer. Spray the frame and leave it to harden. Decide to check it about an hour later as I thought I might be able to get a black topcoat on. The 2K MS primer has not set. I think it too old and with a workshop that averages 28 deg in summer the unused paint doesn’t last long. I get a toothbrush and wash/scrub it off with 2K thinners. In the process some of the PA10 comes off so I end up respraying the etch primer on again. Call it quits for another day.
24 January 2013 (42 days to go)
Head up to my local paint shop and get some new MS primer as well as finishing black paint for the top coat. I’m not chancing it with the old finishing black in my cupboard. Get the MS primer on...it set’s fine. Give it a light rub down and then put two coats on the frame. I take advantage of the extra paint and give my 1936 250cc Excelsior Manxman roadster rear number plate a coat of paint.
25 January 2013 (41 days to go)
I leave the frame and number plate out in the sun for the day to dry the paint. See below for the old and new saddle stays.
A close up of the lugs...new on the left. Camera angle makes them looks slightly different.
26 January 2013 (40 days to go)
I reassemble the back end put in the wheel and replace everything. My mate Dave Stone comes over and we fire her up. Everything seems fine. All set to run her on the road tomorrow.
27 January 2013 (39 days to go) -11,6 kms
I decide to start off slowly as she’s only done 6,6 kms since the rebuild. I’ve two potential circuits around my neighbourhood. Around the block which is 700m and around three blocks which is 2,7 kms. I decide to do a single 700m lap and then let her cool down. Find the belts slipping. Sort the belt… do two laps of 700m and park her off. Once she’s cool I do the 2,7 kms lap. Need a bit of light pedal assistance on some of the hills. Let her cool down again. I then do another 2 laps of 700m. All well. Let her cool down. I decide to do the longer lap again…she running sweetly so I decide to do another 2,7 km lap. Well she started labouring almost at the end so pulled in the decompressor and stopped. Pushed her home about 500 m. Let her cool down and she’s locked up. A squirt of paraffin/oil/petrol mix goes into the cylinder and with a large shifting spanner I get her to turn over. NOTE TO SELF…GIVE HER TIME TO LOOSEN UP!!!.
TOTAL DISTANCE COVERED TO DATE 18,2 KMS
28 January 2013 (38 days to go)
Get home from work early to give her a run. Sort out the belt tension again. Put her up on the stand and give her a pedal. She’s very tight and there’s a distinct clunking noise coming out the engine. OK there’s now NO way I’m going to run her with a sound like that. I make the decision to strip her down. With Dave Stone’s help we have her apart in 1 ½ hours. Here’s what we found. Big end gone and small end also had movement. The small end movement was caused by the gudgeon pin working its way into the piston where the gudgeon pin sits. The piston wore as opposed to the phosphor bronze bushing in the small end. When the motor was worked on my local engineering shop they put in new big and small end, rebored the barrel, made a new gudgeon pin and gudgeon pin caps. The gudgeon pin caps (designed to stop the harden steel rubbing against the barrel wall) were made by them from some heat resistant plastic. I queried this at the time but they assured me they were fine. That plastic had smeared up the piston into the rings. In the picture you can see the plastic plug covering the end of the gudgeon pin but also smeared up the piston. This locked up the piston in the barrel causing the conrod to fight itself and wore out the piston and big end.
I’m going in first thing tomorrow to chat to them and hopefully they agree to sort it out asap. Right now I’m pouring myself a Gin and Tonic or two...three... four!!!. 96 years off the road, then back on the road and now 18 kms later she’s off the road again…life’s not fair!!!
29 January 2013 (37 days to go)
Crank, con-rod, piston and barrel dropped off at Eagleharm Engineering for their tender care. Cross fingers that they’ll get it back to me asap. Spend the evening cleaning up the crankcases and checking roller bearings, etc. Notice that the drive side felt washer is not in place. Wonder if it got forgotten in the original rebuild… the timing side one is present???. This might have also played a part in the seizure. Remake drive side seal and install.
30 January 2013 (36 days to go)
Paul G. sends me the specs from Ian J. for the big end rebuild The bronze must be PB 1, the pin should be hardened to a depth of 70 thou and then ground to be a good fit through the flywheel. The running clearance should be 2 thou and the end float 20 thou but as long as the rod clears the flywheels more is ok. If the old pin is to be used clean up as best they can and make the running clearance 6 thou. The big end must be run in for at least 500 miles, with oil changes and keep plenty of oil in the engine. Use a straight 50 grade oil. Engineering shop busy with the work so all fingers crossed for an early return.
2 February 2013 (33 days to go)
Today is our Club day and the DJ bikes can be scrutineered in accordance with the FIM requirements for the DJ.
6 February 2013 (29 days to go)
Get the bits back from the machine shop. Everything seems fine. Dave pop round and we go though the bits carefully. First observation is that the gudgeon pin is now a drop through fit in the small end. We got rid of the buttons and replaced the Teflon with a soft aluminum drilled through on both sides to allow the air exchange and prevent the buttons being pushed hard against the cylinder wall. Radius these to a slightly smaller diameter than the cylinder and allowed 1 mm clearance either side of the buttons and cylinder walls.

We check out the old rings in the cleaned up bore…. 42 thou ring gap…a bit too much. We dig out some new rings and after a bit of careful filing the ring gaps are set at 10-12 thou (RADCO advises 3 thou per inch of bore). Not quite sure why the previous piston ring end gap’s had opened up. Perhaps it was from the rings being forced open by the plastic contamination or perhaps too much honing on the barrel as virtually all the score marks are gone.
The clearance between the cast iron piston and the honed bore is now 12 thou. I bit more than I would have liked but this is probably adequate for now. Figure better to be slightly larger than run the risk of piston seizure. Incidentally RADCO gives a figure of 1 thou clearance per inch of bore for the piston cylinder clearance for cast iron pistons. We assemble the bottom end with black Loctite gasket maker No 2. I’ve only ever used red hermetite but now I’ve run out and cannot get any in my part of the world. The black gasket maker smells like hermetite and at least seems to perform like it. Let the wet gasket maker in the assembled bottom end dry overnight. Read that Red Hermetite has been replaced by Hylotyte Red….I look out for some for my next rebuild….hopefully on another Triumph and not this one again!!. We pack it in for the night as we have two more evenings to reassemble before “she takes her maiden flight” as Paul G put it. I would have added the word “again!!”.
7 February 2013 (28 days to go)
I get into the workshop the minute I get back from work. The timing case needs to be sorted. I make a new gasket and use some grey gasket maker with the gasket and reassemble the cams.
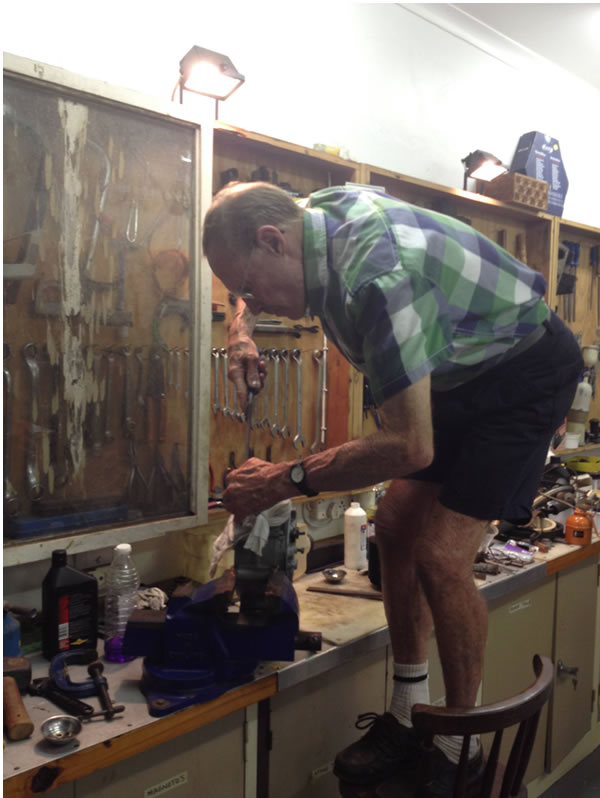
I assemble the timing case and check that everything’s turning ok. Motors tight and will not turn. Strip the timing side, clean everything up and and rethink the approach. The motor ran fine with the previous slightly thicker gasket. I dig this out clean it up. Reclean all the faces and recoat the gasket…this time with black Loctite gasket maker No 2 and reassemble. This time the motor turns as it should. The second job is to get the piston into the barrel. Dave’s joined me now so we oil and pack the rings into the piston. As the set of last set of rings were 3 mm thick with a ring shim of 0,7 mm making up 6,7 mm we had to use 3 X 2 mm rings plus ring shim to make up the new set. We space the ring gaps at 120 deg so the ring set will be pretty airtight with probably very little blow by. We compress the rings and insert the piston into the barrel. Two attempts needed and she slips in fine. Next we try to locate the gudgeon pin through the small end. The conrod won’t locate into the piston. We measure the gudgeon pin bush and its 0,7 mm longer than the gap in the piston. Mutter, mutter we very surprised the machine shop did not check such a basic issue. Well we weren’t about to take the bottom end apart to machine the bush and we didn’t have a tool to cut back the bush so we opted for a file. We lock up the engine in the vice and position it so that the fillings will not drop back into the moth of the crankcases. Dave decides the best position to work is overhead and so he stands on a chair (see picture) and gently files the bush back till we end up with about 0.5 mm clearance each side of the gudgeon pin bush.
We clean up and now get he gudgeon pin to locate and finally fit the barrel. Out with the Loctite gasket maker No 2 again and we bolt her down. The next job is to swing the motor in and she goes in without too much effort. We slide in the engine bolts and pack up.
8 February 2013 (27 days to go)
Back at it again tonight. We set up the engine pulley and belt to make sure we can get to turn the motor over. Belt slips. We clean up the belt and pulleys…belt slips. We shorten the belt and replace it…still the belt slips. We decide to use the old rusty pulley of the 1914…dimensionally the same as the 1908. We figure the inside is rougher than the nickeled 1908 pulley. Still the belt slips. We had used the intermediate belt clip link so we go down to the smallest link…he engine turns but then the belt slips at either TDC or BDC. We decide to try pushing her down the road with no plugs in the head.
The motor turns but is quite tight. We go down the road and back taking turns to pedal and push. We get some strange looks from two passing vehicles…mind you its after 9 pm at night!! The motor turns ok and the barrel was slightly warm from the little outing already. We both puffing so we drag her into the workshop to continue assembly. We fit the exhaust system and mag and pack in for the evening.
9 February 2013 (26 days to go)
Domestic chores delay me getting into the garage so start later than I expected. First job is to assemble mag chain drive. I noticed that the last time I assembled the mag sprockets the key way that locates into the sprocket on the motor side was badly worn. I set it up and cut a new keyway in the old sprocket and assembled the mag chain. I am using the new mag sprocket that I machined a Christmas…it nice when something you make works so well. I set up the spark timing with Dave’s help and we nip up the mag sprocket nut. We decide to make up a gasket for the mag chain so Dave will take that home to work on. One cotter pin on the near side of the bike is getting a little “floppy” which Dave sorts out. I get the valve caps and spark plugs gapped and install with a spot of graphite compound. That will help the parts from seizing together. I install the oil line to the motor. We notice a slight seeping of oil out of the lowest crankcase bolt. We remove it clean up with acetone and then use a sealant with a fibre washer each side under the nut to make it oiltight. We fit the footrests and rear brake system
10 February 2013 (25 days to go)
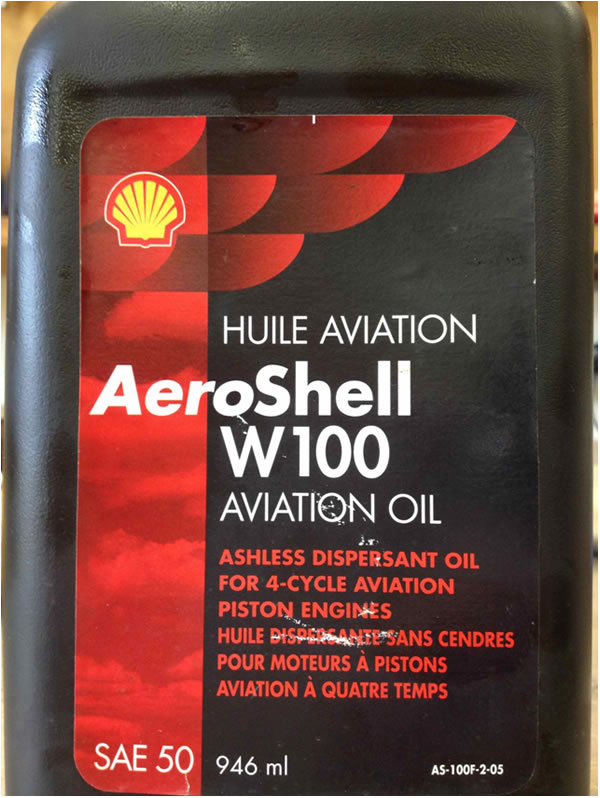
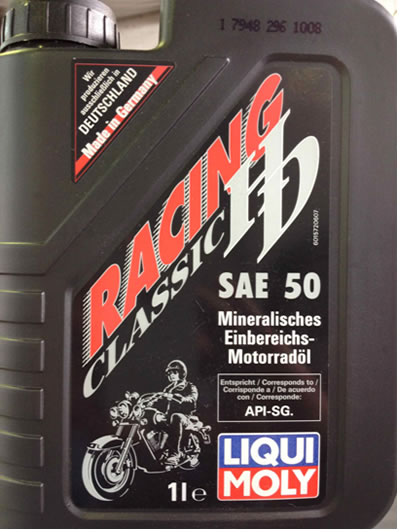
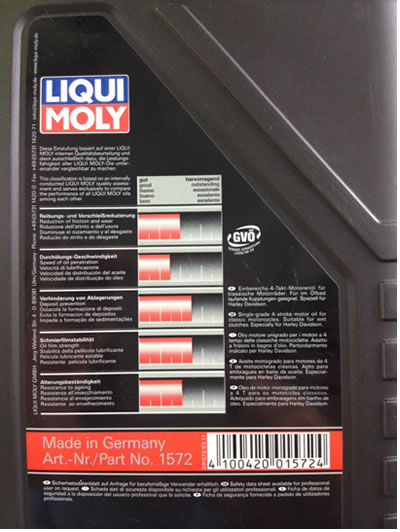
Sunday morning up early and into the workshop. Before I get going Brian Wallace calls to tell me that the plastic fuel filter on his Douglas cracked this morning on a 50 km run and the first thing he knew was when he had fuel all over his shoes. He tells me that this is now the second plastic fuel filter to break on him. It could have ended badly but luckily he stopped and did not have a fire on his hands. Over the years I’ve been riding there has been several bikes that have caught fire on the DJ. Some riders have resorted to riding with a fire extinguisher with them!!!. I attach the carb and connect up the levers. I top the oil tank up with SAE 50 oil (for those who may want to know what it was here is a photo of the oil container).
I give it 5 pumps to the engine. OK… I know for normal running this is a bit more than necessary but can you blame me given what has recently gone wrong. The next bit is the fuel…or rather fuel cocktail. My friend Brain Wallace experimented with a unleaded fuel/paraffin mix and found that in his Douglas it didn’t seems to make much difference however in his single cylinder BAT the optimum mix seemed to be around 80% unleaded: 20% paraffin. I decide to go with the 80:20 mix and drop in some valve ease for good measure. PRECAUTIONARY NOTE: Some web site report unburnt paraffin washing the oil off the cylinder bores and accelerating the wear on the bores. Please be sure that you understand these risks when you try this at home!!!. The science behind this is quite interesting. When this bike was new it ran on fuel that was unleaded (yes before man discovered that one could add lead and raise the octane rating) and of a lower octane rating than current fuels. The rider of this period couldn’t nip down to the petrol station he had to order his/her fuel in gallon tins supplied by various outlets. If he was out and about and ran out of fuel a favourite dodge to get home was to fill up the bike with power paraffin. NOTE the bike would run on this but you could not start it from cold on paraffin. I’ve a 1916 Sunbeam with three compartments in the tank…one for oil, one for petrol and the last one for paraffin. You start the bike on petrol and then when its hot switch over to paraffin. The reason it was designed like this is that paraffin was far more obtainable (and cheaper) than petrol especially during WWI. Returning to the science of these fuels…. Petrol and paraffin have different properties… Petrol has a higher Heat of Combustion than paraffin. (Heat of Combustion is the energy released as heat when the fuel undergoes complete combustion)
|
Paraffin |
Unleaded fuel |
Gross Calorific Value (kJ/litre) |
46 000 to 41 500 |
47 300 to 44 400 |
Density (kg/Litre) |
0.798 |
0.74 |
Flash point (Deg C) |
38 to 72 |
- 43 |
Auto ignition temp (deg C) |
220 |
280 |
Viscosity (cSt) |
2.71 at 68 deg C |
0.4 to 0.88 at 60 deg C |
What that means is that for the same rate of intake into the combustion chamber, paraffin powered engines will run cooler than petrol powered engines however will have slightly less power. I guess the extra fuel you need to “match” the performance of the petrol equalizes out. However one benefit is that low compression engine run smoother. Low compression ratio as we have with these bikes at 3,5 to 1 also affects the heat/power relationship in these older engines. Back to the bike…we get her ready and Dave pushes me off. Engine fires a few times then stops. She didn’t really get going and I think I didn’t give it enough fuel. We reprime her and try again. This time she fires up and runs for about 10 seconds before the belt breaks. I have been using a endless black v belt however by cutting the belt one cuts through the reinforcement. Up till now it had been fine but perhaps the extra tension to overcome the tight engine finally did it.
Back to the workshop and out with the Bremmer belt I had previously imported from Veteran Triumph. We fit it but it stretches. Take out another link…it stretches again. After removing 5 links individually and testing tension, we lose our sense of humour and remove the belt. I recall Paul G talking about his new belt for his 1914 Triumph and how he hung it to stretch. Well I dug around in the workshop and found 4 cast iron sash window weights. Hung the belt up to stretch for 36 hours.

11 February 2013 (24 days to go)
Had to fly to Joburg for the day but get in with an hour to spare before my meeting so nip up to Bearing Man and buy a Powertwist Plus belt which looks like a good option. Stick it in my briefcase and bring it home. My mate Mark Shaw runs the same belt on his 1910 Bradbury. Fit it and test but belt causes the outer pulley face to wind in and stretch the belt. That’s how the old black belt broke. Decide to make up some spacers to fit between the pulley faces so we can fix the pulley with the right tension…at least until the motor is not as tight to turn over. No material to hand to make these so it’s a job for tomorrow.
12 February 2013 (23 days to go)
While sourcing some 2 inch thick walled tube to make up the spacers, I discovered another brand of SAE 50 oil at the local engineering supply store. It’s slightly cheap than the AERO oil.
I’d be interested to hear from anybody what it’s like.
Make up the spacers and end up with three sizes 3,5 and 7 mm. That allows me some options ranging from 3 mm to 15 mm (3, 5, 7,8, 10, 12, 15). Fit the 7 mm and its good to go. The other area of concern has been the steering stem. The spring clamp just doesn’t seem to hold the handle bar stem in place. We strip it and discover the top bearing holder shaped like a top hat which has three vertical cuts so that it can clamp the handlebar stem has closed up completely and is still not tight on the inside tube. Quick mod…hacksaw open the closed slots, clean and reassemble and it’s doing what it was designed for. Phew…now there’s no danger of the steering going loose on the road.
13 February 2013 (22 days to go)
Get home and get her ready but the belt is now slipping. Overnight I guess there was a bit of stretch. I undo the pulley remove the 7 mm and fit the 5 mm spacer. There’s now slightly more tension in the belt. Finally go her out into the road. I follow the same routine as I did when the motor was new…prime the cylinder with 3 ml of fuel…set ignition just off fully advanced…flood carb…and then get somebody to push me off. The engine fired first time and ran a short distance. Go through same routine again and she runs for a slightly longer stretch. We repeat this several times until the belt slips again. I remove the 5 mm spacer and replace with a 3 mm spacer belt tension is now adequate. We try her again. Still she only runs for about 50m and cut’s out. I think what we may have done differently since the last time. The only thing I can think of was I tightened down the float bowl cap so the squirt of fuel out the float bowl when you flood it doesn’t go onto the back of the cylinder. I feel the action of the needle and she definitely not moving freely. Call it a night as been up since 4 am travelling to Jo’burg again and I’m beat.
14 February 2013 (21 days to go)
[reset mileage to zero after engine rebuild –total to date 1.6 kms]
Another red letter day. Get home and sort the sticking carb needle. The needle had been installed incorrectly in the tickler. Reassemble. Up till now I had carried a small syringe with me to prime the cylinder…I experiment with “Quick start” and this seems to do the trick. I feed in the thin plastic pipe in through the air holes in the carb with the lever fully opened and give it a good spray. Close back air level to about 1/3, tickle carb, pull in decompressor and pedal/push off. I only need to go about 5 m and release decompressor and off she chuffs. We get her going and do short distances first, 200m stop let her cool then another 200m repeat this and build up to about 500m.
Total distance travelled 1.6 kms….well it’s a start at least. I can start her now unassisted but only on a slight downhill. I drain the oil for two reasons, one to see how much is in the crankcase and secondly to look at what it looks like. As I drain it I hear something fall into the measuring cup. I let it drain completely and then fish around in the oil with a magnet. Nothing comes up. I pour it out and at the bottom lies a fibre washer…must have fallen off the drain plug without me noticing. For a moment there my heart was skipping a beat or two!!. 175 ml of oil came out the crankcase. A bit more than normal but again I’d rather be on the conservative side. Now I know why another veteran rider whom shall remain nameless, spoke to me about cutting a window into his veteran Triumph crankcase so he can assess visually how much oil is present. I’d advised him against it but now I’ve been thinking the same!!!. Don’t worry I rather not do something as radical as that. Put in oil, primer her and try to start her on the stand. One pedal crank cotter pin, which was loose, comes out and I end up nearly on my ear. Another job for tomorrow. I pack it in early and do the domestic bit. After all it is Valentines Day, and “she whom must be obeyed” wants at least some time with her greasy fingered biker husband after many weeks of late nights!!!.
15 February 2013 (20 days to go)
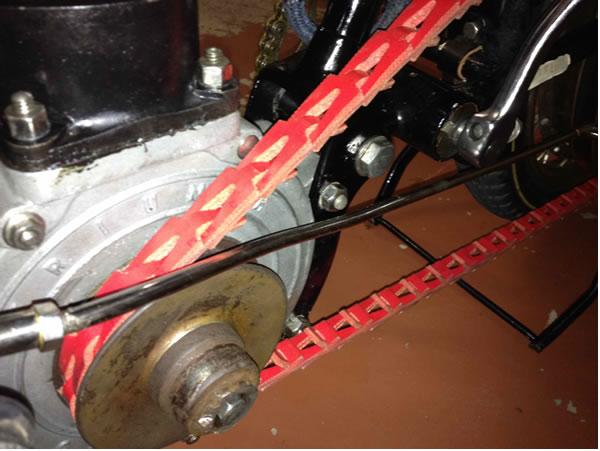
I decided to try and get a slightly larger saddle sorted so that I save myself from the rather painful experience of 3 days in the tiny bicycle saddle that is currently on the bike. I strip it down and take it in for sandblasting and the clamp for nickel plating. Fortunately as I’m a regular customer they do it during the course of the day and I pick up the bits on my way home. I get the PA10 etch primer on asap and pack the bits away as the rain start to threaten. I had notice while running her this last time that the belt is rubbing slightly on the mudguard. I measure the position of the wheel and it is 5 mm too close on the chain side causing the new belt to rub. I drop out the rear wheel and re-machine the lock nuts I had previously made. Make a new spacer to take up the difference and the wheel is now located slightly closer on the belt side. The belt now clear of the mudguard. Dave pulls the pedal crank out and takes it off to have the slots where the cotter pin welded with some harder material to prevent the slots from wearing and loosening the cotter pins.
16 February 2013 (19 days to go)
It is Lara’s, my eldest daughter, 18th birthday today. The plan is to go up the coast for the night leaving at 10 am on Saturday. Problem is that there is another scrutineering taking place at our club today from 12:30 and given that there will be over 200 bikes at the start I was hoping to get it done before hand. I drive my daughter and her friends up the coast with my wife, drop them and drive back home, load the bike and go to the club. Weather’s horrid… light rain most of the day. Get to club and wait while Alan Crookes gets his 4 Excelsior Manxman scrutineered before they get to my bike. The usual checks on brakes lights, reflectors, license, etc are completed in line with the FIM requirements for these classic events. All done and one less thing to worry about sorting in Johannesburg…so I head off home, drop bike and trailer and then head back up the coast.
17 February 2013 (18 days to go)
[total to date 3 kms]
Dave pops around and we get her on the road. Do a lap around the block (700 m) and let her cool. We start another lap and on one corner I slow down just too much and the motor cuts out. I go thorough my start routine and as I have no pedals I decide to push her off. Before she fires I feel a sharp pain in my right calf muscle. I abort the startup. I sit down on the tar till Dave gets to me. I’m in such pain that we pack it in for the day. Looks like its going to be a close call on either the rider or the bike failing this test!!!!. Total distance today 1.4 kms.
18 February 2013 (17 days to go) [total to date 3 kms]
Send off my official picture of the bike and I for the website (www.djrun.co.za) taken the day before.
Stayed home for the day with the leg up and then went to the physio in the afternoon.
She put me on crutches and gave me a work out and advised that I need “Rest, Ice, Compression and Elevation”.
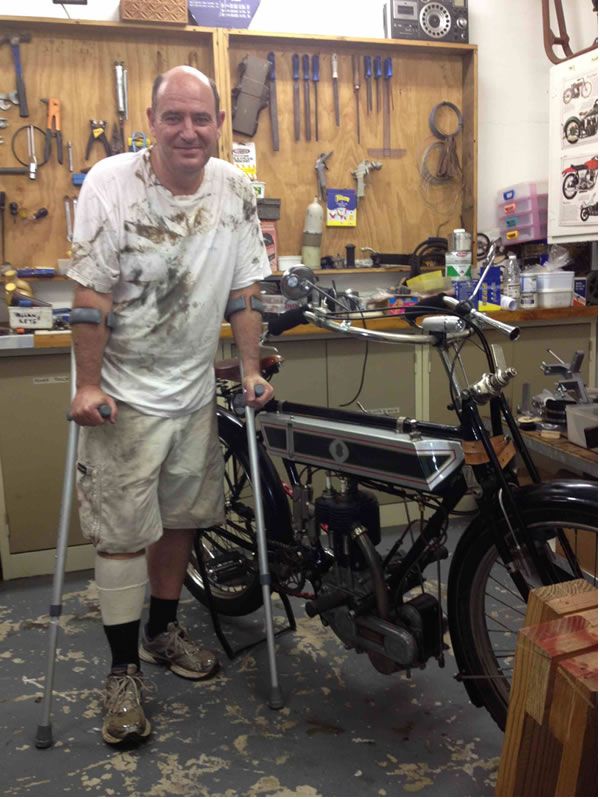
At Paul G request here’s a photo of the sick, lame and lazy brigade!!!.
Dave popped around in the evening with the repaired pedal crank and he assembles it…I’m now pretty much an observer. Sort out the leaking float bowl but lapping in the needle again after I cleaned it up on the lathe with a fine file. We had been having problems with the front brakes and we eventually sort out a way to get them to work ok. No riding today I’m afraid. Get my official letter off to the JD organisers to formally request a dedicated vehicle in the field for support. I hear later that bikes 1(me), 2, 3, 150 and 151 are all granted permission to have a support vehicle in the field.
19 February 2013 (16 days to go) [total to date 5.1 kms]
I spent the day hobbling about on the crutches…I now have sympathy for those less able body folk. Mind you the staff at the course I was attending, were very helpful…mind you it was at one of the top Country Clubs in Durban. Cannot wait to get home. Dave pops home at 5 and I’m already dressed in my work kit...crutches and all. Fire the bike up and I do one 700 m circuit and we let her cool. Do another 700 m and let her cool and then we do a final 700m circuit before we call it a night. Distance 2.1 kms. One corner of the circuit was problematic. It’s a stop street. Ordinarily I slow right down and if the coast is clear, I would pedal and the bike will accelerate off once more. Alas with the leg this was not possible. Dave and I had discussed this previously and so he had the loan of my daughter bicycle and after he pushed me off, he rode the bicycle around till he found where I had come to a stop. Bet he hadn’t figured on all this extra work when he agreed to be my second!!.
20 February 2013 (15 days to go) [total to date 5.1 kms]
Dave pops round and we find a 1 km flat road here home…at least driving distance. Dave gives me a push and I head up the road. First stop some indecisive driver in a Merc causes me to stop. As I’m lame in the one leg I wasn’t go to chance it. I wait for Dave and then I’m off again. I’ve a straight 700m between two convenient turning positions and so we spend an hour and half running and cooling her off. Distanced travelled today 4,3 kms. I’ve noticed when she is cold she will pull up the hills and run to 65 kph (40 mph) on the straight but as soon as she get warm she seems to loose her power. I think it’s the tightness in the rings so am nursing her still. After the run Dave and I drain the oil and I have 80 ml in the crankcases. Discard oil and pump four plunges of fresh SAE 50 into the engine in preparation for tomorrow.
21 February 2013 (14 days to go) [total to date 10,8 kms]
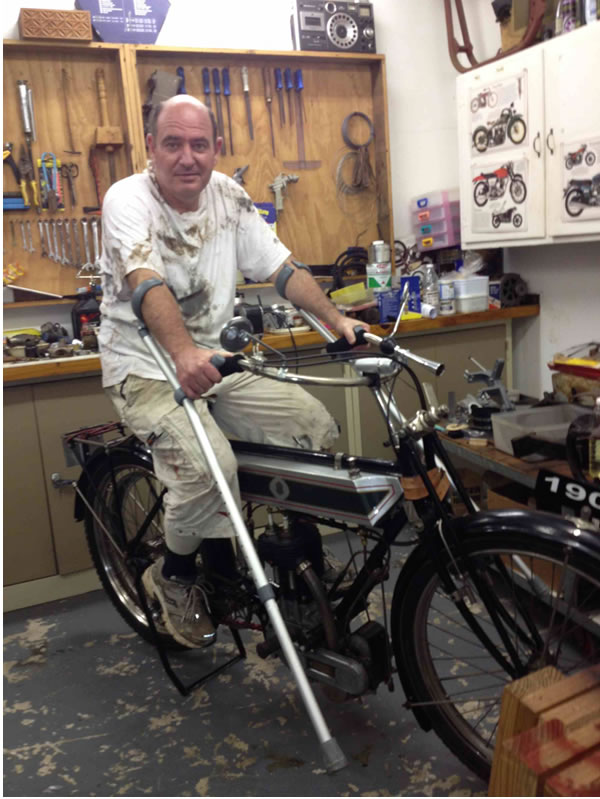
Dave pops around and we drag her out for another run. This time we only get 1,4 kms under the belt. My mate ken pops around and we demonstate it’s easy to start on the stand. We decide that we will set the bike up on the stand and run her with two fans blowing on the engine. That way we can get some hours on the engine relatively quickly and give the rings a chance to settle in at a faster rate than our short trips have been doing.
23 February 2013 (12 days to go) [total to date 10,8 kms]
Couldn’t run her yesterday…tied up with domestic issues…. Dave pops around in the morning and I have her set up to go. Go through the usual start up process and we are meet with a rather muted reception. A faint fire but she won’t run. First check is the mag spark….jumping ¼ inch gap!!. Check plug… sparking fine. OK maybe the new mag sprocket I made has slipped. We retime the motor and try and start her again. No change in the symptoms. We retime the mag another two times just to be sure…still no change. OK maybe the keyway on the main gear driving the cams has slipped. We strip back to the timing case and everything is correct. We remake the timing gasket and fit it with the black loctite gasket maker 2 goo to address an oil leak which has been plaguing us. Before we know it the morning has gone and the family has got to catch a plane to Jo’burg. We are going to the Straits concert this evening and I have the pleasure of driving my mother-in-law (and her dog) from Joburg to Durban the next day as she moves to Durban to be nearer her daughter. Incidentally the lead guitarist of the original Dire Straits band (Mark Knopfler) opted not to join the reformed band, now called the straits, and so a new front man (lead soloist/guitarist) was enlisted and he’s my brother-in-law...Terence Reis. The concert was unbelievable and the whole family went along. Beats us having to come to Europe especially at the cost of flights and tickets. Tickets here were R200 (GBP 15) (although we had free complimentary tickets) and we sat in the third row from the front.
Chris White (one of the two original Dire Straits band members) and Terence Reis.
Backstage after the concert. From Left to right Jessica Bekker (my sister’s daughter), Me, Samantha and Lara(my two daughters), Terence, Sue (Terence and Tina’s mum), Tina, Jo (Terence’s wife) and split down the middle on the right is Alan Clark (one of the original Dire Straits band members)
25 February 2013 (10 days to go) [total to date 10,8 kms]
After a hectic weekend I decide that I need to take some time off work to sort out the bike. I come home at lunchtime and into the garage. Over the weekend we decide that it’s either a blocked main jet or an exhaust valve that’s not seating. Pull the main jet…it’s blocked. Clean her out and reassemble which is easy on the old Triumph carb as the main jet can be removed without taking the carb off. Can’t start her on my own as I’ve just got rid of the crutches today and still not confident of my calf’s ability to handle pedaling as yet. Hope it will be ok in just over a weeks time!!!.
Dave arrives and we give her a whirl. Still the same problem!!!. Ken knows the bike and he asked me if the cork stopper under the main jet wasn’t breaking up and causing bits of cork to float up and clog the jet. As a precaution we removed the threaded cap from a spare carb, dog out the offending cork and refitted it. I think it must have been a contributer!!!.
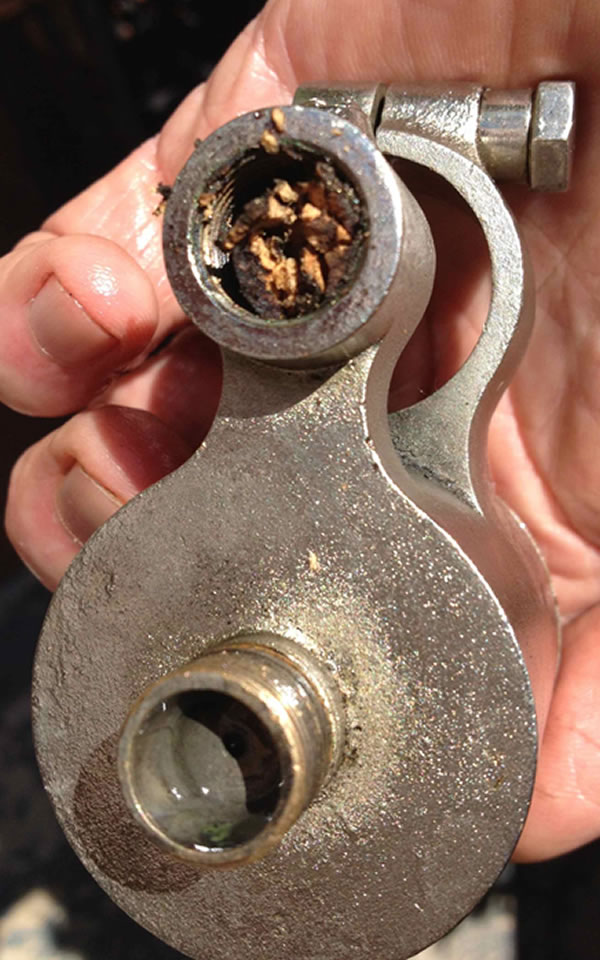
We try again after the removal of the cork and still no go!!!. We decide it must be something to do with the exhaust valve. As I’m sitting on the floor next to the engine I get Dave to operate the decompressor. I notice that the exhaust valve is a bit sluggish, returning back down after the decompressor is released. Haul it back to the garage and extract the exhaust valve. Valve seat and valve tulip is perfect. The valve guide on the other hand has quite a bit of carbon in it. So the problem appears to be a sticky exhaust valve. I clean up the valve stem and Dave cleans valve guide up with some scotch bright cleaning pad.
We clean everything up spotlessly, use a little Mo-Di grease on the valve stem and reassemble. She fires up perfectly. We run her for a little while and then Dave comments on the wobbly headstock. We had been having problems with the fork stem as you will recall. This time Dave is able to wobble the top portion of the fork stem yet the bottom has no movement. I suspect it had cracked through. We haul her back in the workshop and strip the forks. The tapered tube that runs in the main frame had cracked all the way round just below the slot for clamping up the handlebar stem.

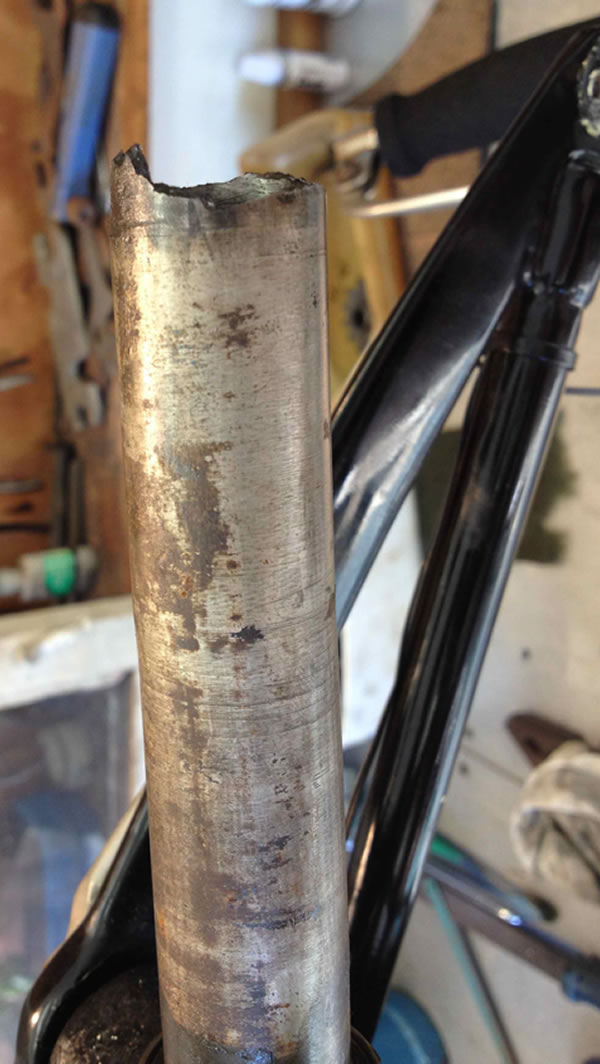
OK. I dig around in my spares and find two headstock stems. We are going to have to make one of these work. Dave is going to set up a time for me to take the better fork stem, it’s cracked too, to his mate to weld asap.
Hopefully we will be able to reassemble tomorrow evening.
26 February 2013 (9 days to go) [total to date 10,8 kms]
Dave sorts out the welding of the stem. He is flying down the coast to Margate to sort out an aircraft exhaust system so I arrange for my mate Ken to go to the airport in Margate and drop off a heat sink he has made me for the engine. Dave pops around after he gets back from Margate and we reassemble the steering stem. Short a few 1/8 balls for the steering races so we cannot complete the job.
27 February 2013 (8 days to go) [total to date 10,8 kms]
I go into to Bearing Man and pick up the required balls as well as a spare length of belt. I head straight to the airport as I’m flying to Cape Town for work. 2 March 2013 (5 days to go) [total to date 15,6 kms]. Dave pops in early and we complete the steering head. It is much better and we get her on the road again to get some distance on the motor. A couple of laps in the morning and then some more in the late evening. Still having the same symptoms. Motor pulls when cold but when hot the motor slows and more than Light Pedal Assistance is required!!!. I don’t want to break her again so close to the event so I have been stopping and cooling the motor and her and then running again. Distance covered today 4,8 kms.
2 March 2013 (5 days to go) [total to date 15,6 kms]
Dave pops in early and we complete the steering head. It is much better and we get her on the road again to get some distance on the motor. A couple of laps in the morning and then some more running in the late evening. Still having the same symptoms. Motor pulls when cold but when hot the motor slows and more than Light Pedal Assistance is required!!!. I don’t want to break her again so close to the event so I have been stopping and cooling the motor and her and then running again. Distance covered today 4,8 kms.
3 March 2013 (4 days to go) [total to date 15,6 kms]
Today’s a make or break day!!. I decide that I need to get much more running time on the engine than the stop start riding I’ve been doing. I set her up with two fans blowing on to the engine and run her on the stand. I run her for stretches between 8 and 15 mins making sure that there is plenty of oil. I get a total of 54 mins running before Dave arrives. I figure at say an average of 25 km/hour see had covered the equivalent of 22 kms. We drain the oil and see a trace of sparkle in the oil…this may be a good thing. Perhaps the tightness is the main bearing and she’s freeing up a little. Worst case the main bearing is on its way out again!!!. I drag her out to the road and take her on the usual lap around the block. She sounds fine no funny knocking noises. She pulls up the hill home fine, so do a second lap…still pulling on the hill ok but not quite as strong as the first lap. Continue with a third…into uncharted territory here…needs a bit of LPA up the last hill…go for a fourth lap and need slightly more LPA. Rest her and then do another 3 laps. Pack up as it is now too hot to be out in the sun. Drag her out for her evening exercise. Just do 8 laps up and down the road testing the hill. Manage to do 3 kms Much better distance covered today….. 30 kms in all. Pity I don’t have another week to go!!.
4 March 2013 (3 days to go) [total to date 46 kms]
Today we make the decision to go up to Jo’burg a day early. This is so Ken can help out sort the Douglas collection belonging to the late Mike Milner-Smyth. The day start with a last physio session, been going every two days to get the torn calf muscle sorted. Once I got home I ran the bike on the start for about 20 mins. I have been busy making up a rally board holder as well as race number mountings. I also found an old metal toolbox and bolted that on to the carrier after giving it a quick lick of black 2K paint. Dave arrives so we take her out on the road. I’m still not starting her on my own and that’s where Dave help is needed in pushing me off. I do 7 laps around the block…engine is definitely much freer than yesterday. I end up doing a bit of LPA on laps 6 and 7. Give her a rest during the heat of the day and I go and buy supplies for the bike as well as attend a meeting I could not get out of. Dave pops around in the afternoon and we notice from the running this morning one of the rear mudguard stays has sheared off. I take it off and silver solder a new fitting and then Dave tells me the other one has also started coming apart. I sort that out too. We go over the bike and check all the nuts and find the nuts holding the cylinder down on the crankcase have loosen slightly…they get nipped up. I have been using thread lock on virtually all nuts to prevent these coming loose from vibration. Ken arrives around 5 pm with his BSA and sidecar on the trailer. We take the triumph to the road and I do 6 laps with only LPA required on the last lap. We take her in and drain the oil and she had 110 ml in the crankcase. Notably the colour was not as sparkly with phosphor bronze as it had been previously… hopefully the big end is getting settled in fine. I figure I covered 19 kms today. Not as much as yesterday but more in the saddle and less on the stand and I think that’s probably better for the engine. After Ken goes I pack the required tools, lubricants, spare plugs, belts and a whole lot of tools etc ready for the morning. While I have been writing the days events I have reflected back on what has been a real challenge on my part to get this far especially with all the incidents along the way. Guess when one is dealing with an 100+ year old machine one must expect some degree of difficulty with her resurrection!. The last chirp comes from my dear wife Tina and I quote she “ cannot wait to see me on my way to Jo’burg and for peace and quiet to return to the house”.
5 March 2013 (2 days to go) [total to date 65 kms]
We drive up to Jo’burg pulling the old Triumph as well as Ken’s 1922 Douglas and 1929 BSA combination.
We are head up to our late friend Mike Milner-Smyth’s home to sort out his bike collection that is to be sold. I manage to get 2 kms on the motor that evening.
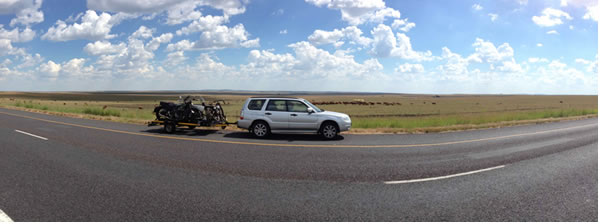
6 March 2013 (1 days to go) [total to date 67 kms]
We finish the sorting around 10 am and head over to the start. I get told that the bike requires a functioning brake light before it will pass scrutineering. We ask around and find a local bike shop in the area that might be able to supply the necessary stuff to set it up. Buy a battery stop switch and taillight and head back and fit her to the metal tool box on the back. We get her though scrutineering ok. After fitting numbers and completing the documentation we wait for the competitors meeting. Generally this is the last chance to get any changes in the route schedules and any other relevant information relating to the road conditions. There are no surprises and we head over the road to the hotel for the night.
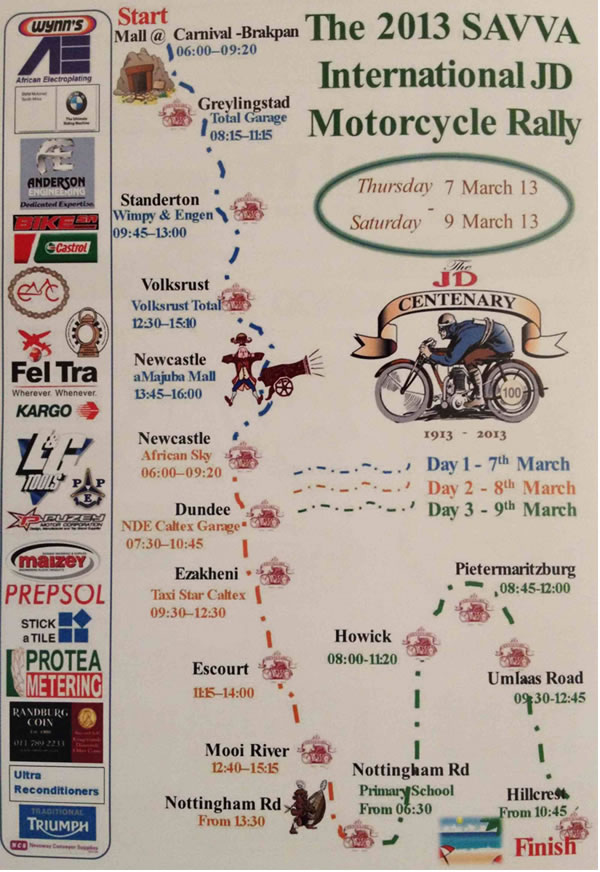
The logo’s on the safety vests
List of the A speed group riders
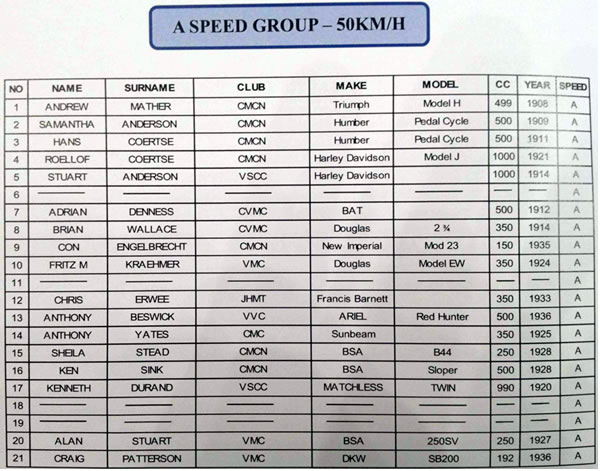
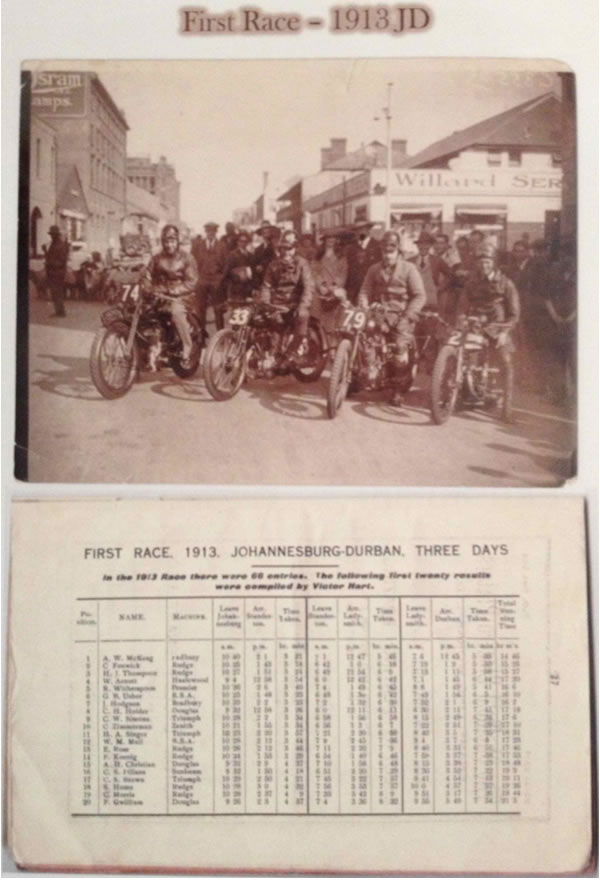
7 March 2013 (DAY 1) [total to date 67 kms]
Start the day off with a 1:30 am wake up…I’m so keyed up that I cannot sleep. I toss and turn till 4:30 and then get up. We get across to the start at 5 am and get ready. Fire her up on the stand and all’s well. I drive her over to the start and wait till my departure time which will be 6:01 am (first bike off). I get my rally clock box out the toolbox but it’s empty.
Some fun was had by my fellow riders as they stuck an egg timer on the bike for me to use.
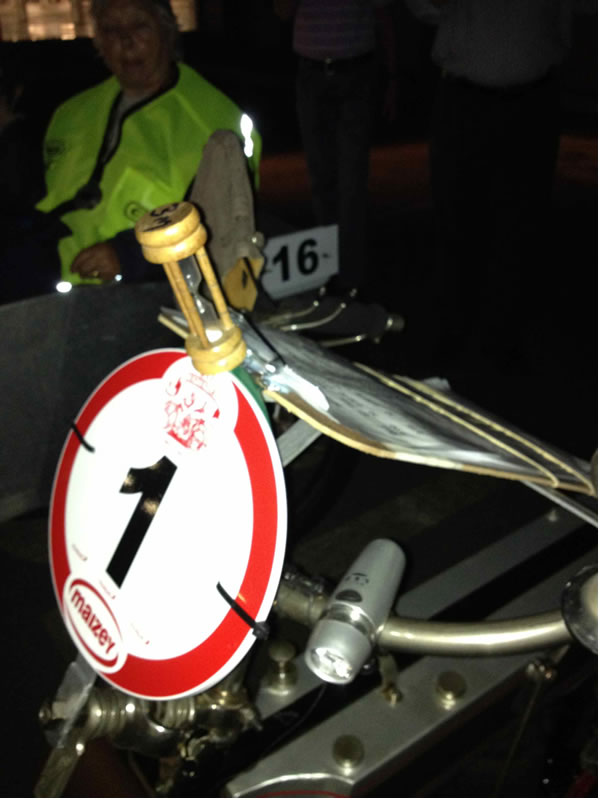

Ken giving me some “fatherly” advice before I set off.
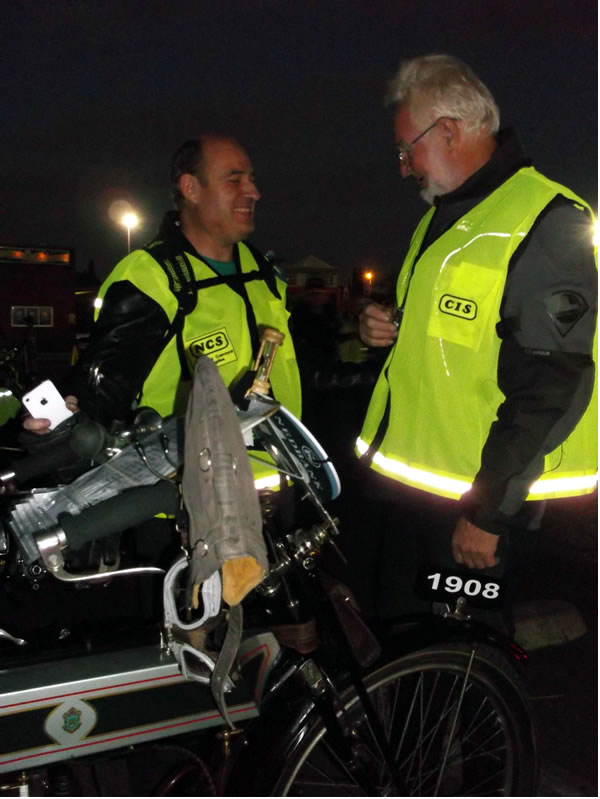
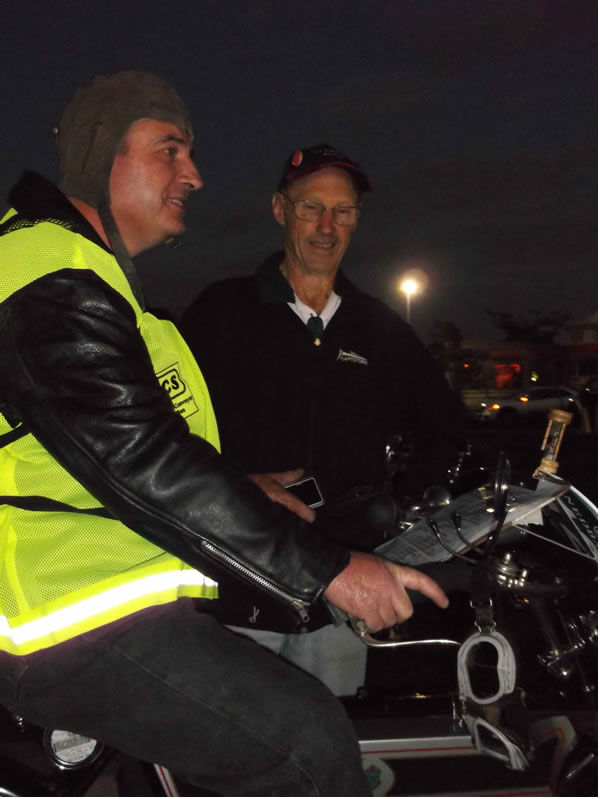
The butterflies are going wild as the time approaches 6 am and it starts to get light. Just before 6, I’m interviewed by the press as we await the message from the Mayor of Jo’burg to be handed to me. The Mayor is nowhere to be seen and at six the traditional cannon is fired. That gives me a minute to go. We prime the carb, give her a squirt of quickstart into the cylinder and set the controls to go. We wait and eventually at 6:02 the starter waves me off. Lost a minute waiting for the non-arrival of the Mayor.
Dave pushes me off and she fires quickly and we are off. Coming around the third bend out of the shopping centre and the toolbox opens and all the spanners and equipment spill out across the intersection. I brake (front brake cable goes!!), pull over, run back and collect all my bits. Lucky it is early and hardly any traffic. Bike number two a 1909 Humber ridden by Samantha Anderson passes me. I wire the fastener up with wire and am now faced with a solo start. I’ve no choice but to turn her into the oncoming traffic (not that there was any so early in the morning) and pedal her off. She still tight and I’m still nursing my damaged calf muscle. She fires and I make a u turn in the intersection and restart the journey. I make my way slowly through traffic till I’ve covered about 10 kms and encounter my first big hill. I try and keep the revs up but slowly and surely the rev drop. I’m ready to pedal when the time right. I pedal assist her for about 50m and she stops. I had started the run on a NGK BP5ES and I immediately change the plug to a colder one BP6ES. Dave’s right behind me as my support team with flashing yellow light on the roof. We push her off and she takes off up the hill with no further pedal assistance. I go about another 20 kms and again the hills slow me down and I stop. We change plugs again this time a BP7ES (colder still). The bike started to go better and better. I’m pumping loads of oil into the engine just to keep the big end happy. I’m not pushing her as I’m effectively still running in the engine.
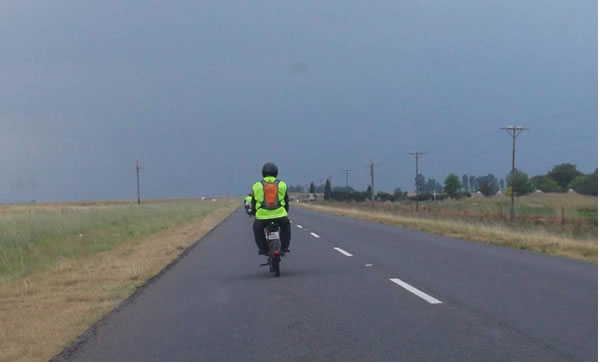
Get to Greylingstad and pull in for fuel and oil…and water for my hydro pack. Drank over a litre in this last stretch!!. Off I go again and continue slowly and uneventfully into the brunch stop at Standerton. Done 120 kms in 5 and ½ hours!!. We fill up with oil and petrol. This time we couldn’t get any paraffin so opt for a straight fuel mix with just lead replacement and colloidal graphite valve ease. Got going after brunch and ran well till just before Volksrust. We take the opportunity to fill her again as we were carry our own fuel and Dave checks the mag points gap and finds it’s opened up and so we adjust them.
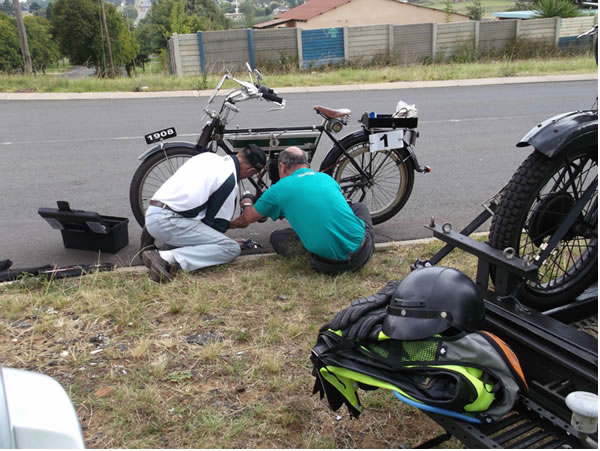
I set off on the last leg into Newcastle, across the famous battle field sites where the British fought the Zulu’s in the late 1800, catching up the time I would have spent stopping a second time. The route to Newcastle takes us down the Majuba pass that through several sections of roadwork “stop-go’s”. I got through most stops and was now stopping regularly. Each time the plug would be removed, the silver finish would be blue and when a new cold plug was inserted I could get about 5 to 10 kms before the engine would slow and stop. We kept replacing plugs until we finally limped into Newcastle at 5:30 pm having been on the road for 11 and ½ hours covering 280 kms. If you look closely at the saddle you get an idea of the state my backside was feeling like!!!!. We go to our accommodation, grab a quick supper and then we work on the bike. We clean the belt as quite a bit of oil had got on it and wire up the broken front mudguard stay. We are unable to ascertain why the motor is running hot. We decide to restart the next day but this time using the 90:10 fuel/paraffin mix. We assumed that this might be the reason that it’s running hot. We finally get to bed at 10:30 pm.
8 March 2013 (Day 2) [total to date 347 kms]
Awake again at 4:30 and eventually got out of bed at 5:15 and proceeded to the start. The plan was to run her and see how she went. I’d already said that I did not want to break her again and so we were cautious. I was also very sore from the previous days efforts and was dreading the day ahead. After two plug changes in 8 kms we decided to pull out the rally and loaded her on the trailer. We drove ahead purchased new plugs and preceded to the overnight accommodation at Nottingham Road. In the car we discussed all the symtons and we come to the conclusion that its either the carb stub letting air in and causing the mixture to run lean and therefore leading to overheating. Or the timing was wrong. Some of the plugs were white in colour were as the first few plug changes the plugs were sootly. We set up a little workshop outside in the shade and get to work.
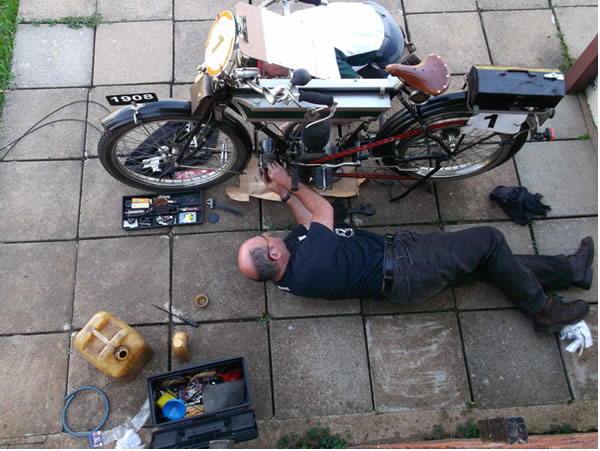
We first sort out sealing the carb stub on the head with some high heat resistant “Red Devil” RTV silicon. We then address the motor. We start from first principals. Set up the engine at ½ inch BTDC, fully advance the timing lever and check the points. Everything looks right. We slowly turn the motor and see the points do not open on the cam as quickly as it would normally. In fact we only get the points correctly open about ½ way along the cam.
Dave and I now concentrate on setting the points. I set them and get Dave to check. He finds a different gap to the one I just set. We discover that we set the point’s gap differently. I revolve the points till they have just open on the cam and set the points gap then. Dave uses the aircraft mag approach that is to find the widest gap position on the entire cam and set the right points gap in this position. Both would be fin provided the cam circle is concentric with the armature shaft. In this case the points gap varies along the full length of the cam. We check it out and by using Dave method the points don’t open on the ramp…but do so later on resulting in a very retarded spark beyond the maximum flux position. I decide that we need to set the point’s gap just after opening. We set the points and redo the timing and test her on the stand. She fires and sounds great.
I saw a chap start an old Triumph using the right hand side pedal as a form of kick starter and I was telling Ken and Dave about it. I set it up and gave it a firm push and lo and behold the motor fired into life!!!. We decide to do a test run. I’m about 4 kms off the tar road so start off on the dirt and held up towards the dirt road. The condition of the road is so bad that I have to drive slowly not a problem until one gets to a hill!!. Stop on a hill so we load and go to the main tar road. I run her for 15 kms with absolutely no problems. We return to our lodging happy that we have solved the problem.
9 March 2013 (Day 3) [total to date 370 kms]
We get to the start and its bucketing down and the visibility is down to 20m in the misty and wet conditions. I make a decision not to start as the braking ability is seriously impaired and I do want to survive till pensionable age!!. We drive ahead of the field take in a decent breakfast. Up till now we have been missing breakfast with the early starts. We go through to Hillcrest and offload the bikes. Its now overcast but no rain. We ride a short distance to the finish. The 1909 and 1911 Humber’s come limping in with broken frames. The 1909 broke its frame in three places. Both chainstays as well the downtube from the headstock. The 1911 suffered the same fate with a sheared off downtube from the headstock. The 1912 BAT gets in having had the petrol/oil compartment wall fail. All three bikes decide not to participate on the mass ride into Durban.
At 2pm all the bikes start off on the last 32 kms into Durban to the City Hall. I get in behind the lead car. My good friend Brain Wallace and I are the only two belt drives continuing. The pace is, believe it or not, too slow for the Triumph!!. I’m working the brakes and the decompressor to stay behind the police escort and the lead car. This is ok up to a point…when the road starts rising I need to get some momentum up so surge ahead of the escort to tackle the hill. I cress the hill and then fly down the hill towards Durban. I’m now 7 kms from City Hall and going well when the next hill stops me again with similar problems to previously. The cavalcade has mysteriously slowed to a stop about 2 kms behind me. Maybe they are in amazement of the turn of speed the Triumph has just demonstrated. I change plugs as they come by and fortunately get a push off from a club member riding a modern who saw me in trouble. I’m now at the back of the field. I gun it and catch the field eventually getting to the front 5 bikes as we enter the designated parking area. The rain coming down again and we assemble in front of the City Hall in the rain as the organisers hand over the message of good will to a council official. Total distance travelled on the redone motor is nor 404 kms…about half way through her running in period!!!!.
Post JD comments (to follow)
I noticed the following reference to the in period development of the 1908 Triumph. They certainly covered some miles on these bikes in the era.
Mr F Hulbert seems to have been a works Triumph rider who competed in many events for Triumph including the TT.
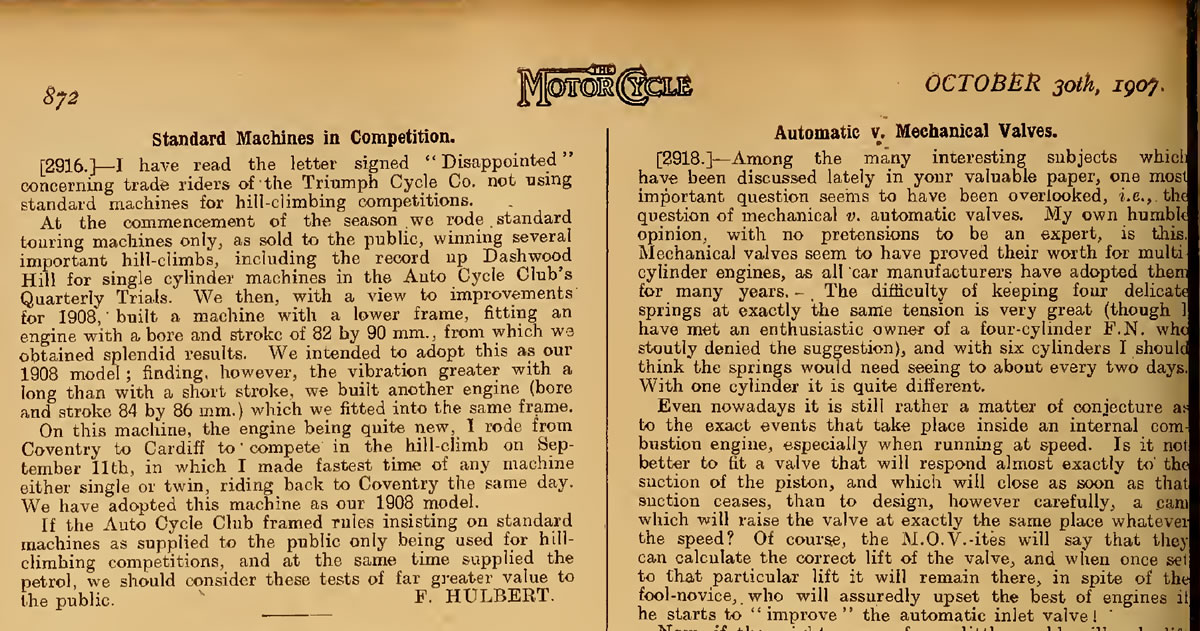
You can read Paul's ramblings about his 1914 Triumph on his 1914 Triumph pages.